Sunday, February 28, 2021

Welcome Spring

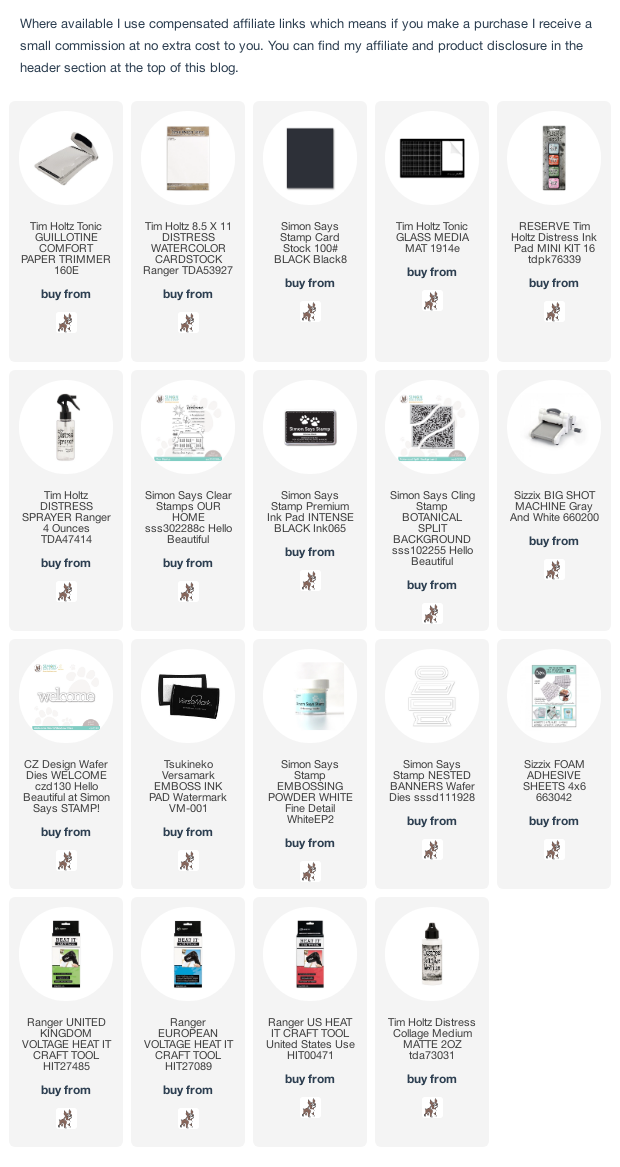
Happy Sunday my friends, the last day of February already and Spring is definitely on the way, in fact, the weather has been almost Mediterranean in my neck of the woods and I've had quite a few first coffees of the day sitting outside the back door. I should have known that the minute I invested in a snowblower to make clearing the driveway and paths so much easier, the snow would disappear as fast as it arrived and this wonder of technology would be put to bed in the garage until next year. Tomorrow is officially the start of Spring, one of my favourite seasons and watching Mother Nature bring the garden to life again and the birds busy nest building is one of life's simple pleasures so I made two WELCOME cards using Simon Says CZ Designs Welcome die and Our Home stamp set from the Hello Beautiful release and All Seasons Trees from the Love You, Too release.


I coloured an A2 panel of Distress Watercolor card using the smooshing technique with Shabby Shutters and Speckled Egg Distress Oxide inks to create a soft background. I inked the medium size tree from All Seasons Trees with Frayed Burlap Distress Oxide ink, using masking paper to partially stamp the two trees to the right so that they didn't poke out from below the Welcome die-cut and the foliage with Peeled Paint Distress Archival ink. I coloured a scrap of Distress Watercolor card with Fossilized Amber Distress Oxide using the new domed blending foam, die-cut using the CZ designs Welcome shadow die, fixed to the panel with Distress Collage Medium and added the word die, cut 3 times from Distress Watercolor card and layered to create dimension.I stamped the Spring sentiment from All Seasons Trees, inked with Versamark ink, on to a scrap of Idea-ology BlackOut KraftStock, sprinkled with Simon Says Detail White Embossing Powder, heat embossed, trimmed and fixed on the Welcome die-cut using Sizzix Foam Adhesive. To finish, I trimmed the panel down to 4" x 5.1/4", fixed to an A2 Distress Kraft HeavyStock card blank and added Sparkletz Lucky Charms.


On the second card, I trimmed Distress Watercolor card to 4" x 5.1/4" using Tim Holtz/Tonic Studios Deckle Edge Trimmer and coloured as before using the smooshing technique and a Custom Blend Ink pad (Antique Linen/Old Paper Distress Re-Inkers and Speckled Egg/Frayed Burlap Distress Oxide Re-inkers). I stamped the smallest tree from All Seasons Trees, inked with Ground Espresso Distress Archival Ink. I die-cut CZ Design Welcome shadow from Simon Says Stamp Vellum twice and the Welcome word and Village house from kraft card and fixed in place with Distress Collage Medium. I stamped the sentiment from Simon Says Our Home, inked with Ground Espresso Distress Archival.
I had a change of heart and die-cut the welcome word again from the left over scrap of Fossilized Amber card from the previous card and added the teeny heart sequins from Sizzix Gold Beads and Sequins Tower. A little dot of Distress Collage Medium Matte and my trusty Squeezers or Reverse Action Tweezers to give them their Sunday name, from Tim Holtz/Sizzix Shaping Kit, got the job done in no time.

Enjoy the rest of your weekend and I'll see you all tomorrow to share my DT project for Simon Says Stamp Monday Challenge. Have fun with whatever you are creating.
Hugs Kath xxx

Saturday, February 27, 2021

Simon Says Stamp - Hello Beautiful Blog Hop - Day 2

Happy Saturday my friends, I'm thrilled to be joining so many talented makers on Day 2 of the Simon Says Stamp Hello Beautiful Blog Hop to celebrate the Hello Beautiful release and am excited to welcome you to my stop on the hop. If you shop during the blog hop you can use the code RSE542 to get a gorgeous Rose Trio Stencil for FREE (with purchase). This promotion will expire on 28 February at 11.59pm EST.

Simon Says Stamp are also giving away a $25 coupon at every stop on the blog hop from the blog comments section so be sure to leave a comment below for your chance to win. The winners will be announced on the Simon Says Stamp Blog on Wednesday 3rd March.

Do you know that Simon Says Stamp has card/project galleries for each of their releases and card kits and also a video gallery. There is so much inspiration to see and I encourage you to check them out and add your own cards and projects to Simon's Brand Gallery and the Hello Beautiful Gallery. You should have arrived here from the very talented Natasha Vacca but if you got lost along the way or would like to start at the beginning of the hop, head over to Simon Says Stamp Blog HERE or click on the list of makers below.

I created a home decor panel to fit inside a shadow box frame using Simon Says Our Home 4" x 6" stamp set, Botanical Split Background and CZ Designs Welcome dies along with the Distress Mini Inks release from Tim Holtz and Ranger.

I trimmed Distress Watercolor to slightly smaller than 6" square so that it would fit inside the frame and smooshed Speckled Egg, Kitsch Flamingo and Rustic Wilderness Distress inks from the newly released mini pack from Tim Holtz and Ranger on to the craft mat of my Glass Media Mat. I spritzed the inks with water and laid the card into the ink. I dried the card and then tapped it back on to the mat several times to pick up the remaining droplets, drying between layers. I stamped the house, trees and cloud images from Simon Says Our Home inked with Simon Says Intense Black ink. I inked the top corner section of Simon Says Botanical Split Background Cling Stamp with Rustic Wilderness Distress Ink, spritzed lightly with water and stamped in the top left hand corner.
I die-cut the shadow section of CZ Design Welcome die from the card panel to create an aperture. I lined up the word die on the shadow section and die-cut again.
I die-cut the word again 4 times from Distress Watercolor card and layered with the stamped die-cut on top to create dimension.
I fixed the stamped word die-cut back into the aperture, stamped the sentiment from Our Home, inked with Versamark ink, on to a scrap of Simon Says Black Cardstock, heat embossed with Simon Says White Detail Embossing Powder  and die-cut using Simon Says Nested Banners Die. I fixed the sentiment to layers of black cardstock and fixed in place with a thin strip of Sizzix Foam Adhesive.
I finished by fixing the panel inside the frame leaving out the glass until I had taken the photographs.
I was thinking of gifting this to a friend but I won't tell if you don't, I think I may keep it for myself, a reminder of how much I'm looking forward to welcoming visitors again to my home, once all this craziness is over. 


Now it's time for you to hop over and visit the very talented Mandy Stacey to see the magic she has created with the Hello Beautiful release and if you missed Day 1 of the Blog Hop, you can check out loads more inspiration HERE. Enjoy your weekend, have fun with whatever you are creating and happy blog hopping.
Hugs Kath xxx

Friday, February 26, 2021

Keeping It Real

Happy Friday my friends, I'm sharing the "keeping it real" card I made with one of the Alcohol Ink backgrounds inspired by the Tim Holtz YouTube Live demo last Saturday and it doesn't matter how long you've been doing this craft stuff, it doesn't always go according to plan but hey, you can always fall back on Plan B and keep your fingers crossed or perhaps rely on Tim Holtz/Sizzix The Gent coming to your rescue.


I created the background on a panel of  5" x7" Distress White Yupo, dragged it through a puddle of Pitch Black, Mushroom and Slate Alcohol inks diluted with drops of Blending Solution and tapped the panel back into the inks to pick up the remaining inks. I inked the images from Tim Holtz/Stampers Anonymous Distinguished with Alcohol Lift Ink and was pretty happy with the result apart from the umbrella which had lost most of it's detail and looked like a white blob in the middle of the card, my fault, wrong choice of stamp perhaps. While I contemplated a solution I inked the script from Tim Holtz/Stampers Anonymous Entomology with Barn Door Distress Archival and that turned out too faint, so it was fast turning into one of those days.
So it was time for Plan B. I inked the image from Tim Holtz/Stampers Anonymous Faded Type with Crackling Campfire Distress Oxide ink and stamped randomly over the background. Distress Oxide ink won't dry on a non-porous surface unless you heat emboss it, so a sprinkle of Campfire Distress Embossing Glaze and hey presto, we're back on track.
I decided to cover up the umbrella with die-cuts and who better to save the day than a dapper chap aka Tim Holtz/Sizzix The Gent. I coloured 2 panels of A2 Distress Watercolor card using Speckled Egg, Frayed Burlap and Black Soot Distress Oxide inks on one and Crackling Campfire, Frayed Burlap and Black Soot on the second and guess what, at this stage of the proceedings, the battery in my camera died. So before I gave in to the urge to give up and chuck the background in the bin, I die-cut and assembled The Gent and his umbrella,
with the help of Tim Holtz/Sizzix Reverse Action Tweezers or Squeezers from the new Shaping Kit which are just the ticket for picking up and positioning all those itty bitty fiddly diddly bits.
I tapped Distress Embossing ink pad lightly over and around the edges of an Idea-ology Quote Chip and sprinkled with Speckled Egg and Crackling Campfire Distress Embossing Glazes, tapping the back of the quote with my fingers to mix the powders, heat set and fixed in place with Distress Collage Medium Matte.

To finish I added Idea-ology Hardware Heads to the quote and background
I trimmed the panel to 4.3/4" x 6.3/4", fixed to a slightly bigger panel of white card and matted on to a 5" x 7" white card blank covered with Idea-ology BlackOut CardStock.
Have a great weekend whatever you have planned. I'll be back tomorrow at 1.00pm to share a special project and then I'm looking forward to heading over to Tim and Mario's at 9.00am PST 12.00pm EST or 5.00pm if, like me, you are in the UK for the exciting YouTube Live Saturday night party to reveal the NEW IDEA-OLOGY PRODUCTS, hope to see you there.
Hugs Kath xxx


Wednesday, February 24, 2021

Fun With Alcohol Inks

Hi my friends, if you watched the Tim Holtz YouTube Live demo on Alcohol Inks, you'll know how amazing it was and if you didn't, I would highly recommend you go catch up on the replay
HERE. It doesn't matter how much you think you know about Alcohol Inks, Tim always manages to share a few more spicy nuggets of inspiration and information to inspire you to look out those inks again.
I made a pile of backgrounds but these dark and moody combinations created by swiping panels of Distress White Yupo and Distress Translucent Yupo through puddles of Pitch Black, Mushroom, Slate and Moss Alcohol Inks either diluted with Blending Solution or Isopropyl, are my favourites and I'm sharing how I turned one of them into a card.


I used the top left panel in the first photo using 5" x 7" Distress Translucent Yupo, the above mentioned Alcohol Inks with Blending Solution. Once I was happy with the background, I stamped the images from Tim Holtz/Stampers Anonymous Faded Type inked with Alcohol Lift Ink and Black Soot and Barn Door Distress Archival inks.Then it was time to play with the secret surprise parcel very kindly sent to me by Tim Holtz and Simon Says Stamp containing Tim's new releases from Ranger. And secret surprises are the best, it was like Christmas morning when the box arrived because, on this occasion, I had no idea what it contained.I die-cut the Tim Holtz/Sizzix Perspective butterfly from Distress Watercolor card and coloured with Speckled Egg, Crackling Campfire (so happy to finally add these to my mini ink pad collection) and Fired Brick Distress Mini Inks using the new domed blending foams. I love love love my original mini blending foams and I'm so happy that the new domed blending foams are not a replacement but more of an alternative, great for using with stencils and Distress Oxide ink application and woohoo, I can't wait to try out the new soft rubber brayers. But back to the project, I tapped the Distress Embossing Ink Pad over the butterfly, sprinkled randomly with Speckled Egg and Fired Brick Distress Embossing Glazes and heated until melted.
I stamped the sentiments from Tim Holtz/Stampers Anonymous Tiny Text on to a scrap of Alcohol Black Ink CardStock inked with Versamark ink, sprinkled with Ranger Superfine White Embossing Powder and heat set. 
I confess trimming perfectly straight sentiment strips is not one of my talents so I always reach for my trusty Simon Says Stamp set of Nested Banners.
I curled the butterfly wings on the right side slightly and fixed the butterfly to the panel using Distress Collage Medium, applying the adhesive to the body and tips of the wings only to create dimension and trimmed off the excess at the left edge of the panel. I added the sentiment strips popped up on Sizzix Foam Adhesive.
I added splatters of Picket Fence Distress Paint.
I trimmed the panel down to 4.3/4" x 6.3/4", matted on to a slightly larger panel of Idea-ology BlackOut cardstock and fixed to a 5" x 7" white card blank.

I will be sharing more projects using the other Alcohol Ink backgrounds, in the meantime, have fun with whatever you are creating.
Hugs Kath xxx

Tuesday, February 23, 2021

Happy Mail - Happy Days

Hi my friends, I was excited to receive a message from my adorable Professor to say that Sizzix were sending me his new Die Pick and Brush Kit and the Shaping Tool Kit along with some surfaces. Well, gobsmacked hardly comes close when the box arrived and I opened it to find this bumper bundle of "some" surfaces happy mail. A huge thank you to Tim and Sizzix for their kindness and generosity and I have to confess my first thought was WOW WOW WOW quickly followed by - blimey, where am I going to put it all?But hey, I'm a crafter and an organisation nerd with many years experience of finding space for new stuff so after a little bit of moving around, there's now a space for everything and everything in it's space. I had never used the Sizzix Sculpting Foam before, which comes in packs of 5 - 12" x 24" sheets, enough to last me for the rest of my crafting lifetime, I'm thinking so I fired up my Sizzix Fold-Away and set out on a fun die-cutting adventure using Tim Holtz/Sizzix Tattered Florals BigZ die. The BigZ die cut 4 layers of the Sculpting Foam at each pass so I soon had a big pile to work with. Then I had one of those "what if" moments and decided to add some grungy colour by dipping each flower into a puddle of Distress Oxide inks. (Antique Linen and Old Paper Distress Ink and Speckled Egg and Frayed Burlap Distress Oxide from a Custom Blend Ink Pad and Vintage Photo Distress Oxide ink.I used my Ranger Heat-It Tool along with the stylus tools and mat from Tim's Shaping Tool Kit to shape and curl the individual flowers before layering them together, heating again and pressing down in the centre to create a more realistic look. I haven't fixed them together yet because I'm waiting for Sizzix Stamens to arrive to finish them off. But I best get cracking on the rest of my flower pile. I'll be back soon to share some projects made with these Sculpting Foam flowers and am intending having another fun adventure using card and paper using only the stylus tools in the kit with no heat, so watch this space. In the meantime, I have some Alcohol Ink Backgrounds, inspired by Tim's amazing, fun, inspiring and eductional YouTube Live Alcohol Ink Demo, to make into projects. 

If you missed the demo, you can catch the replay HERE
Have fun with whatever you are creating. 
Hugs Kath xxx