

Hi my friends, I'm sharing the social make project I made for the launch of the Tim Holtz/Stampers Anonymous June 22 release of stamps and stencils and this was a new adventure for me, dipping my toes into the world of resin. I created a framed Art Panel using Botanic Collage and Eccentric stamp sets and the Focus Mini Layering Stencil along with Alcohol Inks and Ranger Clear Resin on an Alcohol Ink Hard Core Art Panel. If you missed the YouTube Live launch for the release, you can catch up with the fabulous new stamps and stencils and the amazing projects from the Makers on Tim's YouTube Channel HERE or over on Tim's Blog HERE.
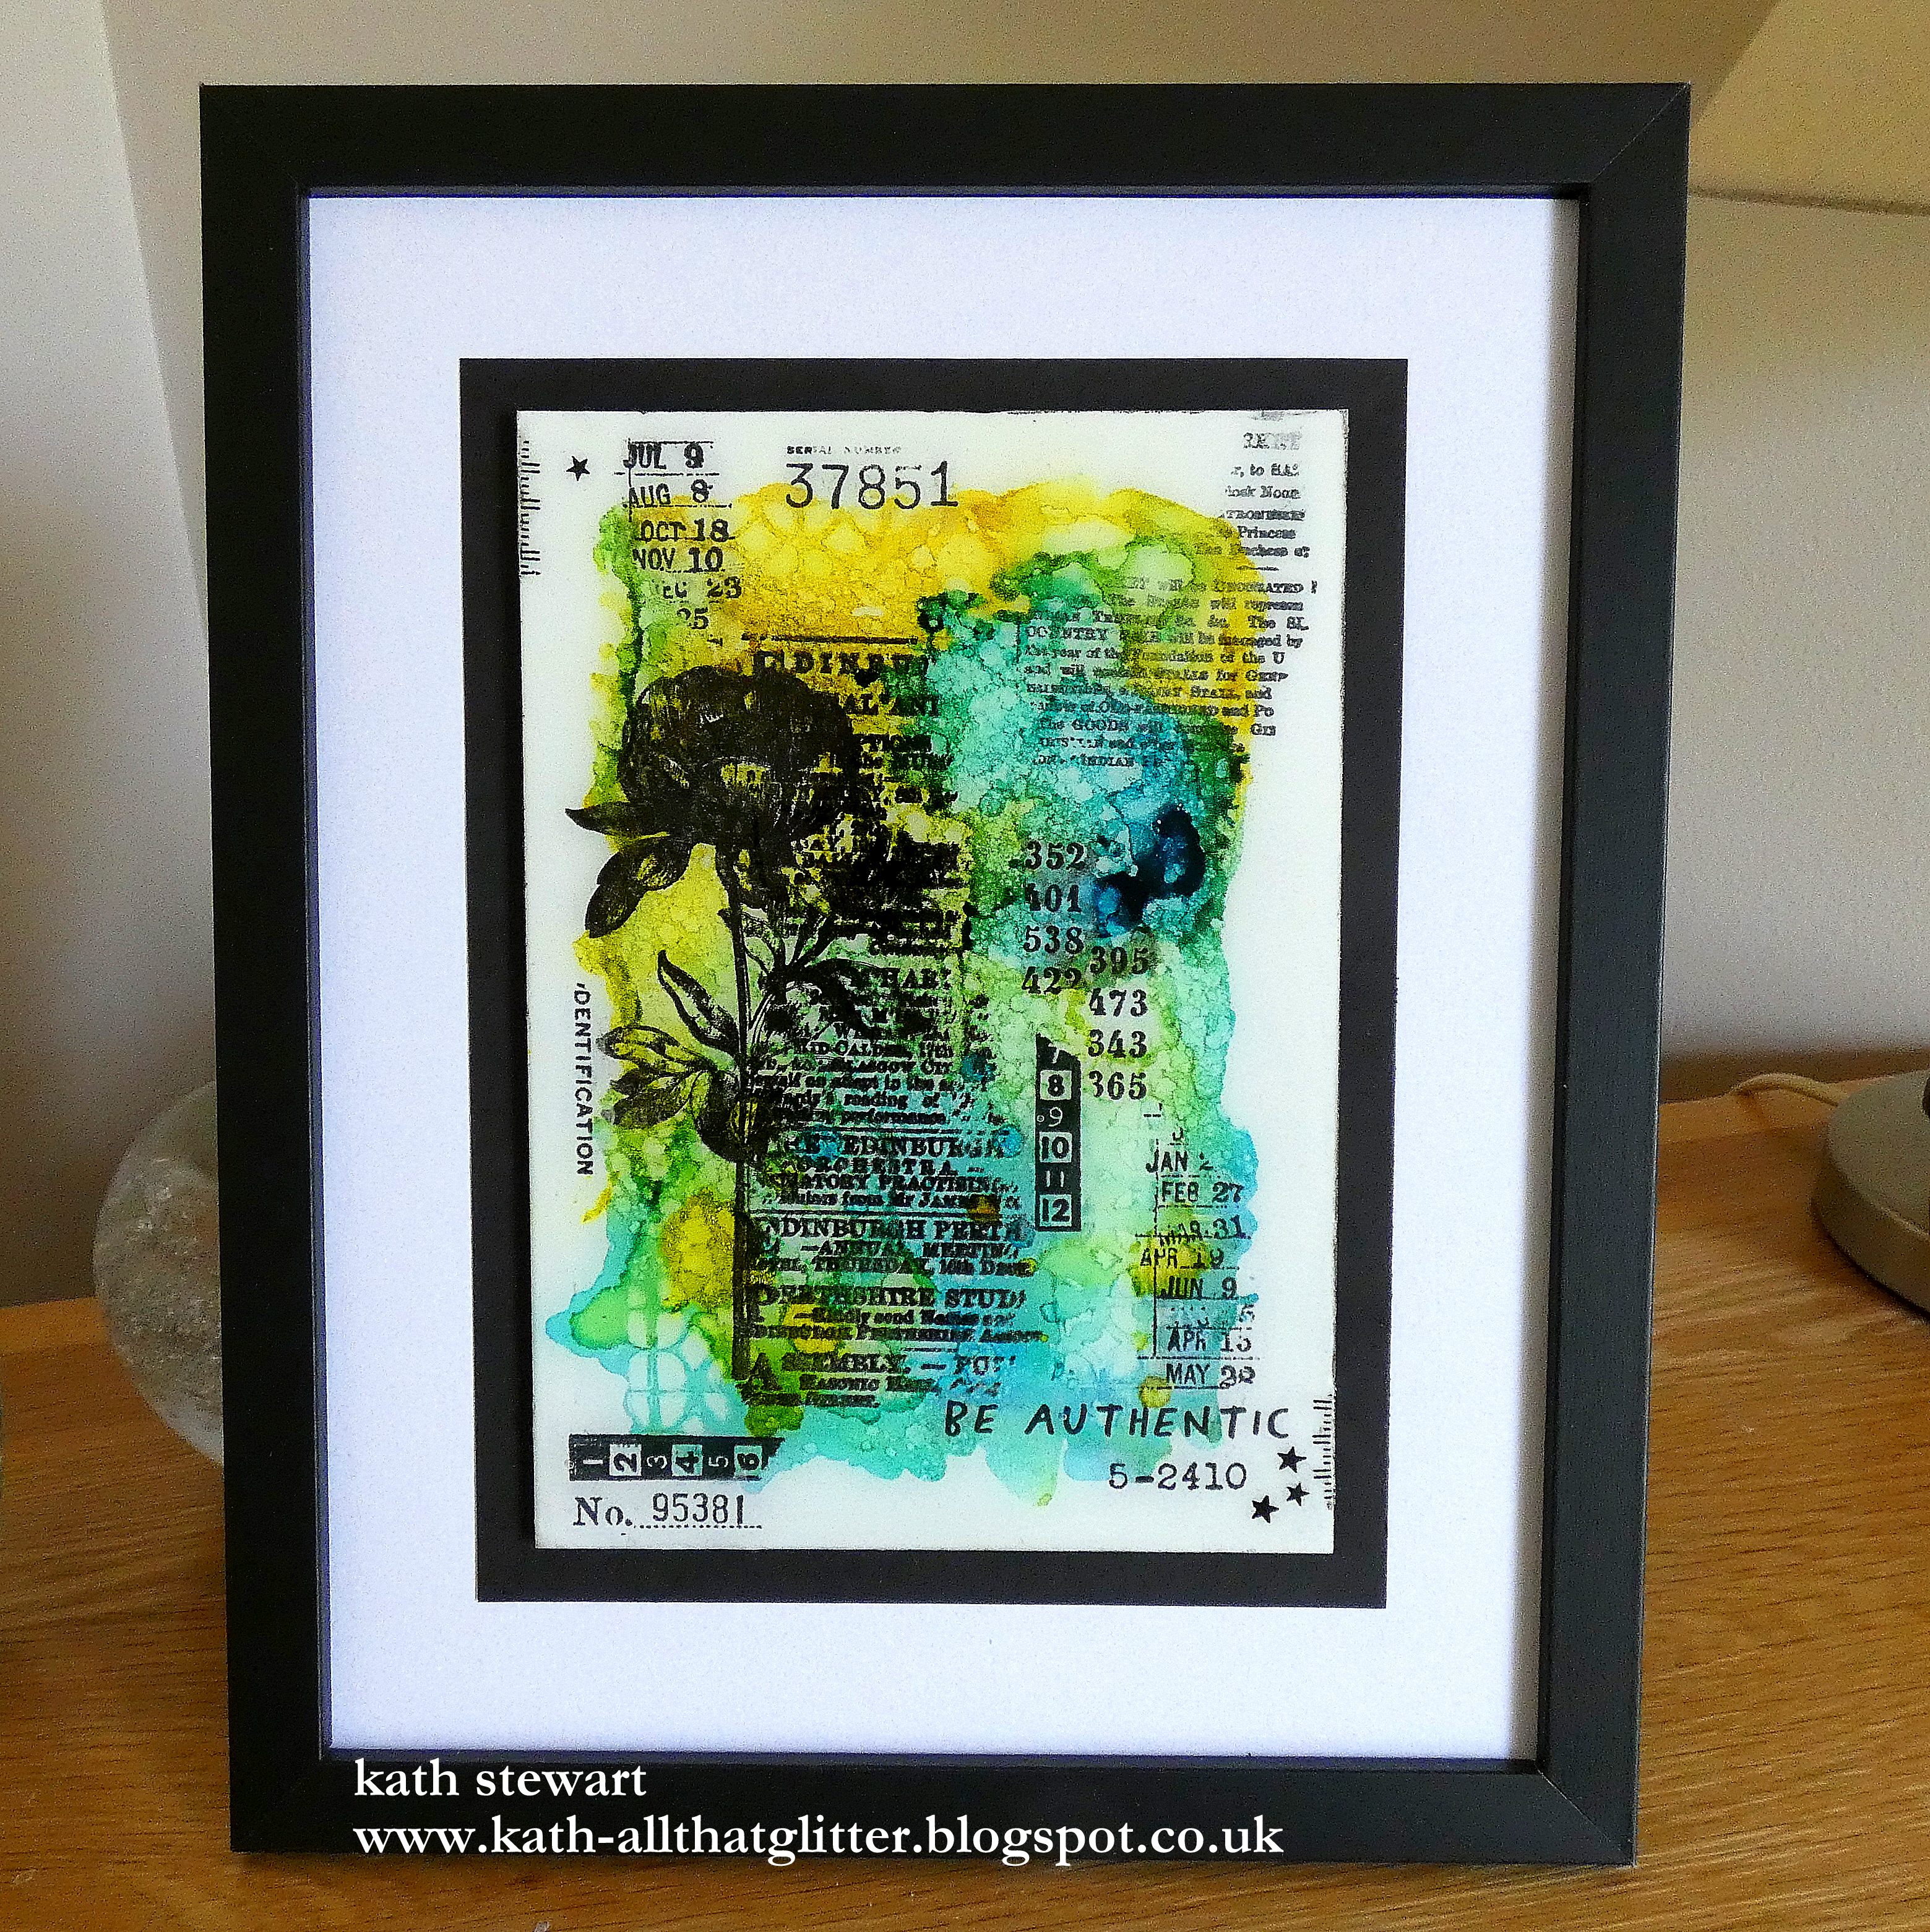

I dripped Blending Solution on to a 5" x 7" Hardcore Art Panel, added drops of Dandelion, Dijon and Stream Alcohol inks, moved the inks around with a Distress Air Blower and repeated the process with more drops of ink and Blending Solution until I was happy with the background. I stamped the images from Botanic Collage inked with Black Soot Distress Archival ink.

I placed the Focus Mini Layering Stencil on the panel and used a paper towel moistened with Blending Solution to dab through the stencil, removing the colour from random sections on the panel and dried with a heat tool to stop the blending solution reacting with the ink.

I placed Idea-ology Plain Collage Paper on the Media Grip in my Stamp Platform (oh boy, this new product is definitely a game changer when it comes to holding things in place) and stamped images from Eccentric and a sentiment from Noteworthy, inked with Black Soot Distress Archival ink.

I wanted the images and the sentiment to really stand out on the background and have the same look as Remnant Rubs, in fact, the Eccentric stamp set is based on the existing set of Idea-ology Eccentric Remnant Rubs, so I sprinkled the images with Ranger Clear Superfine Embossing Powder and heat set.

I used a Distress Detailer Brush to paint water around the stamped images, teased apart with my fingers and fixed to the panel using Distress Collage Medium.
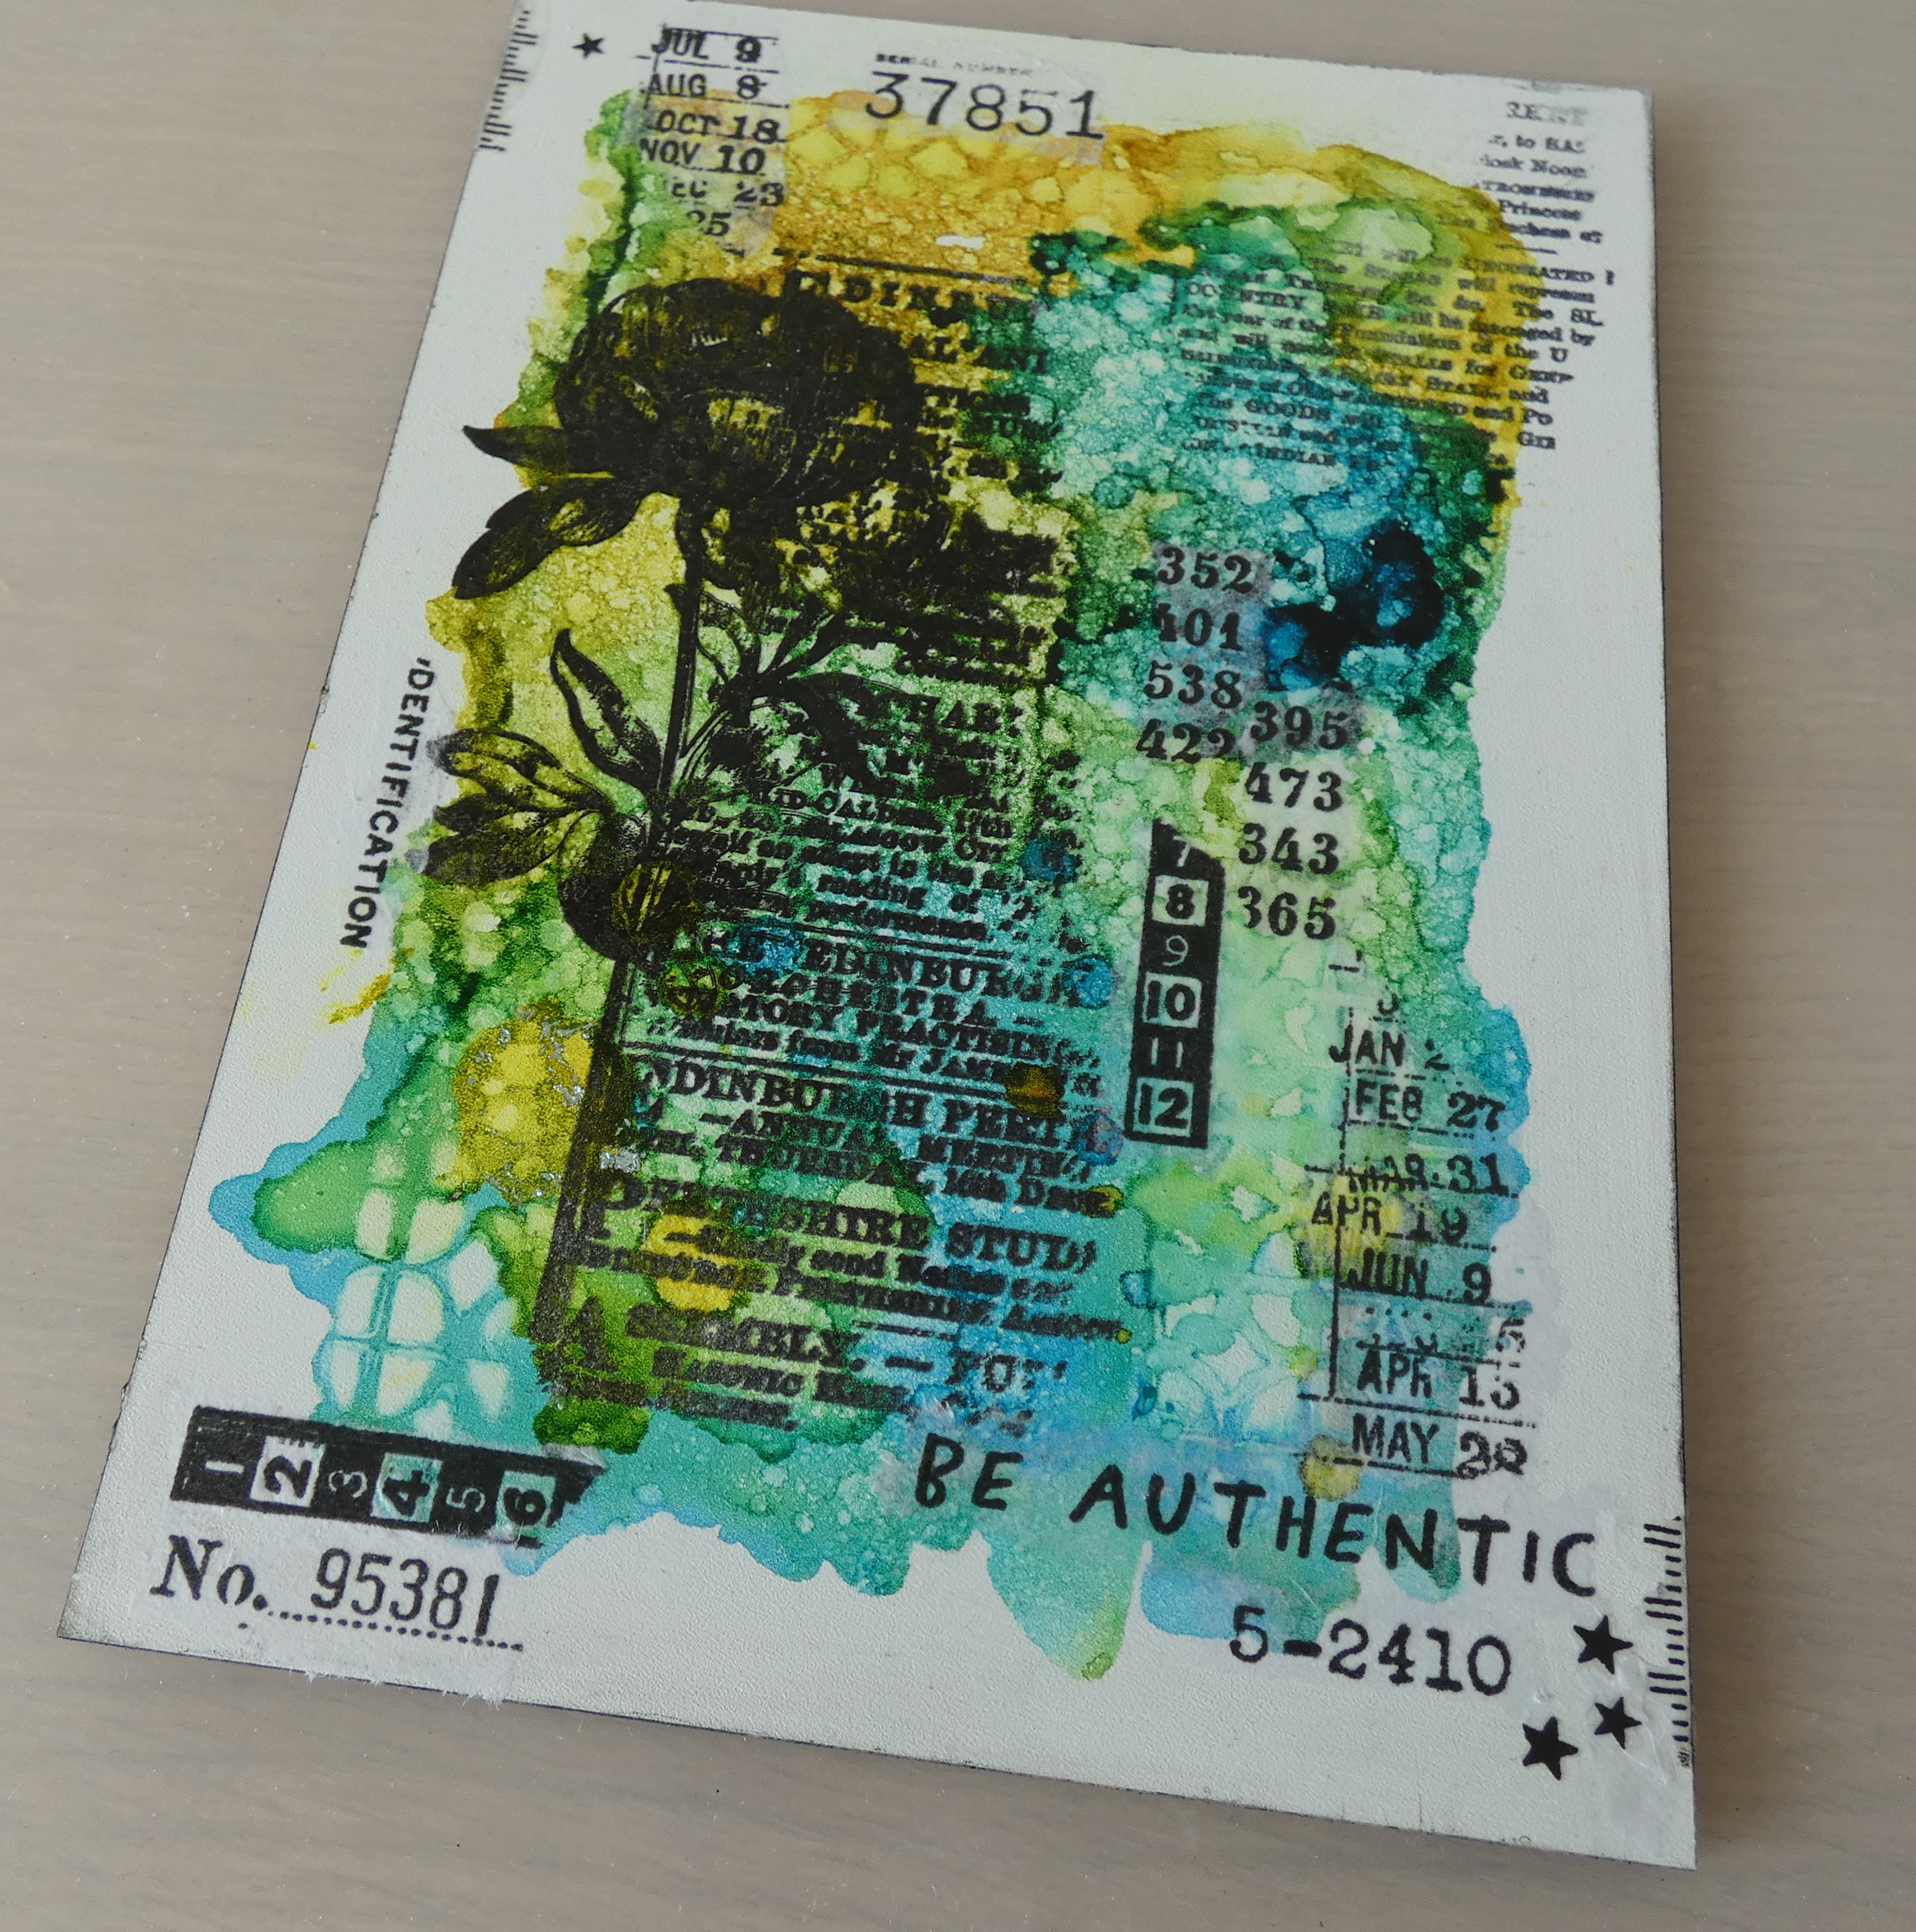
I painted the edges of the panel with Black Gesso and then it was time to coat the panel with clear resin, it was a bit of a scary experience because my first attempt on a practice piece didn't quite go according to plan but hey, if at first you don't succeed, try try try again. I poured Parts A and B in equal measure into the mixing cup and stirred for the time suggested. It's not like me but on this occasion I followed the instructions that came in the pack, to the letter.

I gently poured the resin into the centre of the panel and smoothed out to the edges using the mixing stick. The resin does self level but I found the mixing stick was invaluable to encourage the resin to move and cover any bare patches. It's amazing how little resin you need to cover a panel this size, mix too much and it will flow over the sides leaving you with more resin on your non stick surface than on the panel. Again I used the mixing stick to remove the drips on the edges of the panel and repeated this several times. Air bubbles will appear, they are inevitable but a gentle waft with your heat tool over the panel from about 8" away will dissipate them and I repeated this process after 30 minutes. Patience is not one of my virtues but for this technique it's essential to leave well alone and let it dry overnight. Wow I was amazed when I returned the following morning to find the panel completely dry with the most gorgeous high gloss glass-like coating. Although it is dry enough to handle, apparently the resin takes 3 days to fully cure.
 Sadly it's difficult to capture the beautiful high gloss sheen on camera but this resin novice was rather impressed with her second attempt and decided to mount the panel on to black cardstock and place in a black frame.
 Patience is not one of my virtues but for this technique it's essential to leave well alone and let it dry overnight. Wow I was amazed when I returned the following morning to find the panel completely dry with the most gorgeous high gloss glass-like coating. Although it is dry enough to handle, apparently the resin takes 3 days to fully cure.
 Sadly it's difficult to capture the beautiful high gloss sheen on camera but this resin novice was rather impressed with her second attempt and decided to mount the panel on to black cardstock and place in a black frame.


Have fun with whatever you are creating
Hugs Kath xxx
So beautiful Kath Is your card gorgeous colours well matched frame too xx
ReplyDeleteMy word Kath you go from strength to strength, this is stunning, I would love to try resin out but have been told its quite smelly, which for me not so good, but after seeing this I might just chance it, a beautiful creation.xx
ReplyDeleteThis is so gorgeous Kath! I LOVE the soft AI tones and the resin was a perfect addition!
ReplyDelete