Wednesday, August 31, 2022

Tim Holtz/Stampers Anonymous - Exquisite Framed Panel

Hi my friends, I'm sharing the Hard-core Art Panel I created for the YouTube Live launch of Tim Holtz/Stampers Anonymous latest collection of stamps and stencils using the Exquisite stamp set, Thorned Mini Layering Stencil, Alcohol Inks and Distress Translucent Grit Paste. If you missed the Live launch, you can catch up with this fabulous, something for everyone, release and all the amazing projects from the Makers over on Tim's YouTube Channel HERE or Blog HERE.


I chose to work on a 5" x 7" Rectangle Hard-core Art Panel, which comes in a pack of 3 of different sizes. I dripped Blending Solution on to the panels and added drops of Mermaid, Moss and Lemonade Alcohol Inks. I moved the inks around using the Alcohol Ink Blower, deliberately avoiding the edges and added more drops of Blending Solution and Alcohol Inks until I was happy with the background.
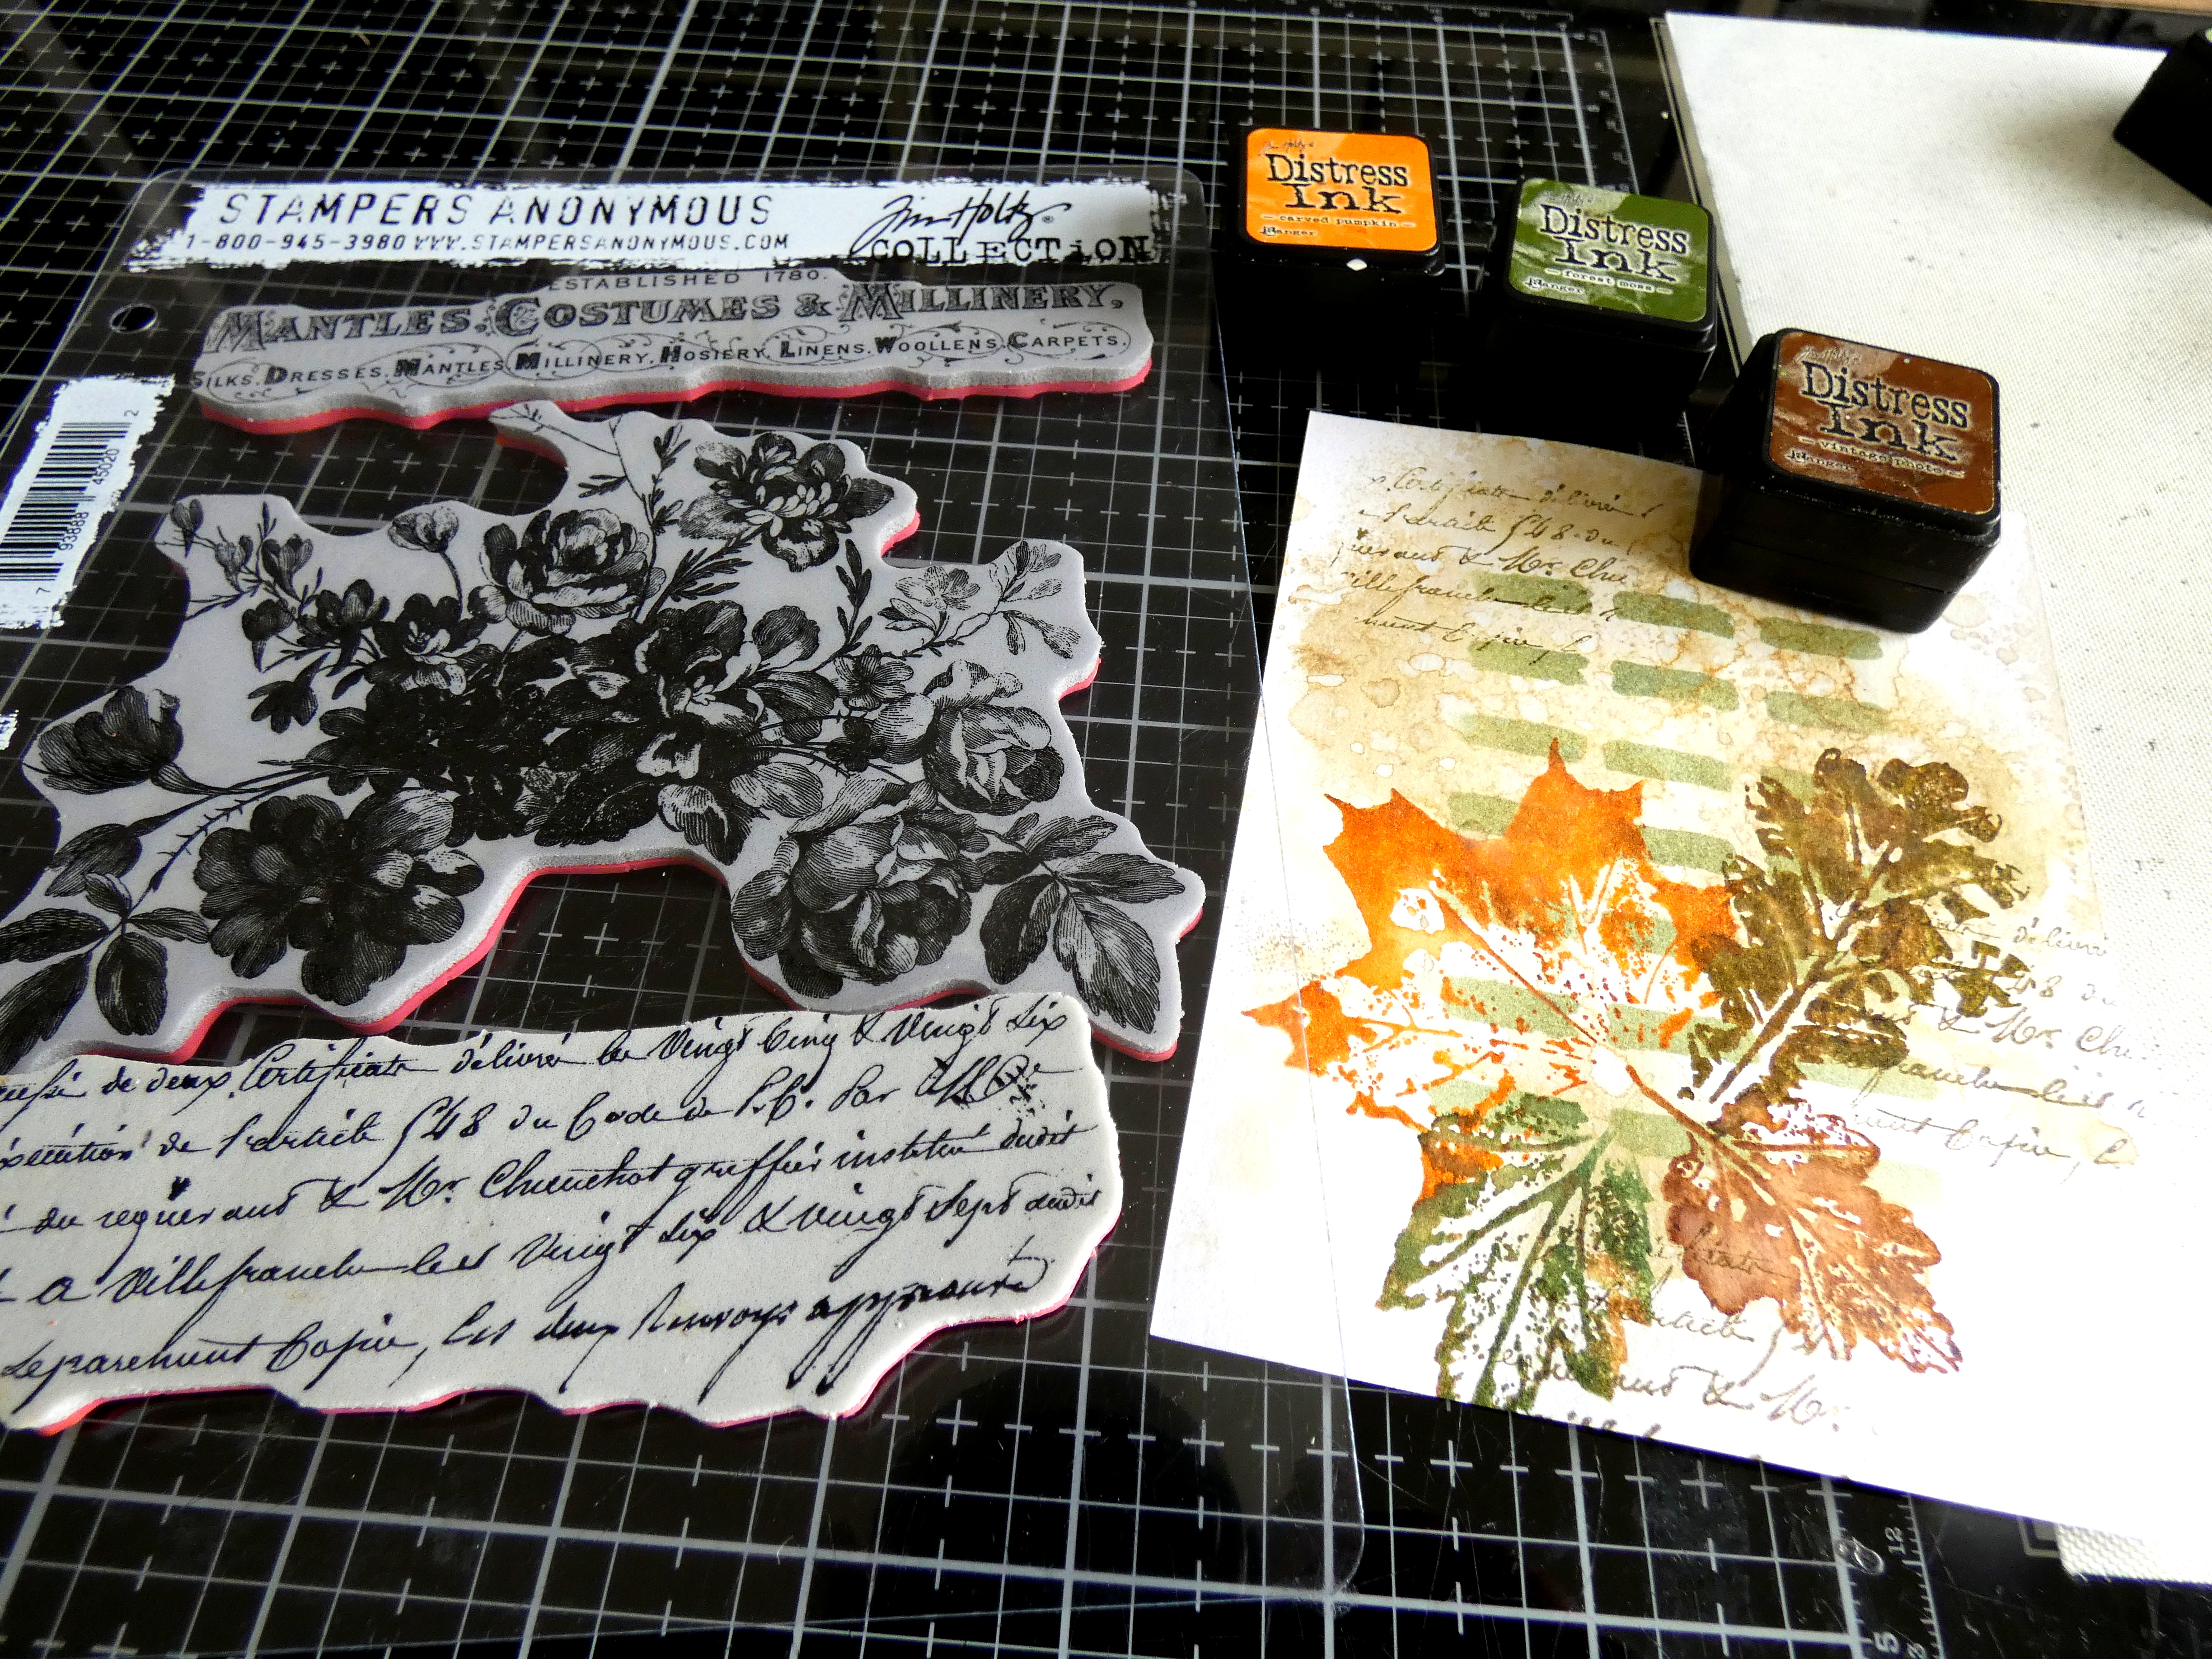
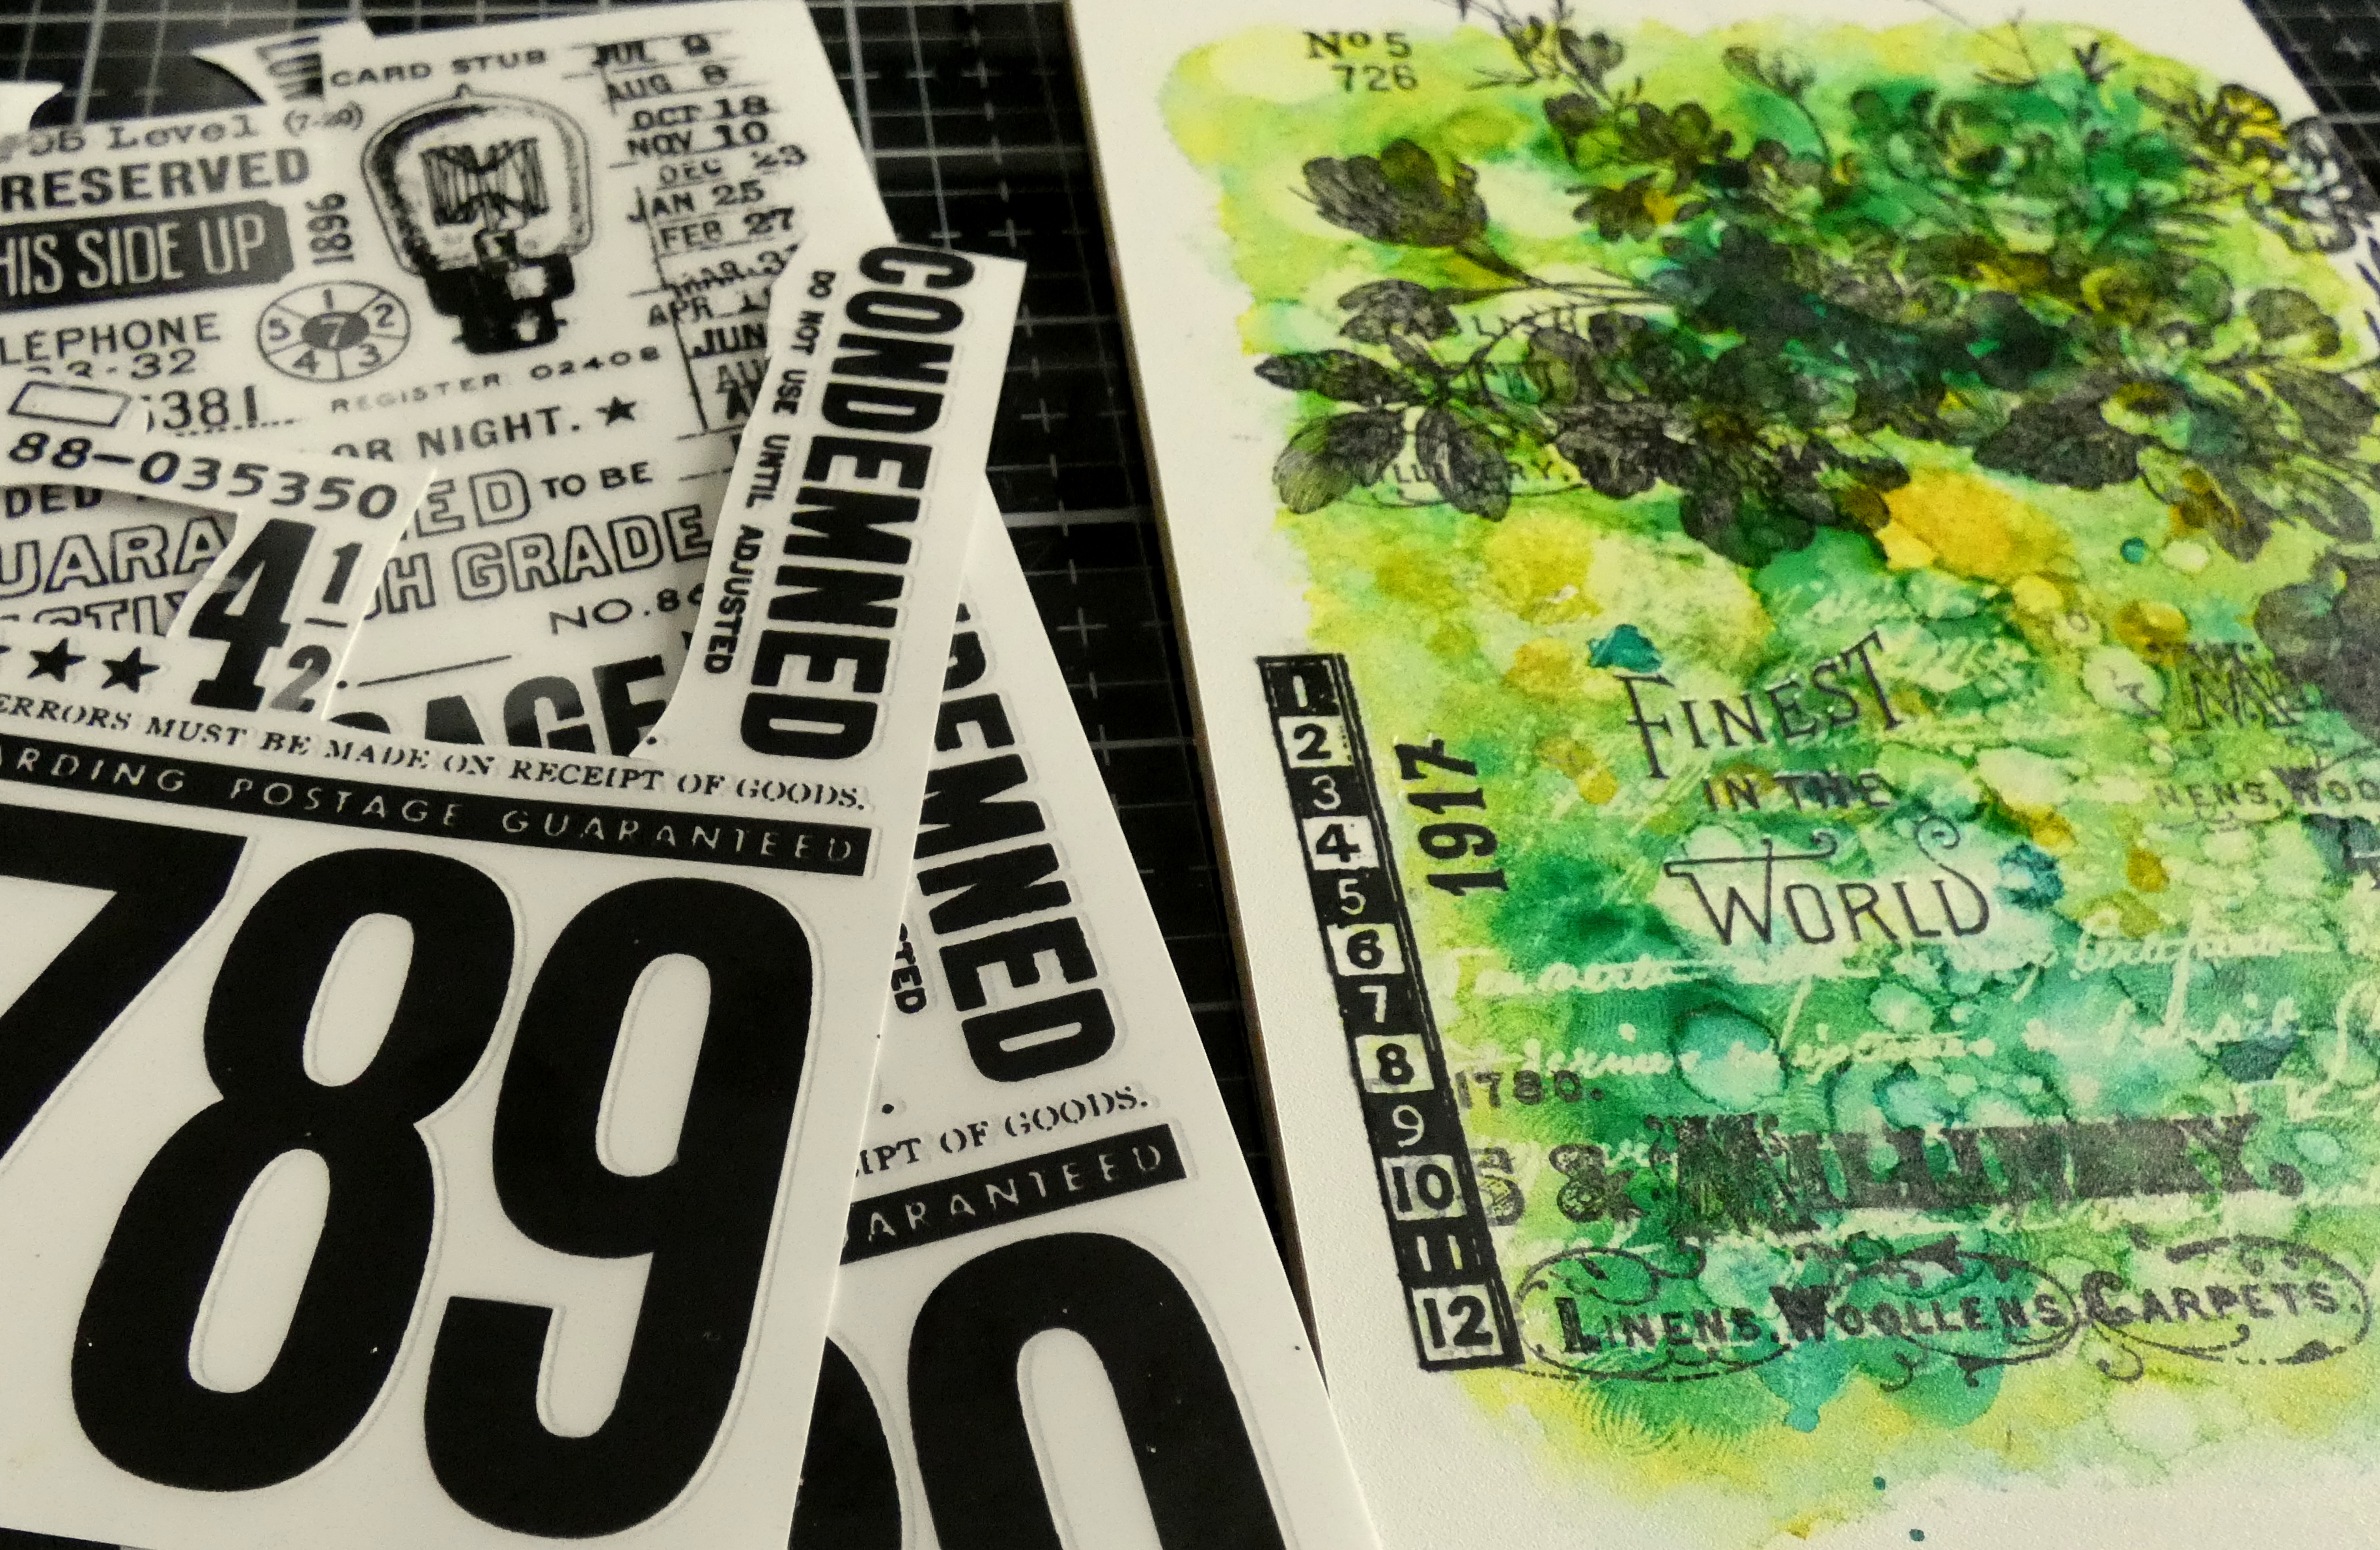
I inked the script stamp from Exquisite with Alcohol Lift Ink and stamped on to the panel. I patted with a clean cloth repeatedly, using a clean section of the cloth each time until no ink was showing on the cloth. I cleaned the stamp and repeated this process. I added a small amount of Alcohol Lift Ink re-inker to my Glass Media Mat, picked with with a mini round blending tool and pounced through the Markings Layering Stencil and patted with a clean cloth.I stamped the floral and sign images from Exquisite (Tim chose the perfect name for this stamp set, the detail is absolutely exquisite) inked with Black Soot Distress Archival Ink and added Idea-ology Eccentric Remnant Rubs. 
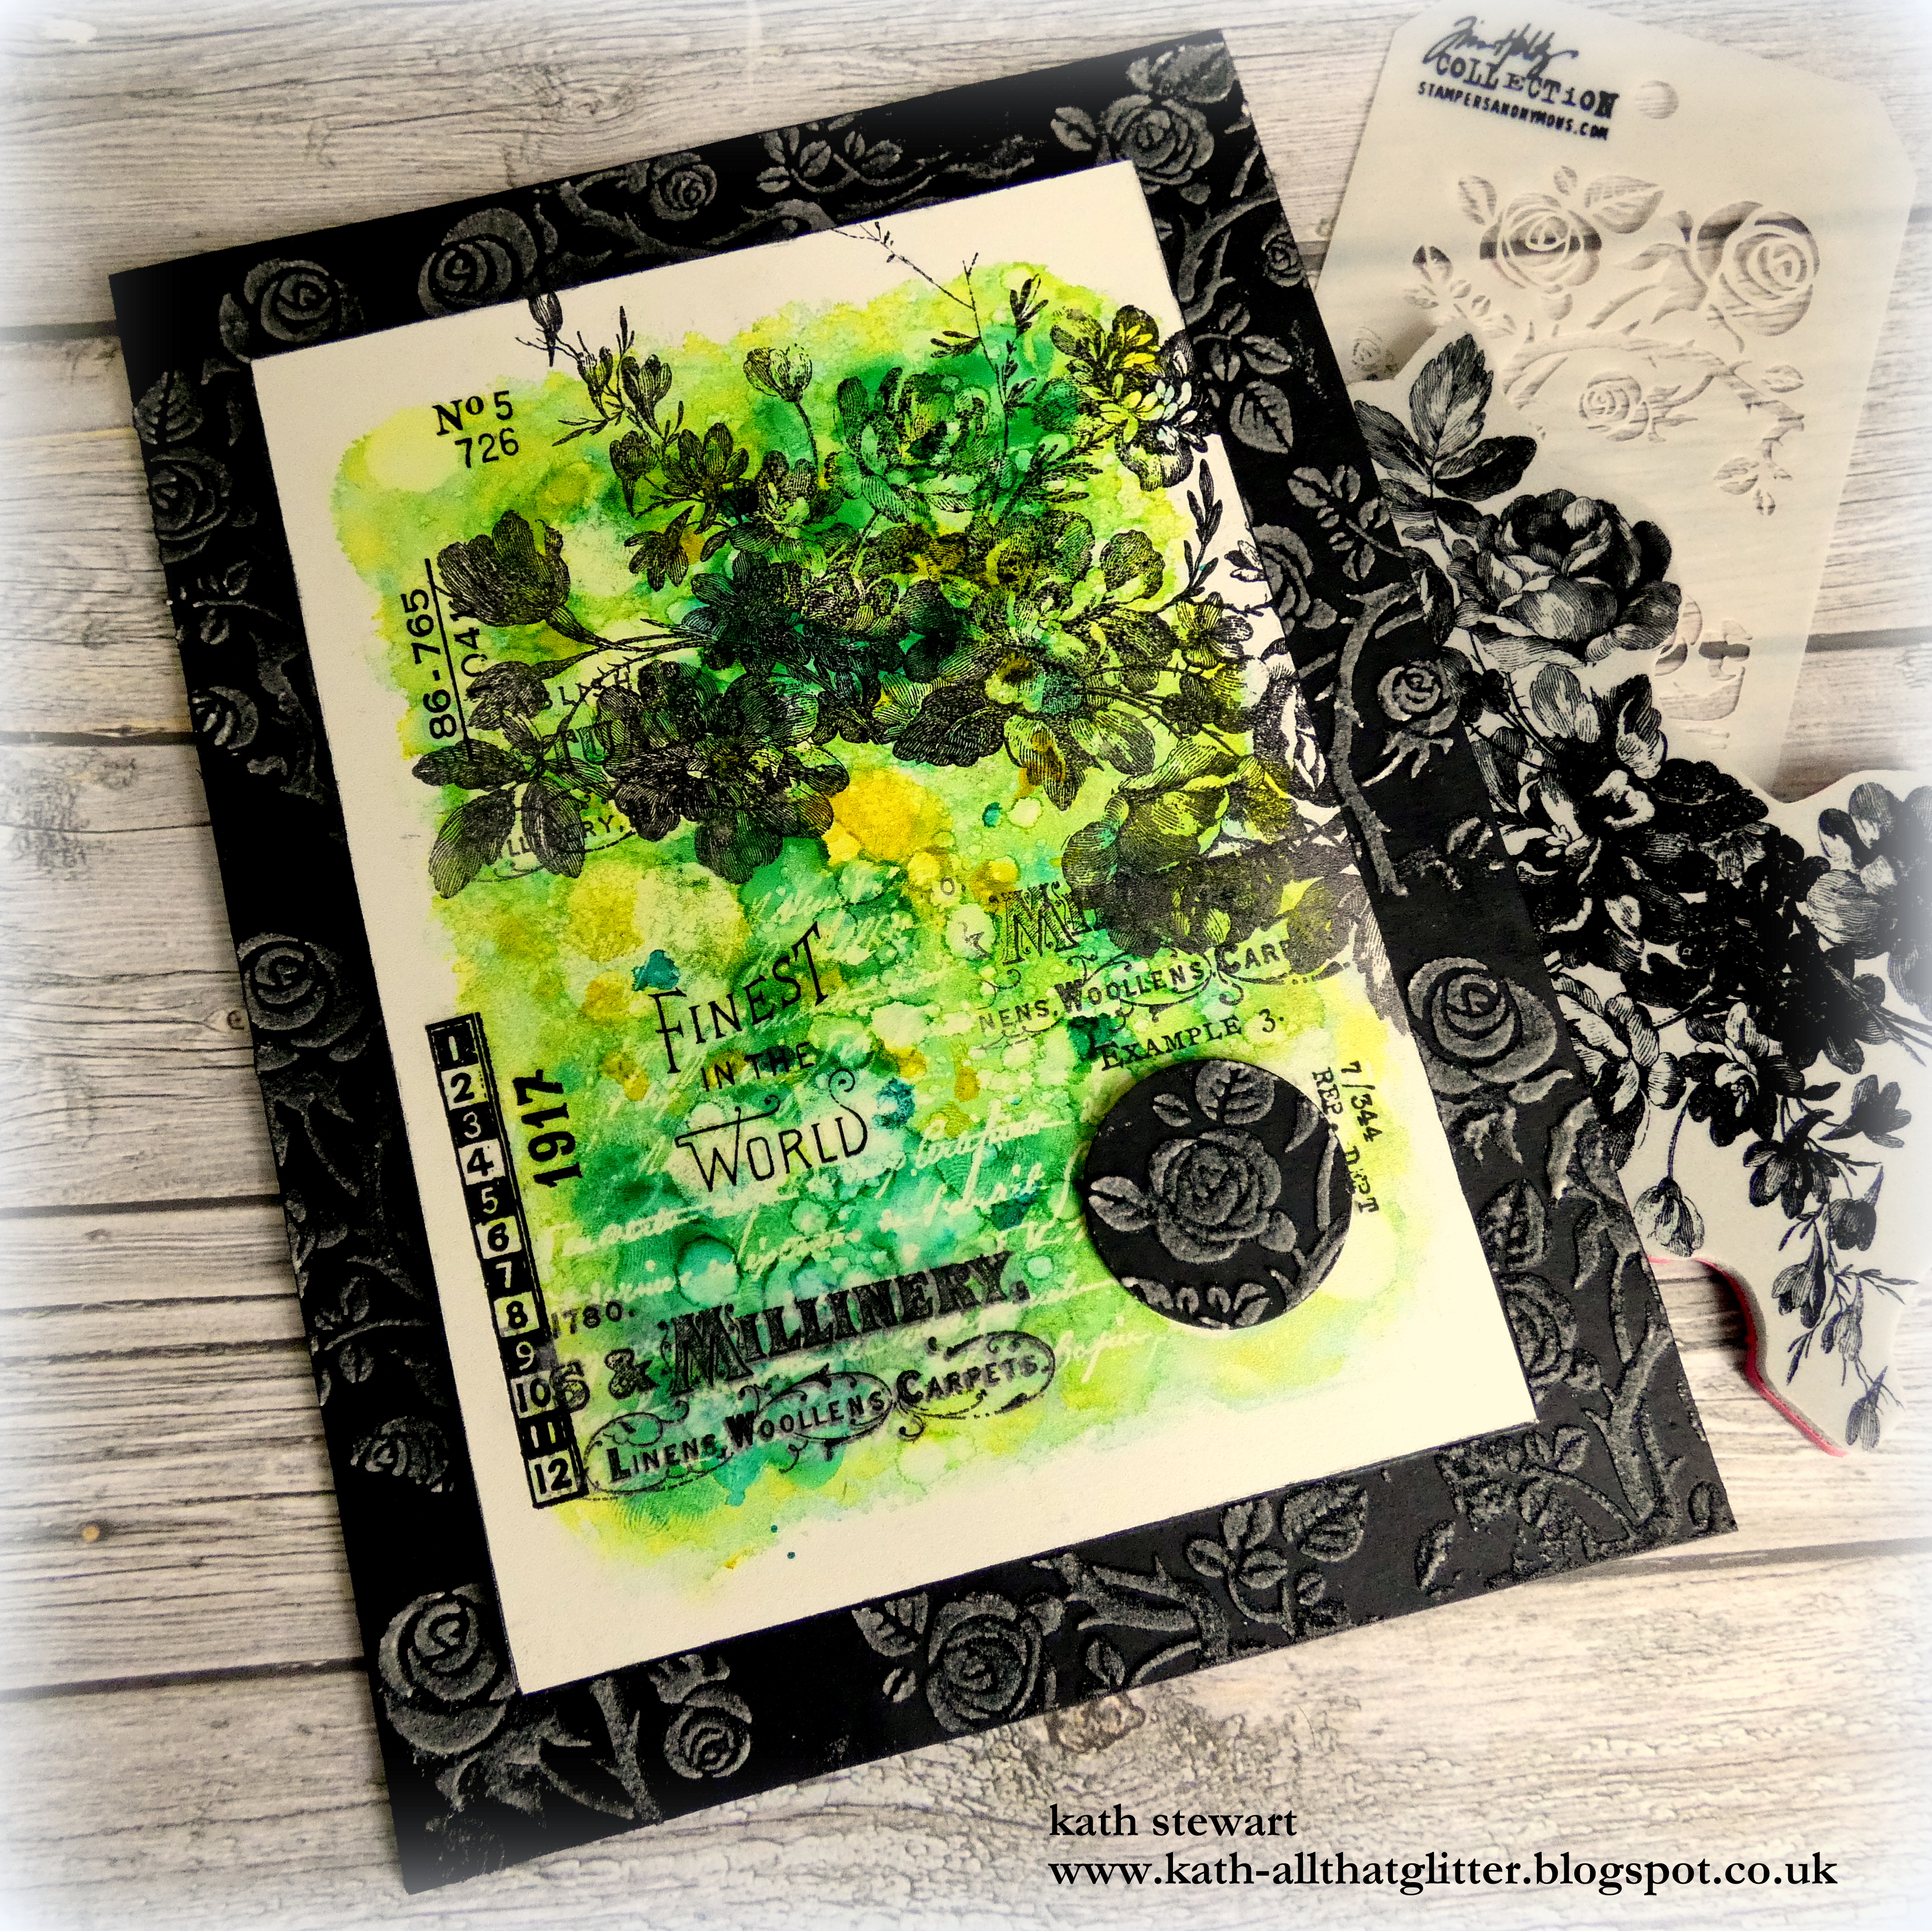
To create a frame for the Hard-Core Art Panel, I trimmed heavyweight chipboard to 6.1/2" x 8.1/2" and covered with Idea-ology Black KraftStock. I placed the Art Panel on the card, marked around the edges with a pencil and applied painters tape to mask off the edges. I applied Distress Translucent Grit Paste through the Thorned Mini Layering Stencil - Set 53, carefully removed the painters tape and set aside to dry.
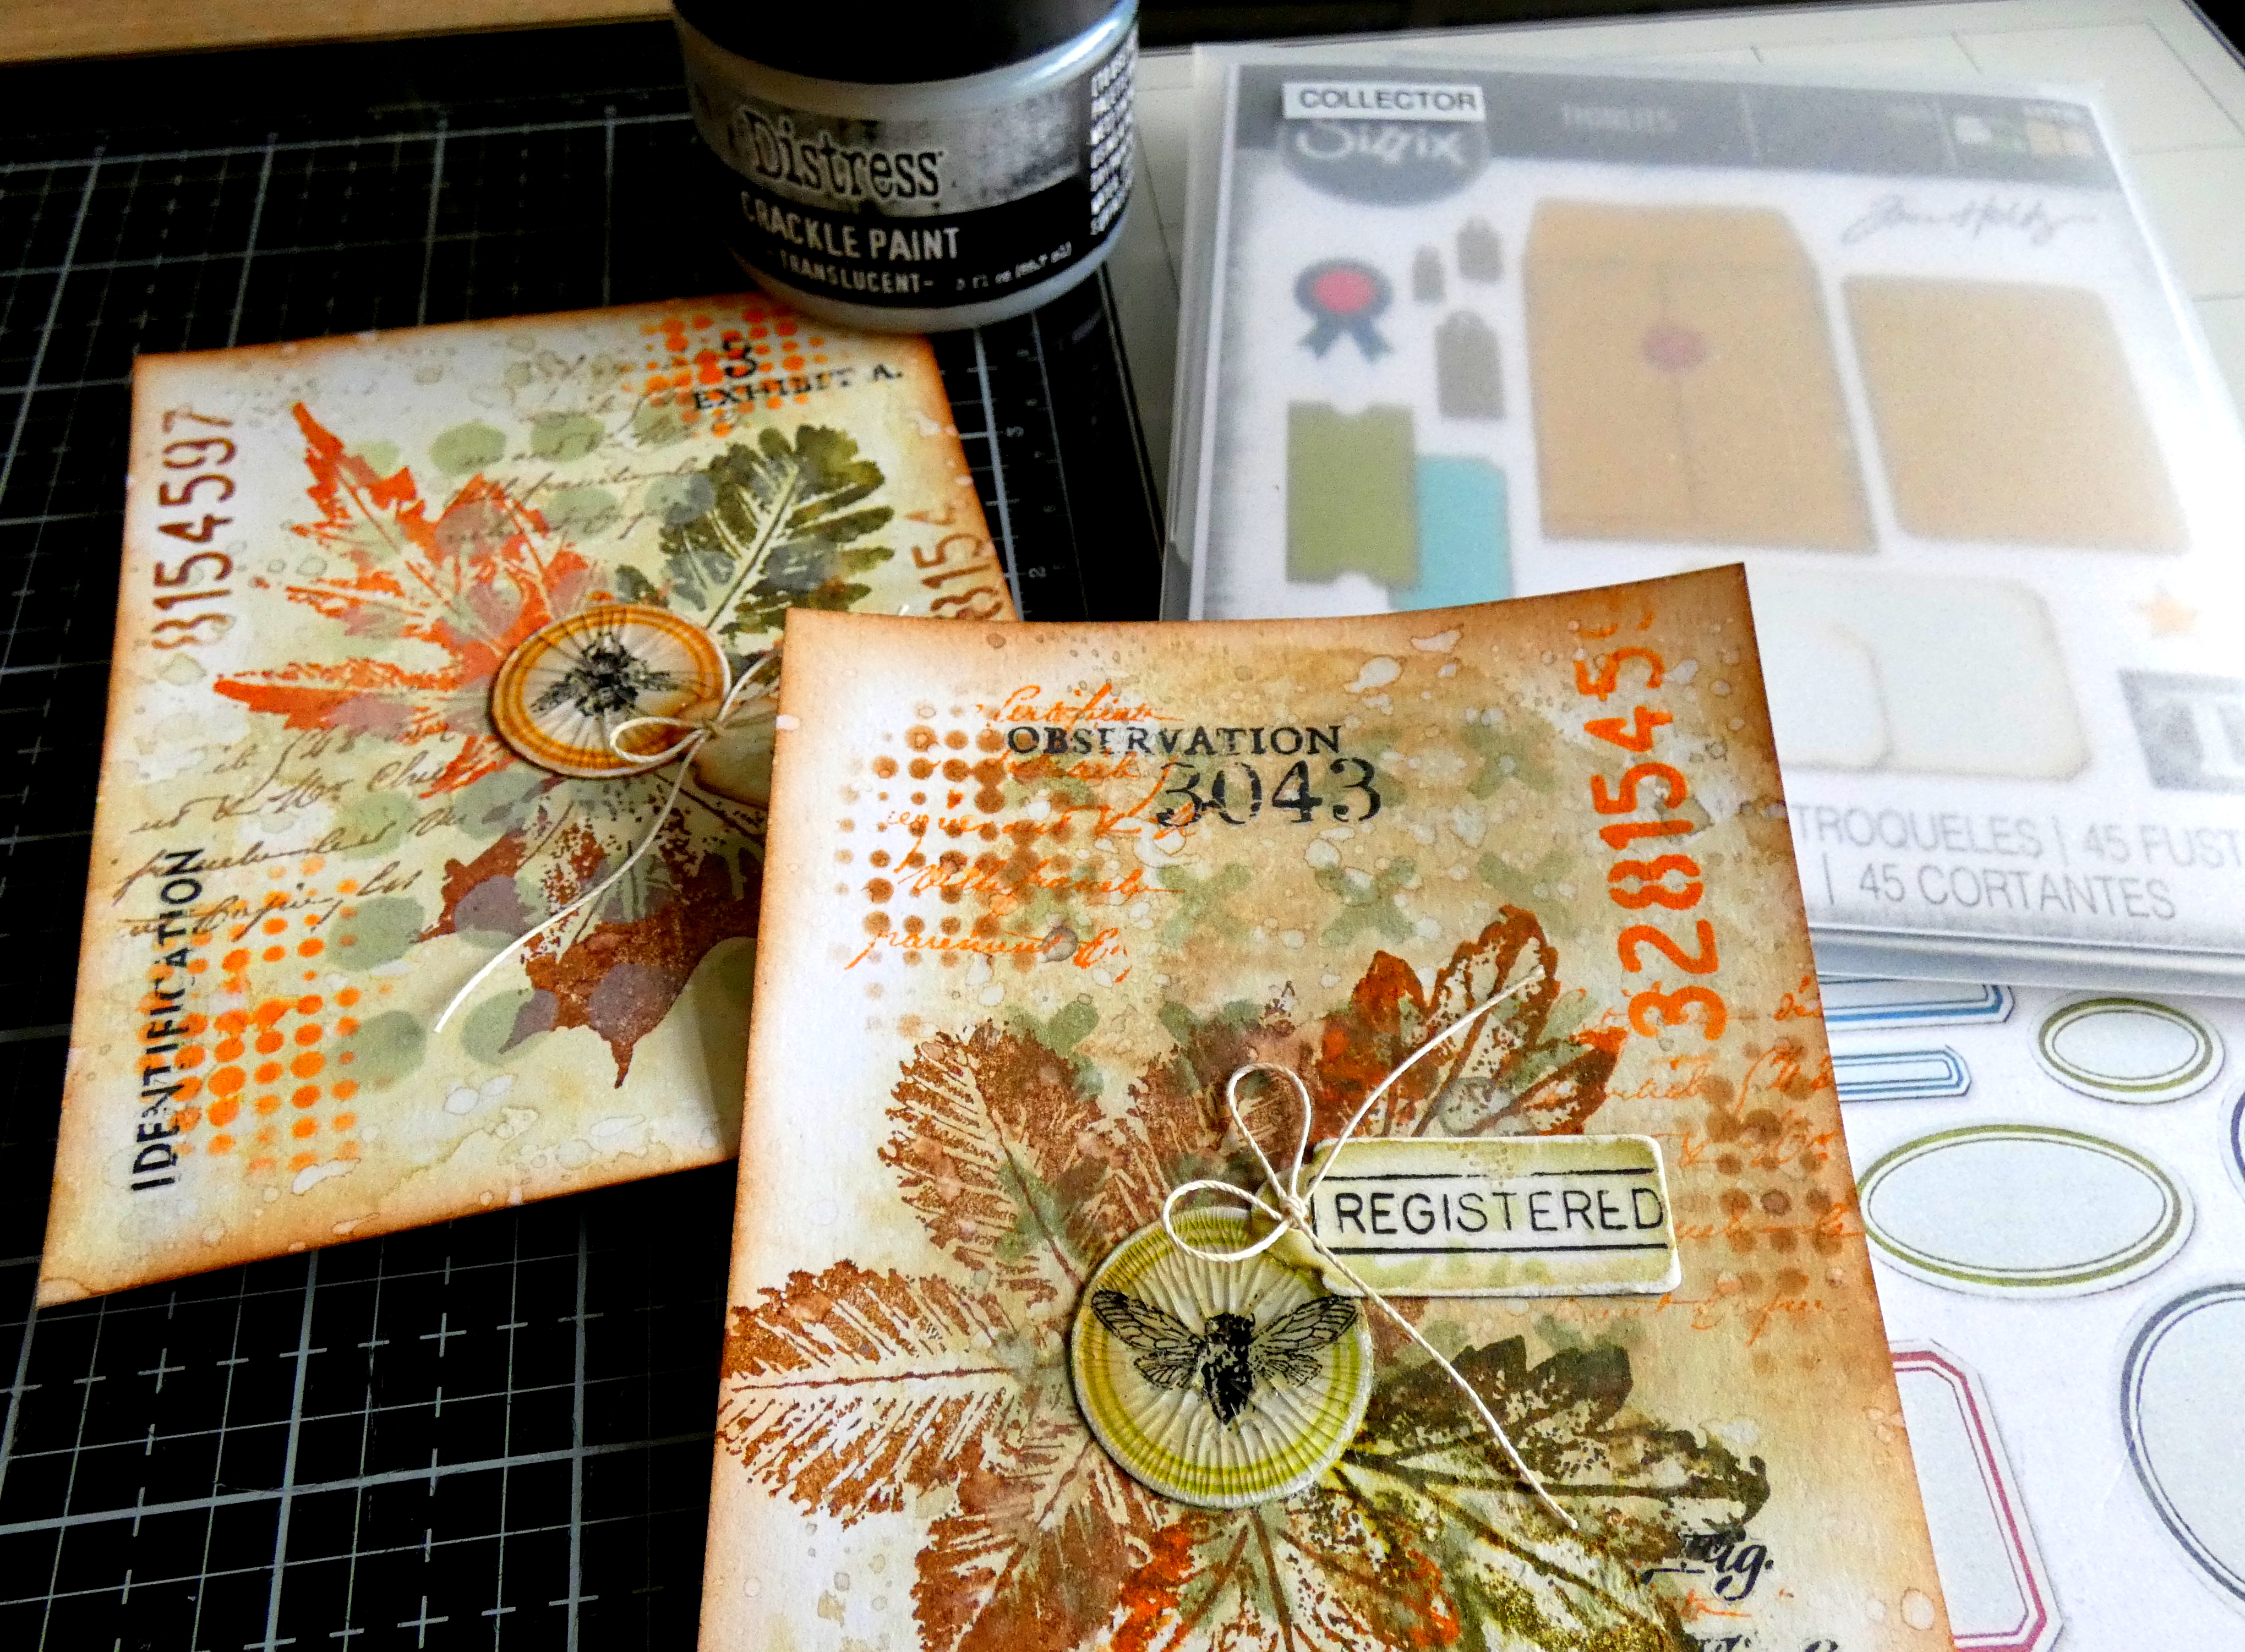
I die-cut 4 circles from black card using Tim Holtz/Sizzix Stacked Circles, layered with Distress Collage Medium and applied Distress Translucent Grit Paste through the same stencil.I added a few more Eccentric Remnant Rubs to balance the design, fixed the circle embellishment on the panel and fixed the panel to the stencilled frame with Distress Collage Medium.


Have fun with whatever you are making.
Hugs Kath xxx

Tuesday, August 30, 2022

Tim Holtz/Ranger - Christmas 2022

 Hi my friends,


I
I


Tim Holtz/Stampers Anonymous - Leaf Prints 2 Envelope Box

Hi my friends, I'm back to share the envelope box I made to hold the cards and envelopes I made for the YouTube Live launch of Tim Holtz/Stampers Anonymous latest collection of stamps and stencils, a great release as always with a mix of stamps for everyone. If you missed the Live, you can always catch up and check out all the amazing inspiration from the Makers over on Tim's YouTube Channel HERE or Blog HERE. If you missed my blog post on how I made the cards, you can find the details HERE.


I trimmed Distress Watercolor card to 8.1/8" square, coloured with the same Custom Blend ink pad that I used for the cards and created the envelope box using my WeRM Keepers Envelope Punch board. I scored again 1/4" out from the original lines to create the extra depth for the contents.
I inked the leaf images from Tim Holtz/Stampers Anonymous Leaf Prints 2 with the custom blend ink pad (colours linked below) spritzed with water and holding the stamps in my hand, stamped randomly over the envelope.
I also stamped the script stamp from Gothic Tapestry randomly over the background, inked with Vintage Photo Distress Ink.
I stamped one of the labels from Tim Holtz/Stampers Anonymous Label Frames on to a left over piece of the coloured card, inked with Vintage Photo Distress Ink. I inked the leaf images from Leaf Prints 2 with Carved Pumpkin, Forest Moss and Vintage Photo Distress Inks, spritzed with water, stamped on to the label and fussy cut around the edge.
I smooshed the Custom Blend ink pad on to my Glass Media mat, spritzed with water, dipped the crinkle ribbon into the ink, scrunched up in my hand and dried.  
I fixed the ribbon across the front of the envelope and added the stamped label.
I fixed the bottom flaps of the envelope box closed with strong double sided tape and tied the ribbon into a double bow.


Have fun with whatever you are making
Happy Crafting
Hugs Kath xxx

Monday, August 29, 2022

Simon Says - Make Your Own Background

 Hi Everyone...welcome to another week on the Simon Says Stamp Monday Challenge Blog. Thank you for joining us for last week's challenge and we hope you can join us this week too because


and the theme for this week is...
MAKE YOUR OWN BACKGROUND
I created quick and easy backgrounds using Tim Holtz/Stampers Anonymous Moon Mask Stencils and Distress Mica Stains, Sets 3 and 4. I used images from Tim Holtz/Stampers Anonymous The Scarecrow and Unravelled and Tim Holtz/Sizzix Bold Text Halloween, spiders from Frightful Things and bats from Otis Colorize Thinlits to decorate.
I began by fixing the Moon Mask stencil temporarily in place with Tim Holtz/Sizzix Sticky Grid to A2 panels of Distress Watercolor card and spritzed with Frayed Burlap Distress Spray Stain and Burning Embers/Decayed Distress Mica Stains on the left panel and Peeled Paint Distress Spray Stain and Wicked Elixir/Fortune Teller Distress Mica Stains on the right. I removed the mask, spritzed the edges of the moon with water, let the stains wick on to the moon and dried.
I inked the images from The Scarecrow and Unravelled with Black Soot Distress Archival, stamped on to Distress Watercolor card, coloured with Distress Re-inkers (colours listed in the links) using a Distress Detailer Brush and fussy cut.

I die-cut the letters from Simon Says Black cardstock 3 times using Bold Text Halloween Thinlits and stacked to create dimension. I die-cut the spiders using Frightful Things Thinlits and the bats from Black cardstock and Ranger Black Two-Tone Woodgrain card using Otis Colorize Thinlits.
I fixed the characters in place with Simon Says Black Foam Squares to create dimension and added the letters, spiders and bats using Distress Collage Medium. I added Ranger Glossy Accents to the letters and spider bodies.


To finish I matted the panels on to Simon Says Black Cardstock and fixed to White Card blanks

You can find all the products I used over at Simon Says Stamp, just click on the links below


Why don't you pop over to the Monday Challenge Blog and check out the amazing creations from my very talented Design Team mates and as always you have until Monday 8am Ohio time... 1pm UK time... 2pm CET to join in with the chance to win a $25 voucher to spend online at Simon Says Stamp


You can also follow Simon Says Stamp on Instagram
and if you use Instagram...
please add #sssmchallenge to your entry uploads so we can see them on there too

I look forward to seeing what you create this week...
Have Fun and Happy Crafting
Hugs Kath xxx

Saturday, August 27, 2022

Tim Holtz/Stampers Anonymous - Leaf Prints 2 Cards

Hi my friends, I'm sharing a trio of cards, envelopes and envelope box I made for the YouTube Live launch of Tim Holtz/Stampers Anonymous latest collection of stamps and stencils using Leaf Prints 2, Mini Markings Layering Stencil and Distress Inks. If you missed the Live launch, you can catch up with this, something for everyone, release and all the amazing projects from the Makers over on Tim's YouTube Channel HERE or Blog HERE.


I'm sharing how I made the cards and decorated the envelopes in this post but am only showing one card in the step by step photos as all 3 were made in the same way, just switching up the ink colours when stamping the leaves and stencilling.
I smooshed the Custom Blend Ink pad (colours listed below) on to my Glass Media Mat, spritzed with water, laid the panels into the inks, dried and tapped back into the inks repeatedly to pick up the remaining droplets. I applied Forest Moss Distress Ink through the Mini Markings Layering Stencil using a different pattern on each panel.
I inked the leaf images from Leaf Prints 2 with Carved Pumpkin, Forest Moss, Rustic Wilderness and Vintage Photo Distress Inks, spritzed with water and stamped on to the panels.
I stamped the script from Gothic Tapestry randomly over the panels, inked with Vintage Photo Distress Ink.
I applied Carved Pumpkin and Forest Moss Distress Inks through the Halftone and Digits Mini Layering Stencils from Set 48 using a mini round blending tool.
I inked the circle die from Tim Holtz/Sizzix Vintage Labels with Spiced Marmalade, Vintage Photo and Peeled Paint Distress Archival inks using Tim Holtz Small Brayer and die-cut 3 circles from Distress Mixed Media HeavyStock.
I fixed the die-cut Vintage Labels to the panel, added Ideaology Specimen and Eccentric Remnant Rubs and applied a coat of Distress Crackle Paint.
I die-cut the tags using Tim Holtz/Sizzix Collector Thinlits, decorated with Remnant Rubs, fixed in place and added twine bows.

I inked the label frame with Vintage Photo Distress Ink, the leaf and script with the Custom Blend ink pad and stamped on the envelopes.
To finish, I rounded the corners on the panels and the A2 white card blanks.


I'll be back next week to share how I made the envelope box to hold the cards and envelopes. In the meantime, have fun with whatever you are making.
Hugs Kath xxx