

Hi my friends, I'm sharing a trio of cards, envelopes and envelope box I made for the YouTube Live launch of Tim Holtz/Stampers Anonymous latest collection of stamps and stencils using Leaf Prints 2, Mini Markings Layering Stencil and Distress Inks. If you missed the Live launch, you can catch up with this, something for everyone, release and all the amazing projects from the Makers over on Tim's YouTube Channel HERE or Blog HERE.

 I'm sharing how I made the cards and decorated the envelopes in this post but am only showing one card in the step by step photos as all 3 were made in the same way, just switching up the ink colours when stamping the leaves and stencilling.
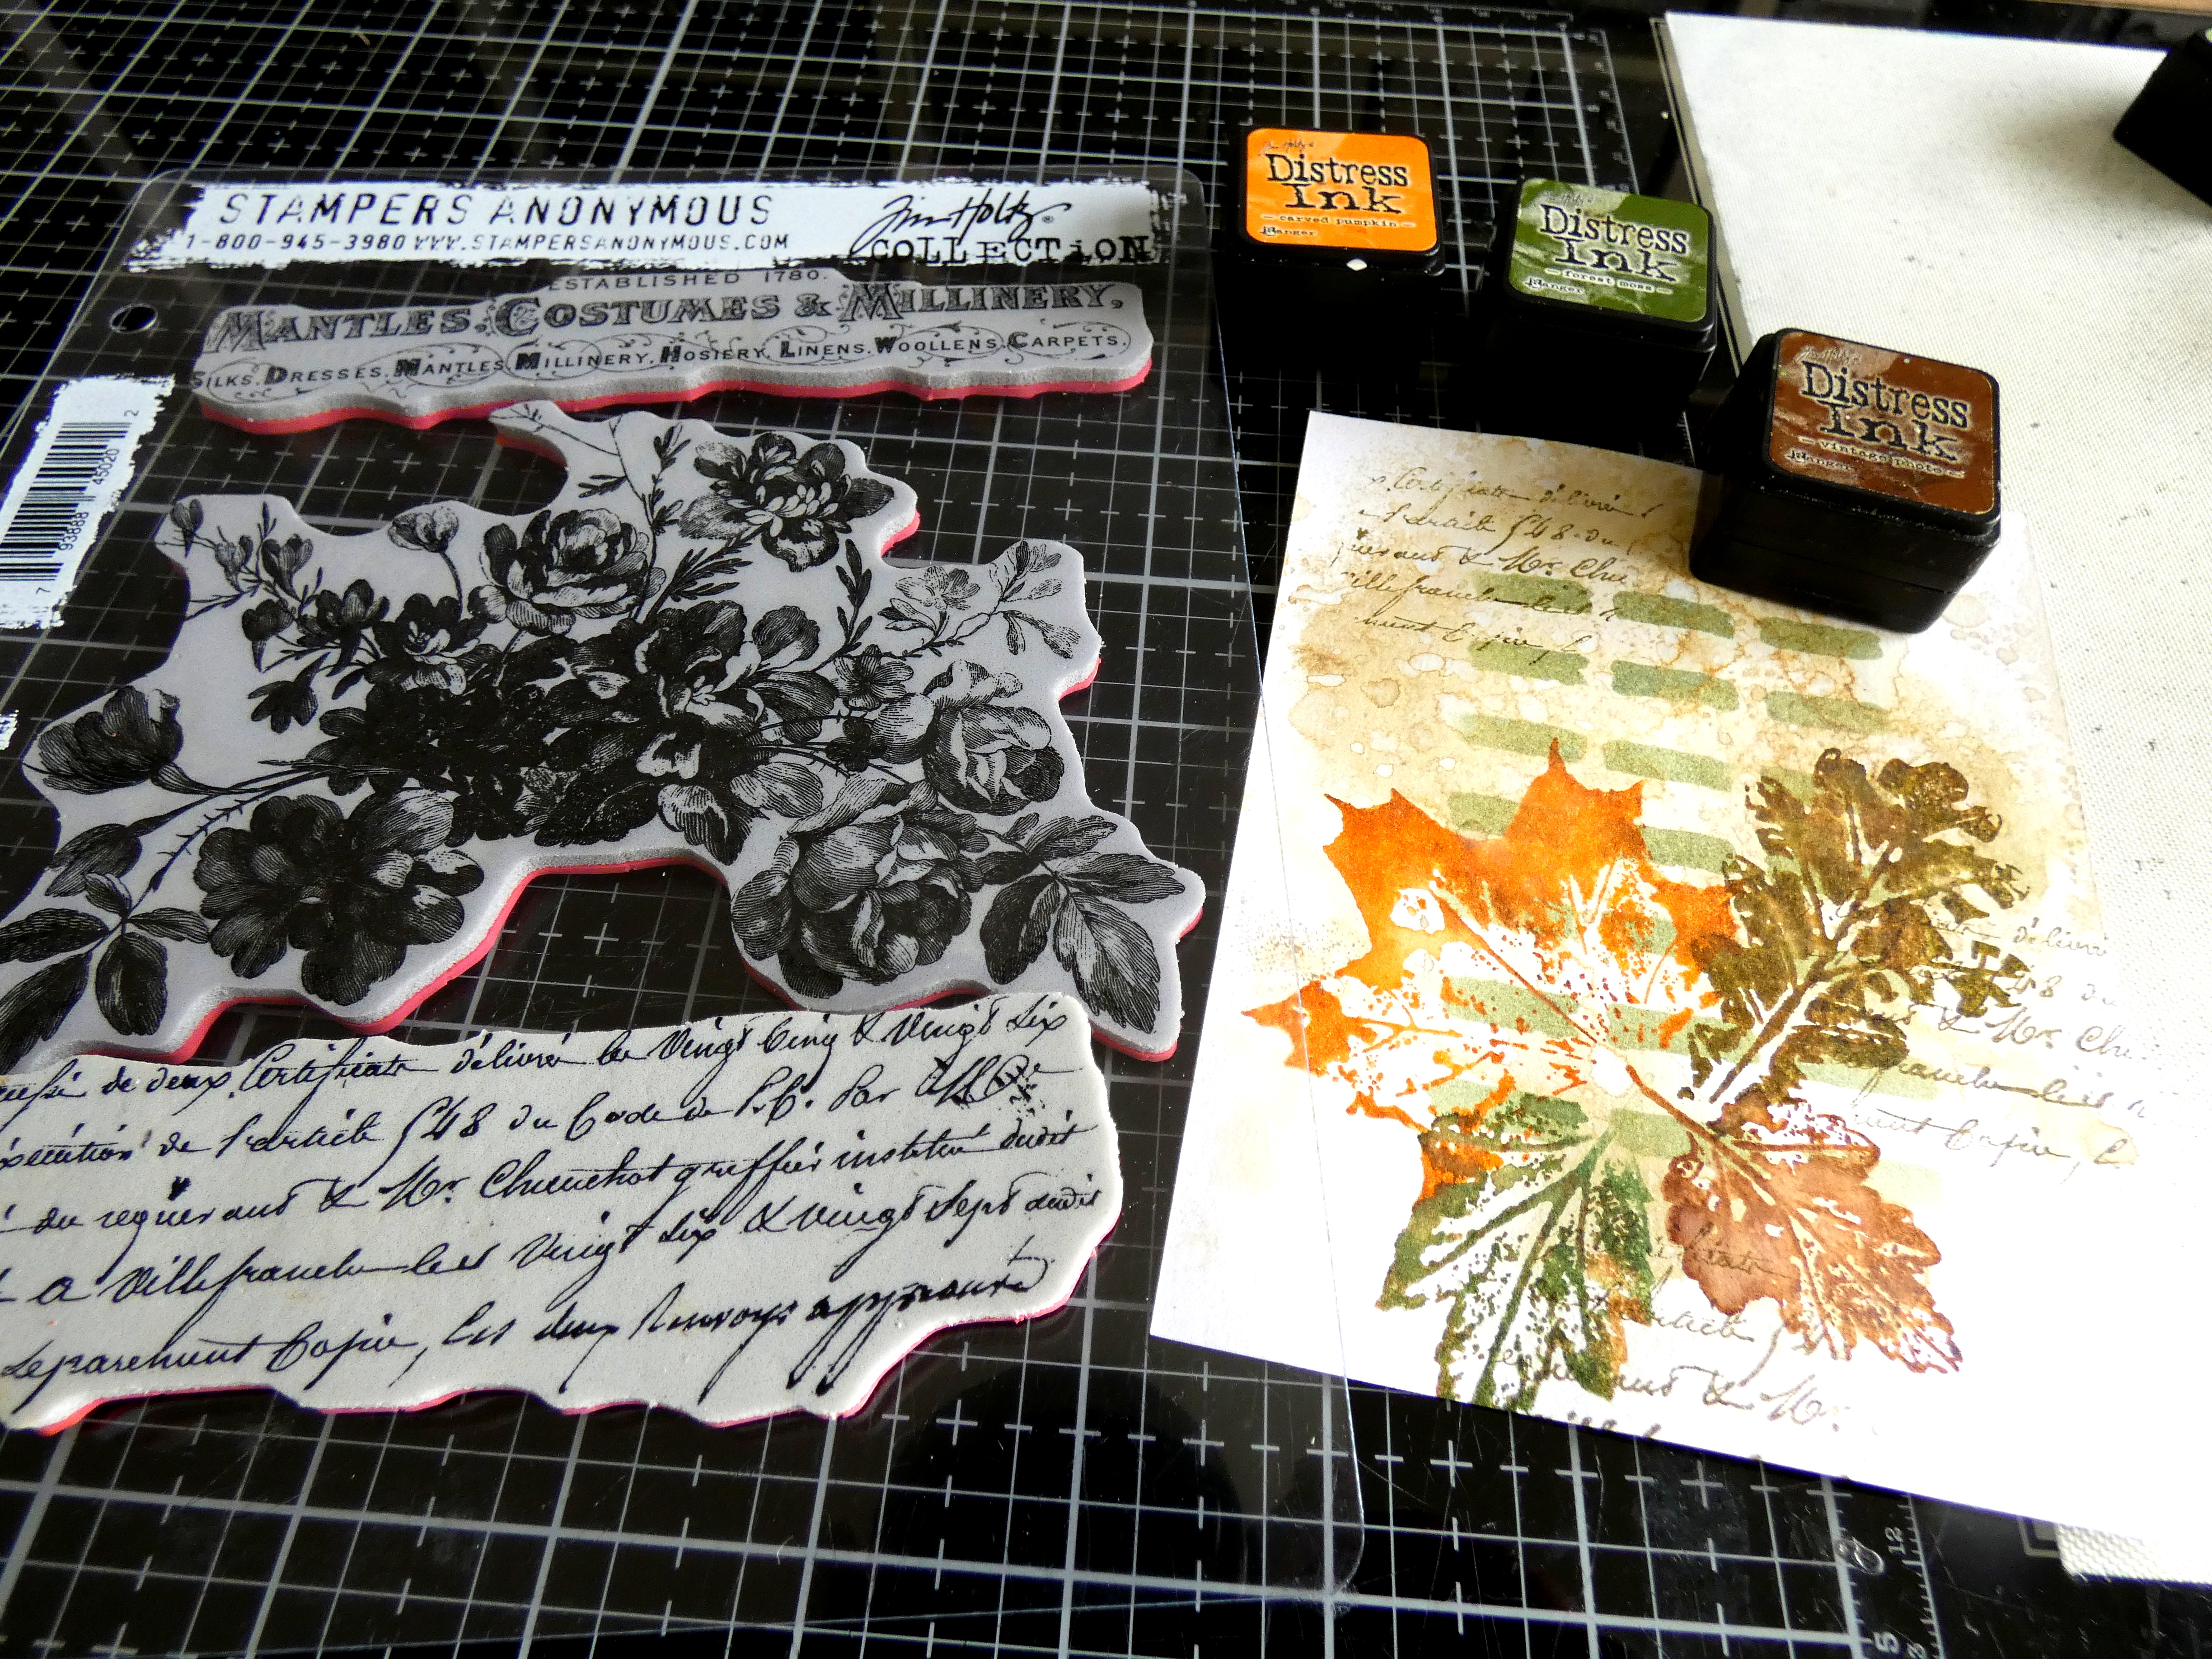
I smooshed the Custom Blend Ink pad (colours listed below) on to my Glass Media Mat, spritzed with water, laid the panels into the inks, dried and tapped back into the inks repeatedly to pick up the remaining droplets. I applied Forest Moss Distress Ink through the Mini Markings Layering Stencil using a different pattern on each panel.


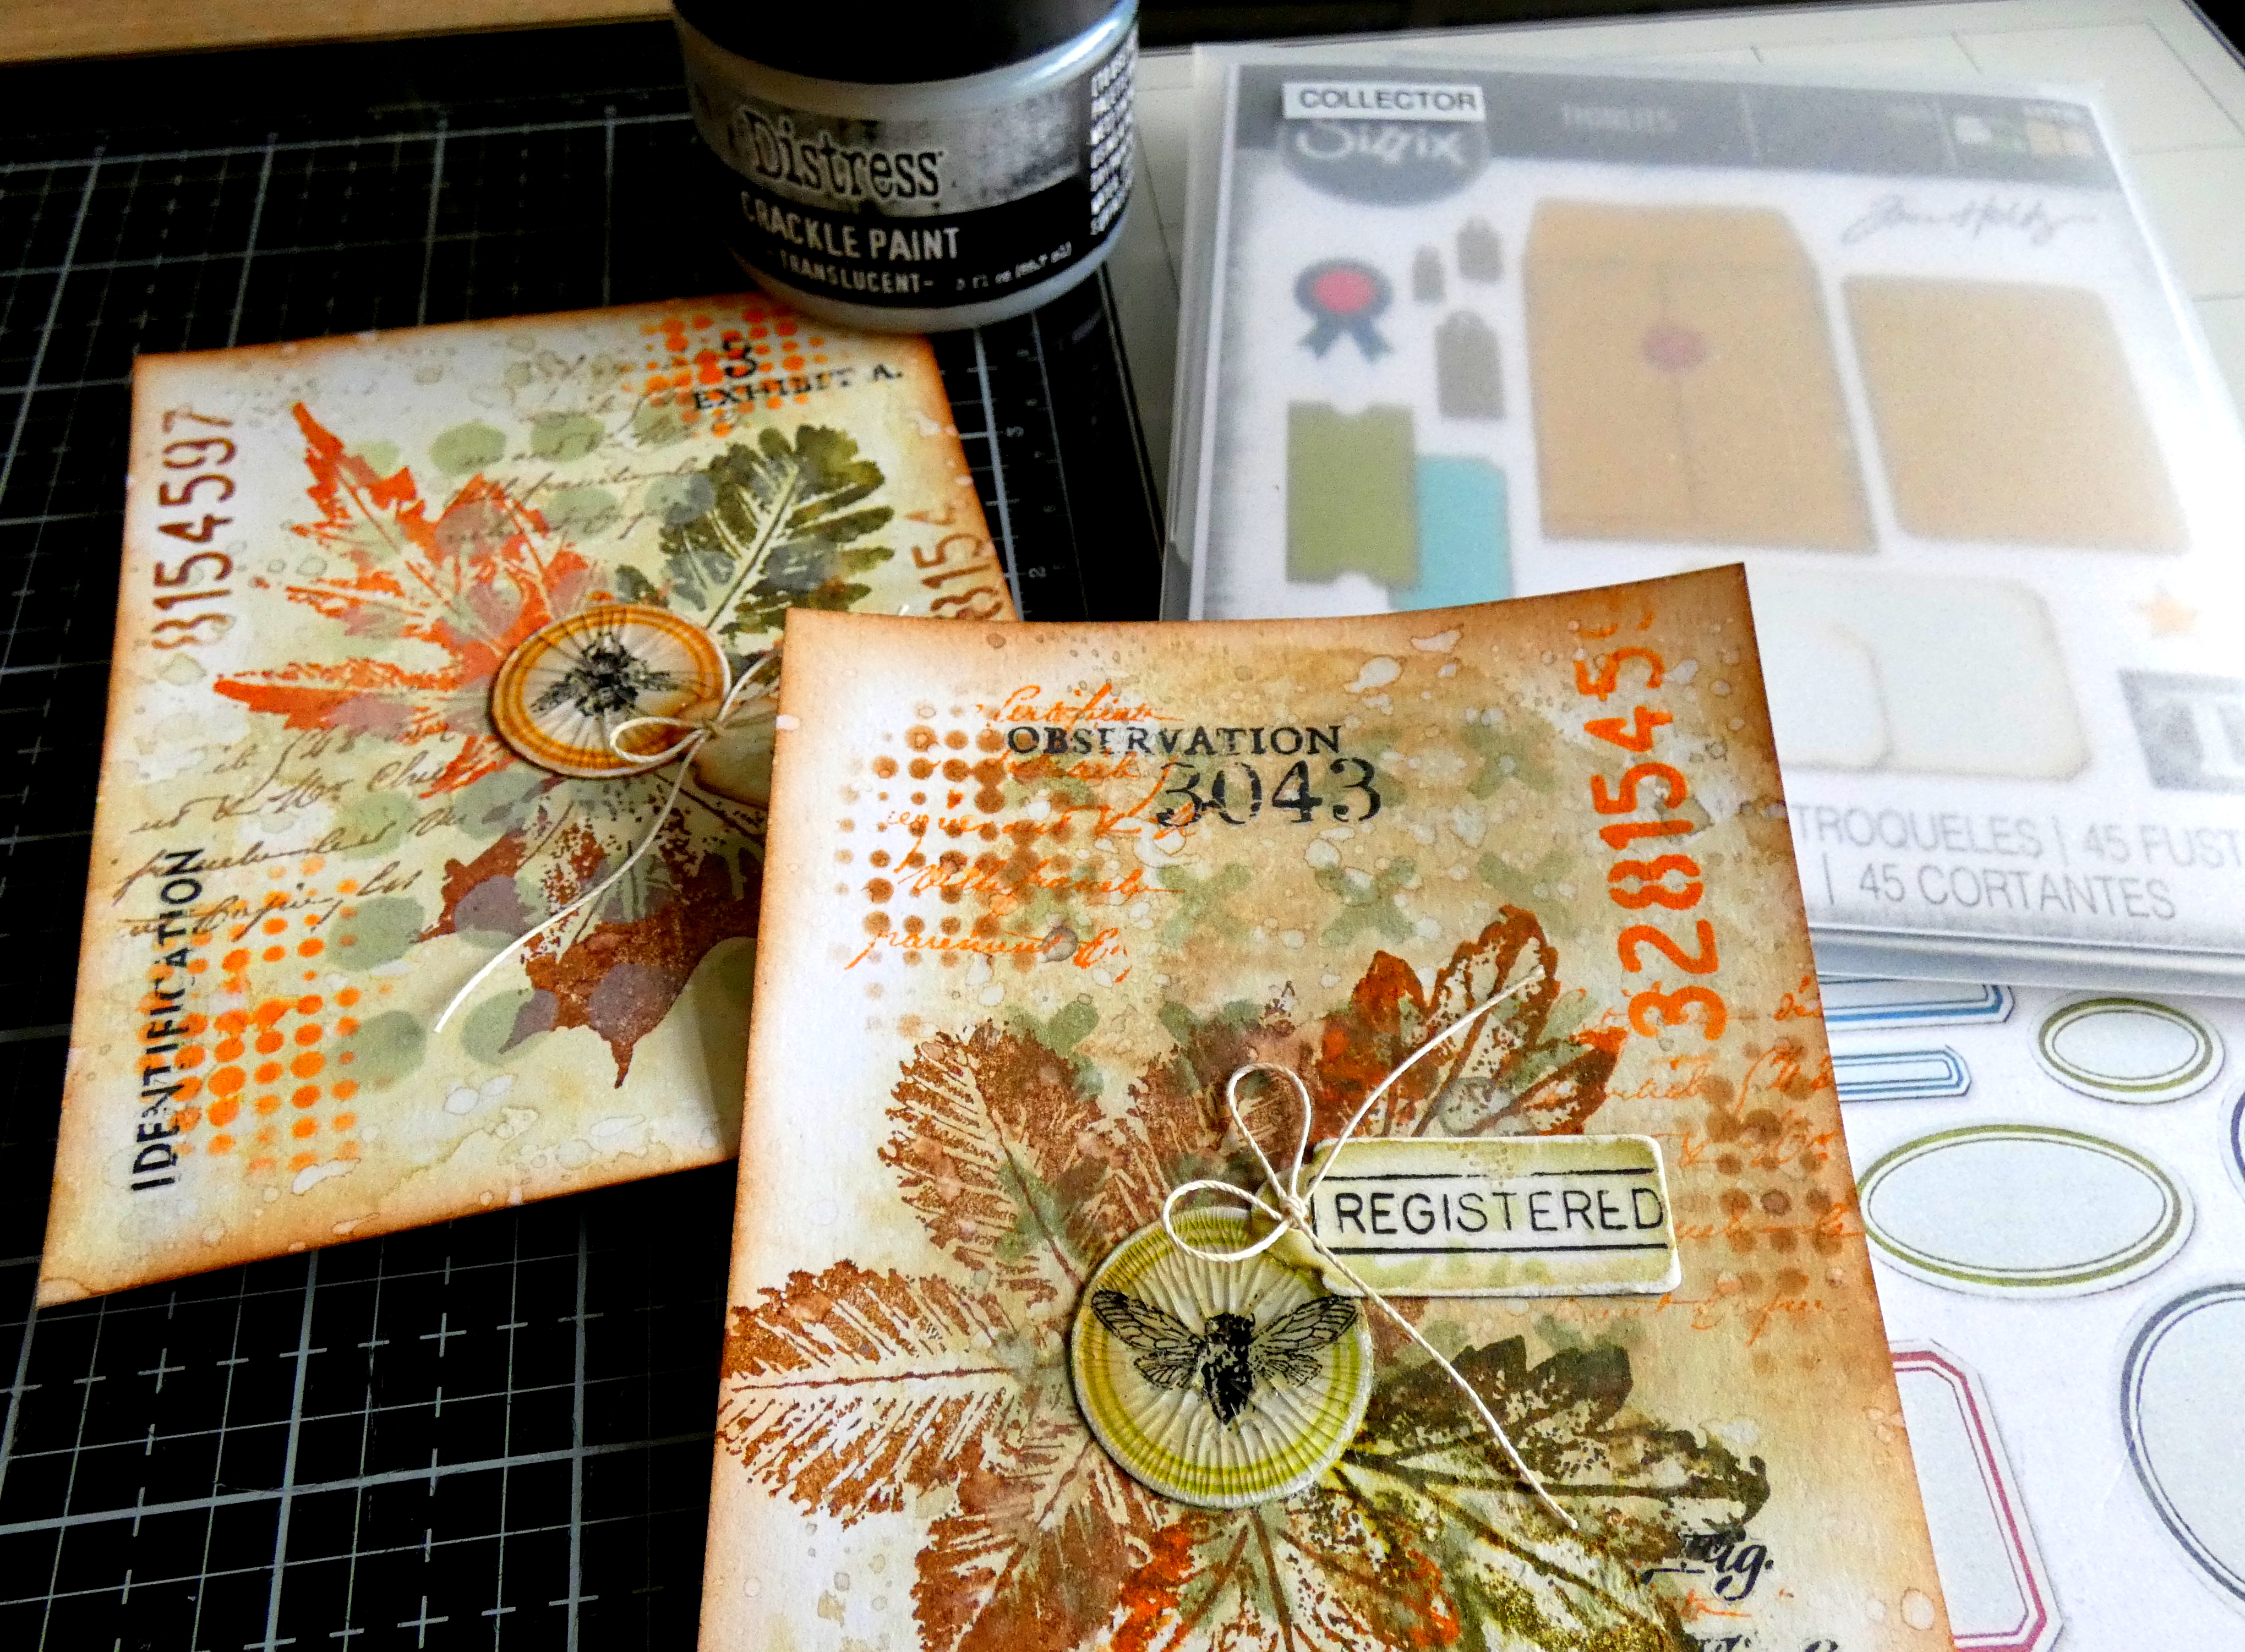
I inked the circle die from Tim Holtz/Sizzix Vintage Labels with Spiced Marmalade, Vintage Photo and Peeled Paint Distress Archival inks using Tim Holtz Small Brayer and die-cut 3 circles from Distress Mixed Media HeavyStock.

I fixed the die-cut Vintage Labels to the panel, added Ideaology Specimen and Eccentric Remnant Rubs and applied a coat of Distress Crackle Paint.


I inked the label frame with Vintage Photo Distress Ink, the leaf and script with the Custom Blend ink pad and stamped on the envelopes.

To finish, I rounded the corners on the panels and the A2 white card blanks.


Hugs Kath xxx
So beautiful x
ReplyDeleteAwesome cards,Kath!
ReplyDeleteSaw these on the live and loved them. Thanks for sharing all the details. The tiny lable with the insects and crackle work so well on these. What a great gift to get even if you make yourself!
ReplyDeleteSo beautiful Kath, I just love the autunm colours, so pretty.xx
ReplyDeleteSo awesome love how you used the leaves would love to be able to do that!
ReplyDelete