Monday, February 28, 2022

Simon Says - Use At Least One Stencil

Hi Everyone...welcome to another week on the Simon Says Stamp Monday Challenge Blog. Thank you for joining us for last week's challenge and we hope you can join us this week too because

and the theme for this week is...
USE AT LEAST ONE STENCIL
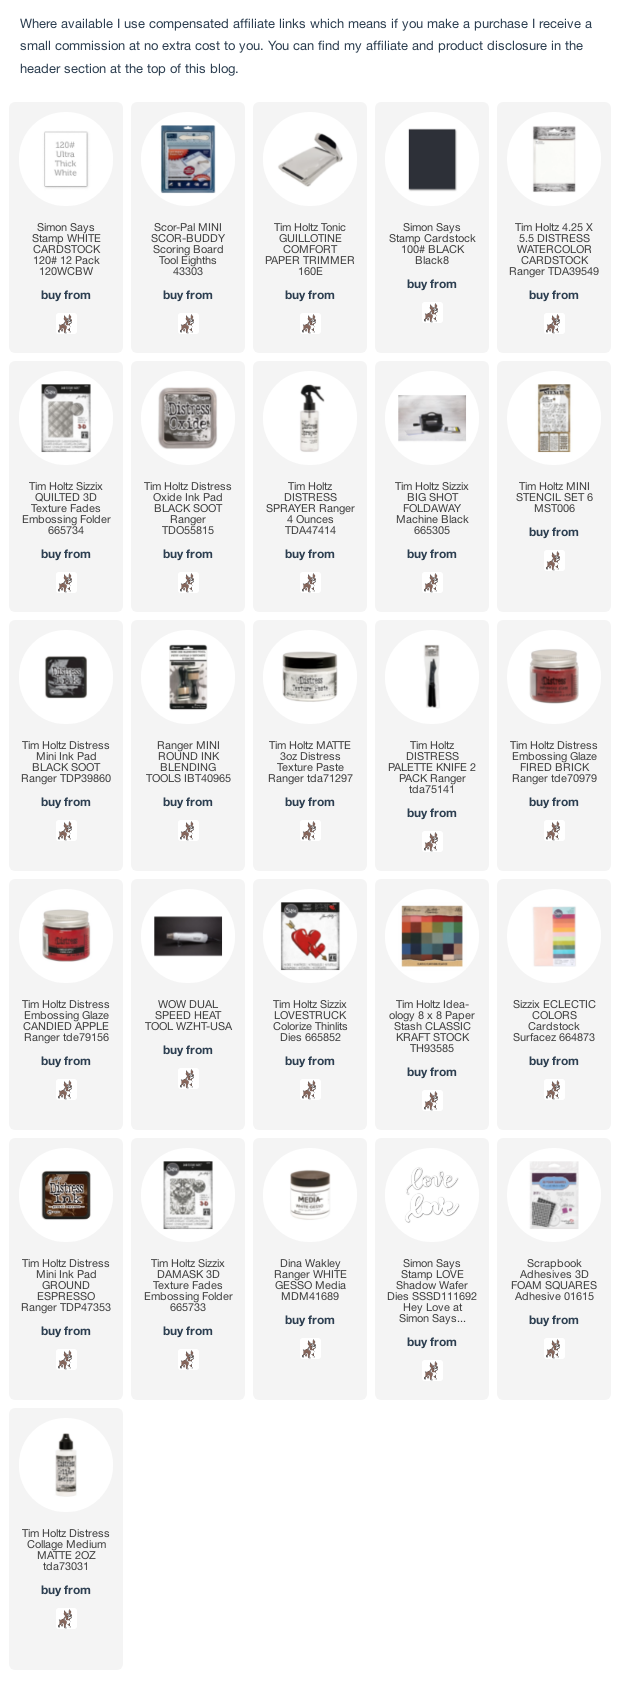
I made a card using Tim Holtz/Sizzix Lovestruck Colorize Thinlits, Damask and Quilted 3D Texture Fade Embossing Folders, Tim Holtz/Stampers Anonymous Mini Layering Stencils from Set 6 to add interest to the background and Simon Says Love Shadow die for the sentiment.

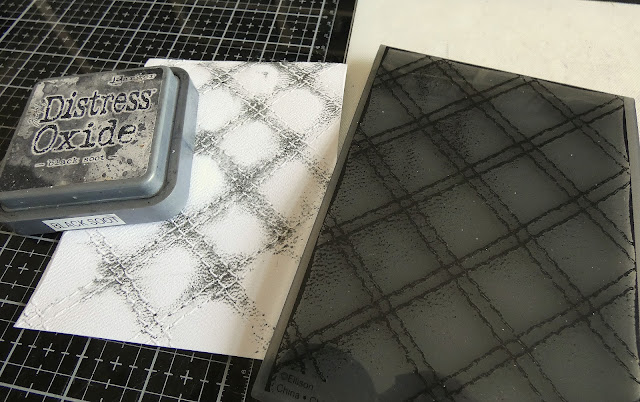
I began by lightly dragging the Black Soot Distress Oxide ink pad over the debossed side of Tim Holtz/Sizzix Quilted 3D Texture Fade, spritzed lightly with water, placed a 4" x 5.1/4" panel of Distress Watercolor card in the folder and embossed using my Sizzix Foldaway.
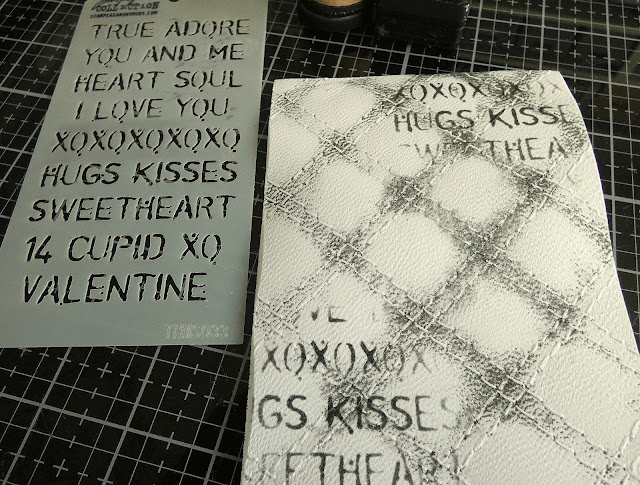
I applied Black Soot Distress Ink through the Valentine Mini Layering Stencil from Set 6 using a mini round blending tool.
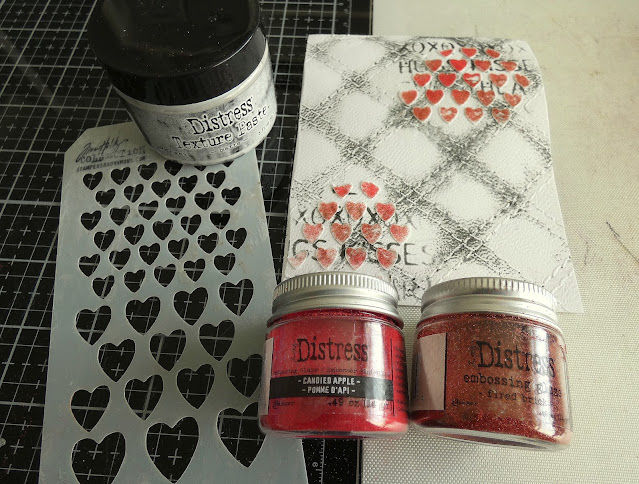
I applied Distress Texture Paste Matte through the Hearts Mini Layering Stencil from the same set, sprinkled with Fired Brick and Candied Apple Distress Embossing Glazes and heat set once the paste had dried.
I die cut Tim Holtz/Sizzix Lovestruck Thinlits from different shades of Idea-ology Classic KraftStock and Sizzix Cardstock, inked the debossed side of the Damask 3D Texture Fade with the Black Soot Distress Oxide ink pad and embossed the top layer heart.
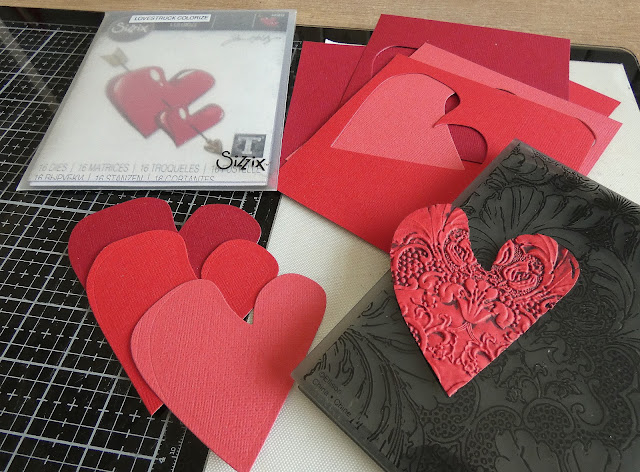
I inked the edges of all the heart die-cuts with Ground Espresso Distress ink using a mini round blending tool, drybrushed the edges with White Gesso and assembled. I also drybrushed the arrow and the top layer heart with White Gesso to highlight the amazing detail from the Damask 3D Texture Fade.
I fixed the heart to the panel using foam adhesive, die-cut the love word twice from Distress Watercolor card using Simon Says Love Shadow die, layered to create dimension and fixed to the heart using Distress Collage Medium.

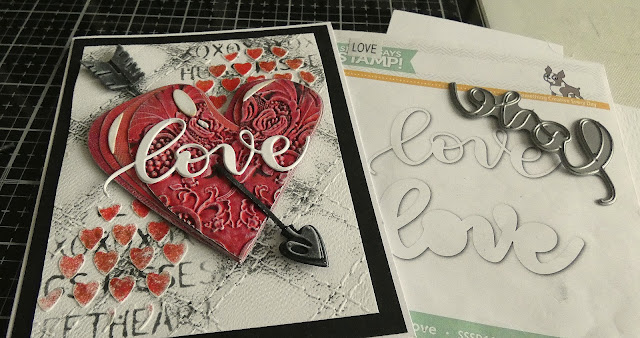
I matted the panel on to Simon Says Black cardstock trimmed to 5" x 6.1/4" and fixed to a white card blank.


You can find all the products I used over at Simon Says Stamp, just click on the links below


Why don't you pop over to the Monday Challenge Blog and check out the amazing creations from my very talented Design Team mates and as always you have until Monday 8am Ohio time...1pm UK time...2pm CET to join in with the chance to win a $25 voucher to spend online at Simon Says Stamp


You can also follow Simon Says Stamp on Instagram
and if you use Instagram...
please add #sssmchallenge to your entry uploads so we can see them on there too

I look forward to seeing what you create this week...
Have Fun and Happy Crafting
Hugs Kath xxx

You Are Totally Amazing

Hi my friends, I've been on a mission to clear my desk and use some more of the newly released products from Simon Says Stamp before I start on another mega exciting die-cutting adventure with Tim Holtz and Sizzix and today I'm sharing a card I made with Simon Says Heart Mandala Cling Stamp, Clean Line Stacks for the sentiment and one of my favourite dies from the Handmade Holiday release, Etched Berry Branch with Shabby Shutters and Picked Raspberry Distress Oxides, a favourite Distress colour combo.I began by trimming Distress Watercolor card to 4" x 5.1/4", smooshed the Shabby Shutters Distress Oxide ink pad on to the craft mat of my Glass Media Mat, spritzed with water and laid the panel into the ink, dried and tapped back in to pick up the remaining droplets of colour. I inked Simon Says Heart Mandala Cling stamp with Picked Raspberry Distress Oxide, spritzed lightly with water and stamped on the panel. I stamped the sentiment from Clean Line Stacks with Simon Says Intense Black and the smaller sentiment with Versamark ink on to a scrap of Simon Says Black cardstock, sprinkled with White Embossing Powder, heat set and trimmed. I die-cut the Etched Berry Branch die from Distress Watercolor card and fixed in place with Distress Collage Medium and foam adhesive underneath some of the leaves.I matted the panel on to Distress Watercolor card, trimmed to be 1/8" larger, coloured with Picked Raspberry Distress Oxide ink using the direct to paper technique and fixed to an A2 white card blank. To finish I added splatters of Picked Raspberry Distress Oxide ink, fixed the embossed sentiments in place with Distress Collage Medium and added Glossy Accents to the berries.


The title of this blog post is totally appropriate to describe the newest member of the Cubbyhole Die-cutting Crew, the Big Shot Switch Plus, so sleek and sexy, decked out in the Tim Holtz brand signature black livery.
I spent the weekend having lots of fun putting the machine through it's paces and although I love my Foldaway and Sidekick, it's a case of having right tools for every job and this guy is the absolute boss when it comes to mass production die-cutting, thanks to the larger sized plates, cutting multiple dies in one pass, goodbye to wasting precious cardstock and woohoo only one pass required for 3D Texture Fade Embossing Folders. Life is short my friends, so what's not to love about a machine that makes the  creative process faster and simpler.
I will confess I was sitting on the "do I need another machine" fence until I watched the YouTube Live launch with Tim where he did a walk-through of the Big Shot Switch Plus and shared so many great die-cutting hints, tips and tricks. If you are also on the fence, you can watch the demo HERE and it may help you make up your mind. It is a considered purchase but if you have ever owned a Sizzix Die-Cutting Machine, you'll know that the Sizzix name is synonomous with quality and if treated with respect, you and your new friend will have many many years of die-cutting fun.
I'll be back soon to share my DT project for Simon Says Stamp Monday Challenge, in the meantime, have fun with whatever you are making.
Hugs Kath xxx


Friday, February 25, 2022

Hoppy Days Ahead

Hi my friends, I'm sharing two cards I made using products from Simon Says Stamp Hoppy Days Ahead March 2022 Card Kit. The kit is still available to purchase HERE and the items from the kit can also be purchased individually.


I began by trimming 2 of the Paper Rose 6" x 6" Wildflower Field papers to 4" x 5.1/4", embossed with the Simon Says Blossom Field Embossing Folder from an earlier release and sanded back the detail to reveal the white core.
I die-cut the Simon Says Nested Domed Arches from the Neenah 110lb Solar White cardstock that came in the kit to create window apertures.
I stamped the images from Simon Says Hoppy Days Ahead stamp set, inked with Simon Says Intense Black ink, on to the left over sheet of Neenah Solar White Cardstock.
I fixed the Nested Domed Arches together, fixed a panel of vellum on the back and fixed to the embossed panel with the Simon Says Craft Tacky Glue from the kit. I coloured the bunny , flower and grass images with Zig Clean Color Real Brush markers, fussy cat and fixed in place with Craft Tacky Glue and Foam Adhesive.
I added sentiments trimmed from the Simon Says Hoppy Easter Sentiment Strips and fixed the panel to an A2 white card blank.


I used the Nested Domed Arches die to cut an aperture in the panel. I applied Spun Sugar Distress Oxide ink with a blending tool to the centre of an A2 white card blank and fixed the embossed panel in place with Simon Says Crafty Tacky Glue. I applied Distress Texture Paste through Simon Says Falling Hearts Stencil, sprinkled with Kitsch Flamingo Distress Embossing Glaze and heat set once the paste had dried.
I stamped the sentiment from Hoppy Days Ahead with Simon Says Intense Black ink, trimmed, fixed in place with Craft Tacky Glue and added the bunnies popped up on foam adhesive.
To finish, I die-cut XOXO from Simon Says Black Cardstock using the CZ Design Trio of Love dies and fixed to the panel.


Have a great weekend whatever you have planned. I'll be heading over to Tim and Mario's place for the reveal of the newest colour to join the Distress Family - 9am PT, 12 noon EST, 5pm UK and 6pm Europe and hope to see you there.
Hugs Kath xxx


Thursday, February 24, 2022

Damask Trio

Hi my friends, I'm sharing a trio of cards made using the gorgeous Tim Holtz/Sizzix Damask 3D Texture Fade and Bold Text Thinlits with Ranger/Tim Holtz Alcohol Ink Pearls and Distress Oxide Sprays on Ranger Black Alcohol Ink cardstock, Distress Watercolor card and Distress White Yupo. I had intended to just make one card but hey we all know what happens when you have left over letters.


I trimmed the 3 different surfaces to make 4" x 5.1.4" panels, spritzed lightly with water and embossed using Tim Holtz/Sizzix Damask 3D Texture Fade.
I used the debossed side of the Black Alcohol Ink cardstock and die-cut using Tim Holtz/Sizzix Bold Text Thinlits. Normally I would die-cut before embossing otherwise the pressure of the machine will flatten the embossing but on this occasion it was OK as I was working on the debossed side.
I added drops of Blending Solution and Snowcap Mixative to the panel, moved the mixative around with the Tim Holtz Alcohol Ink Air Blower and added more drops of mixative until I was happy with the coverage. I added drops of  Blending Solution and Villainous, Tranquil, Smoulder and Celestial Alcohol Ink Pearls and repeated this process until I was happy with the background. I inked the script image from Tim Holtz/Stampers Anonymous Flower Shop with Versamark ink and heat embossed with Ranger Superfine White Embossing Powder. I added splatters of Pitch Black Alcohol ink and stars die-cut from Distress Watercolor card using Tim Holtz/Sizzix Falling Stars Thinlits.
For the Distress Watercolor card panel, I dragged the Black Soot Distress Oxide ink pad over the debossed side of the Damask 3D Texture Fade and ran through my Sizzix Foldaway. I spritzed Salvaged Patina, Shaded Lilac and a little Villainous Potion Distress Oxide Sprays on to the craft mat on my Glass Media Mat, spritzed with water. laid the panel into the sprays, spritzed with water to blend the colours, dried and repeated to pick up the remaining droplets of colour. I stamped the script from Tim Holtz/Stampers Anonymous Flower Shop inked with Black Soot Distress Archival ink and added splatters of Black Gesso. I die-cut the sentiment panel and stars from Black Alcohol Ink card using the Bold Text and Falling Hearts Thinlits and fixed to the panel using Distress Collage Medium.

For the third card, I used the embossed side on the Distress White Yupo Paper. I added drops of Blending Solution and Villainous and Tranquil Alcohol Ink Pearls on to my Glass Media Mat, swiped the panel through the inks and moved the colours around with the Tim Holtz Alcohol Ink Air Blower. I fixed the Bold Text left over letters from the first card and stars die-cut from scraps of White Yupo coloured with Villainous Alcohol Ink Pearl using Distress Collage Medium and added splatters of Black Gesso.

I fixed the three panels to Ranger Black Alcohol Ink card, trimmed to be slightly larger and fixed to A2 white card blanks.


I'll be back soon to share some more playtime makes with dies from Tim Holtz/Sizzix Chapter 1 release.
Hugs Kath xxx