Wednesday, April 29, 2020

Every Day's A Stay At Home Play Day

Hi my friends, I hope you are all staying home, keeping well and embracing the self-isolating, social distancing world we all find ourselves in. Inconvenient at times, I know, but a small sacrifice to make to keep our family, friends and frontline workers safe. I've always been an adapt and overcome, pull up my big girl knickers kind of a girl so to keep my spirits up I've been enjoying the beautiful weather, spending lots of time pottering about in the garden, having way more alfresco coffee breaks than normal and regular video calls to keep in touch with family and friends. And a huge thank you to Tim and Mario, my adorable Professor and his amazing ever so sweet Wingman for the weekly invitation to join them over at their place for a fun and inspiring Saturday night Facebook Live Crafting party which is now one of the highlights of my week. Saturday night at 6.00pm, if you're in the UK, live on Tim's Facebook page or you can watch the replay later on Tim's Blog. There's no dress code, no need to spend hours applying polyfilla, or trying to control the bird's nest hair, just turn up in your jammies and hang out with lots of happy crafters.
Inspired by Tim's Facebook Lives, I've been enjoying Stay At Home Play Days in the cubbyhole, revisiting past techniques using products I'd long forgotten to create inserts, pockets or journaling cards to use in the Collection Folio project I'm planning to complete this Summer.

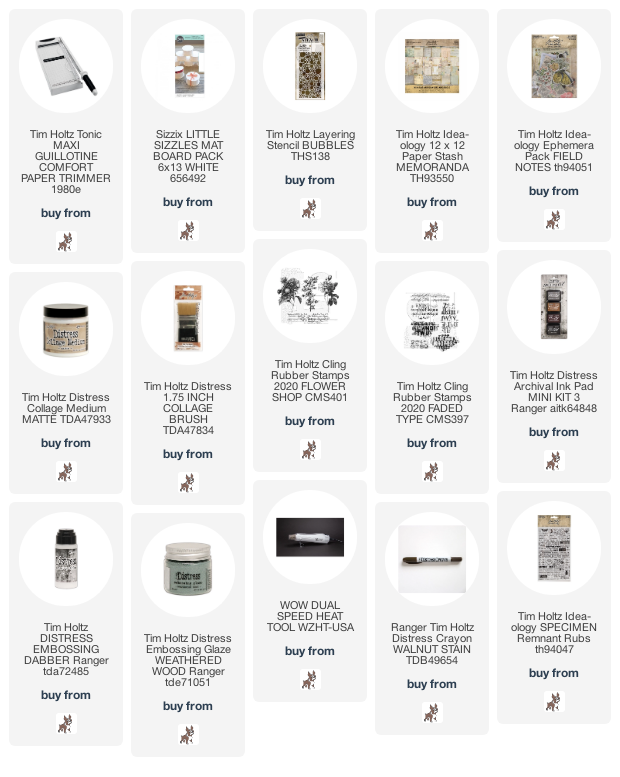
Apologies for the higgedly piggedly collection of photos but it was a go with the flow fun playtime and we all know how you get caught up in the moment and forget to grab the camera. I began by digging out the "bought ages ago/but never got round to using" Distress Custom Blend pads and inked with a mix of Distress Oxide and Distress Ink re-inkers.
I smooshed the ink pads on to the craft mat on my Glass Media Mat, swiped Distress Watercolor card through the ink, dried, spritzed with water and tapped back into the droplets of ink to create swatches.
I added labels of the ink colours used on each pad while the re-inkers were still on my desk because my memory is not what it was and even 10 minutes later I would have forgotten what colours I had used, sound familiar.
Then it was time to create some panels for my Collection Folio using some of the techniques shared by Tim. I trimmed Distress Watercolor card to A2, added Idea-ology Specimen Remnant Rubs
a little stamping using the text stamp from Flower Shop inked with Ground Espresso Distress Archival and applied Distress Micro Glaze through the Digits and Bubbles Layering Stencil. Both these products will resist any inks applied on top so I repeated the smooshing technique with the custom blend pads, added spritzes of Frayed Burlap and Vintage Photo Distress Oxide inks, dried and wiped the ink off the Remnant Rubs and Distress Micro Glaze with a kitchen towel.
Then I found a pack of Idea-ology Alpha Cards, retired some time ago and hiding in the depths of a drawer.
I stamped the images from Tim Holtz/Stampers Anonymous Wildflowers, another oldie but still a favourite,
inked with Black Soot Distress Archival on the middle panel, Ground Espresso Distress Archival on the right and Vintage Photo on the left, sprinkled with the matching Distress Embossing Glazes and heat set. I added colour to the edges of the Idea-ology Alpha cards using Distress Oxide ink pads, sprinkled with Distress Embossing Glazes and heat set.
I matted the panels on to kraft card and added machine stitching


I'm looking forward to another play day in my happy place
Have fun whatever you are creating
Hugs Kath xxx


Where available I use compensated affiliate links which means if you make a purchase I receive a small commission at no extra cost to you. You can find my affiliate and product disclosure HERE

Monday, April 27, 2020

Simon Says - Not A Card

Hi Everyone...welcome to another week on the Simon Says Stamp Monday Challenge Blog. Thank you for joining us for last week's challenge and we hope you can join us this week too because

and the theme for this week is...
NOT A CARD
You may or may not be surprised to know that I love Tim Holtz/Stampers Anonymous Layering Stencils and also that I am a bit of a geek when it comes to storage. I find it handiest, for me, to store my stencils in a tag-type book but the books I already have are all bursting at the seams. So it was time to create another for the new 2020 stencils.

I began by cutting 2 covers from Sizzix MatBoard using the layering stencil cover sheet as a template. I covered one side of the tag covers using Tim Holtz Idea-ology Memoranda paper fixed in place with Distress Collage Medium and trimmed off the excess. Being a thrifty Scot and self-confessed hoarder of my favourite paper ever, I didn't want to cut into another 12" x 12" sheet to cover the back sides so I used what was left from the sheet and used scraps from my Memoranda scrap box to fill in the gaps. I punched holes in the tag covers and added Tim Holtz Idea-ology Field Notes Ephemera on the front cover only.
I stamped the images from Tim Holtz/Stampers Anonymous Flower Shop and Faded Type inked with Black Soot Distress Archival ink. 
I've been itching to try out the Embossing Glaze/Distress Crayon technique Tim shared in a recent Facebook Live but was a little worried I might mess it up so decided to have a trial run on the back cover. If you missed the technique, which creates a beautiful pitted enamel look, you can get the lowdown from our adorable Professor HERE around 1hour 27 mins but I would suggest you make yourself a cuppa, find a comfy sofa, watch the whole thing and enjoy all the hints, tips and amazing ways you can use Distress Crayons.
Tim demo'd the technique on a plain Mixed Media Heavystock tag resulting in a much lighter effect with more contrast between the embossing glaze and Distress Crayon areas but I was rather chuffed with the result
and bit the bullet to repeat on the all-important front cover. I used the Distress Embossing Dabber to add ink randomly on the background, sprinkled with Weathered Wood Distress Embossing Glaze, flicked with purpose on the back of the tag to remove any excess and heat set.
I scribbled over the embossing with a Walnut Stain Distress Crayon, rubbing it into the detail with my finger and blending it out on to the rest of the background. I buffed the crayon off the embossing glaze with kitchen towel and removed some of the crayon from the background with a slightly damp baby wipe.
I finished off by adding Idea-ology Specimen Remnant Rubs.


and this organising geek is happy to have ticked another task off the list of never ending things to do.

As you may know, Simon Says Stamp are accepting new orders, but have longer shipping times for the moment due to the coronavirus. With this in mind we have made the difficult decision to suspend the $50 voucher for this challenge.
We know that many people are staying safe at home and we would love it if you would continue to enter the challenges and have fun! We are all in this together!
You can find all the products I used over at Simon Says Stamp, just click on the links below


Why don't you pop over to the Monday Challenge Blog and check out the amazing creations from my very talented Design Team mates and our Designer In The Spotlight. As always you have until Monday 8am Ohio time...1pm UK time...2 pm CET to join in...

You can also follow Simon Says Stamp on Instagram
and if you use Instagram...
please add #sssmchallenge to your entry uploads so we can see them on there too

I look forward to seeing what you create this week...
Have Fun and Happy Crafting
Hugs Kath xxx


Where available I use compensated affiliate links which means if you make a purchase I receive a small commission at no extra cost to you. You can find my affiliate and product disclosure HERE

Wednesday, April 22, 2020

Don't Count The Days...

Hi my friends, I'm back to share another card from last week's play day with Tim Holtz/Ranger Ink Alcohol Inks, Alcohol Alloy Inks and Alcohol Lift Ink using Tim Holtz/Stampers Anonymous stamps and stencils with a very appropriate sentiment for these difficult and worrying times in our lives. We are all in this together, you are not alone, I too am having days when I lose my motivation, so cut yourself some slack and try, one day at a time, to make each and everyday count.
And neither is it important in the scheme of things when you mess up a card by cutting the panel into strips, not sure what possessed me but hey ho, let's just say it's another "lesson learned-warts 'n all" creation to add to the "won't do that again" pile.

I used the background on the far left for this card which I created on a 5" x 7" sheet of Tim Holtz White Alcohol Ink Yupo Paper. I dripped Isopropyl Alcohol on to the panel, followed by drops of Dijon, Moss and Cobalt Alcohol Inks. I used the Distress Air Blower to move the ink around, added a few drops of Foundry Alcohol Alloy ink and Blending Solution and again used the Distress Air Blower until I was happy with the background.
I inked the image from Tim Holtz/Stampers Anonymous Baroque with Alcohol Lift ink and stamped on to the top left corner of the panel. I dabbed at the ink using kitchen paper towel, repeated using a clean section of the towel each time until no more ink was coming off on the towel and buffed with a soft cloth.
I added a few drops of Alcohol Lift Ink re-inker to my glass media mat, picked up with a mini round blending tool and dabbed through Tim Holtz/Stampers Anonymous Digits Layering Stencil
I stamped the images from Tim Holtz/Stampers Anonymous Flower Shop on the panel, the flower inked with Black Soot Distress Archival ink and the script with Faded Jeans Distress Archival. I trimmed the panel into three sections, matted on to Idea-ology BlackOut Kraftstock trimmed to 5.3/4" square, fixed to a 6" square white card blank and added Idea-ology Specimen Remnant Rubs. I inked the sentiments from Tim Holtz/Stampers Anonymous Tiny Text with Versamark ink, stamped on to scraps of Idea-ology BlackOut Kraftstock, sprinkled with Ranger Superfine White Embossing Powder, heat set and trimmed.
I added the sentiments to the panel popped up on Tim Holtz/Sizzix Mini Foam Adhesive to create dimension. I inked the butterfly from Tim Holtz/Stampers Anonymous Entomology with Black Soot Distress Archival and stamped on to scraps of Distress Watercolor card and the left over Alcohol ink background.
I fussy cut the Distress Watercolor card butterfly leaving a white border around the edge and fixed the other butterfly on top, applying adhesive only to the body.

I'll be back soon to share more Alcohol Ink background makes, in the meantime, have fun with whatever you are creating.
Hugs Kath xxx


Where available I use compensated affiliate links which means if you make a purchase I receive a small commission at no extra cost to you. You can find my affiliate and product disclosure HERE

Monday, April 20, 2020

Simon Says- Create A Scene

Hi Everyone...welcome to another week on the Simon Says Stamp Monday Challenge Blog. Thank you for joining us for last week's challenge and we hope you can join us this week too because

and the theme for this week is...
Create A Scene
I've been spending lots of time in my garden recently, my favourite place to sit and enjoy my first cup of coffee in the morning in the company of my feathered friends who gather at the bird feeder so I was inspired to create a cover for a Collection Folio project I will be working on over the summer with a reminder that now more than ever, we should appreciate and enjoy the little things.

I began by trimming Distress Watercolor card to 5.1/2" x 8.1/2" which is slightly smaller than the front of the Small Collection Folio. I was inspired by one of Tim's Facebook Live demos when he shared a technique for creating a quick background using Distress Spray Stain, a brayer and Distress Sprayer. If you missed the Facebook Live, you can find the demo on Tim's Blog HERE at 1:38. I wanted a neutral coloured background so I used Bundled Sage and woohoo, this time saver would be great for art journal backgrounds too.
I created the brick panel on Distress Watercolor card using Tim Holtz/Sizzix Brickwork 3D Texture Fade Embossing Folder. Once embossed, I sprayed the panel with Old Paper, Bundled Sage and Vintage Photo Spray Stains, dried, spritzed again with Vintage Photo, spritzed with water letting the colour run into the brickwork detail and finished with a little spritz of Bundled Sage Distress Oxide Spray.
I tore the panel in half diagonally, used a Ground Espresso Distress Ink pad to darken the edges and fixed in place using Distress Collage Medium Matte. I inked the script stamp from Tim Holtz/Stampers Anonymous Flower Shop with the same ink and stamped randomly on the background.
I applied Carved Pumpkin Distress Paint through the Bubbles Layering Stencil using a piece of Ranger Cut 'n Dry Foam.
I die-cut the flowers and birds from Distress Watercolor card using Tim Holtz/Sizzix Wildflower Stems 1 and Feathered Friends Thinlits.
I coloured the flowers and foliage using Distress Oxide Re-inkers using a Distress Detailer Brush
and fixed in place using Distress Collage Medium for the foliage and Tim Holtz/Sizzix Mini Foam Adhesive for the flowers to create dimension.
I die-cut the bird bodies again from Idea-ology BlackOut KraftStock and coloured the rest of the die-cuts as before
I used Tim Holtz/Sizzix Media Marks Thinlits to create a branch for the birds to sit on, die-cut twice from brown Idea-ology Classic KraftStock, layered to make it sturdier and fixed in place with Distress Collage Medium.
I added the birds, popped up on Tim Holtz/Sizzix Mini Foam Adhesive. I fixed Tim Holtz/Sizzix Adhesive Sheet to the back of Distress Watercolor card and die-cut the sentiment using Tim Holtz/Sizzix Alphanumeric Label Thinlits.
I added details to the birds and the flower centre using Sakura Black Glaze and White Gelly Roll Pens.

and finished by rounding off the right hand corners of the panel to match the Small Collection Folio and darkened the edges using a Ground Espresso Distress Ink Pad.

As you may know, Simon Says Stamp are accepting new orders, but have longer shipping times for the moment due to the coronavirus. With this in mind we have made the difficult decision to suspend the $50 voucher for this challenge.
We know that many people are staying safe at home and we would love it if you would continue to enter the challenges and have fun! We are all in this together!
You can find all the products I used over at Simon Says Stamp, just click on the links below


Why don't you pop over to the Monday Challenge Blog and check out the amazing creations from my very talented Design Team mates and our Designer In The Spotlight and as always you have until Monday 8am Ohio time...1pm UK time...2 pm CET to join in...

You can also follow Simon Says Stamp on Instagram
and if you use Instagram...
please add #sssmchallenge to your entry uploads so we can see them on there too

I look forward to seeing what you create this week...
Have Fun and Happy Crafting
Hugs Kath xxx


Where available I use compensated affiliate links which means if you make a purchase I receive a small commission at no extra cost to you. You can find my affiliate and product disclosure HERE