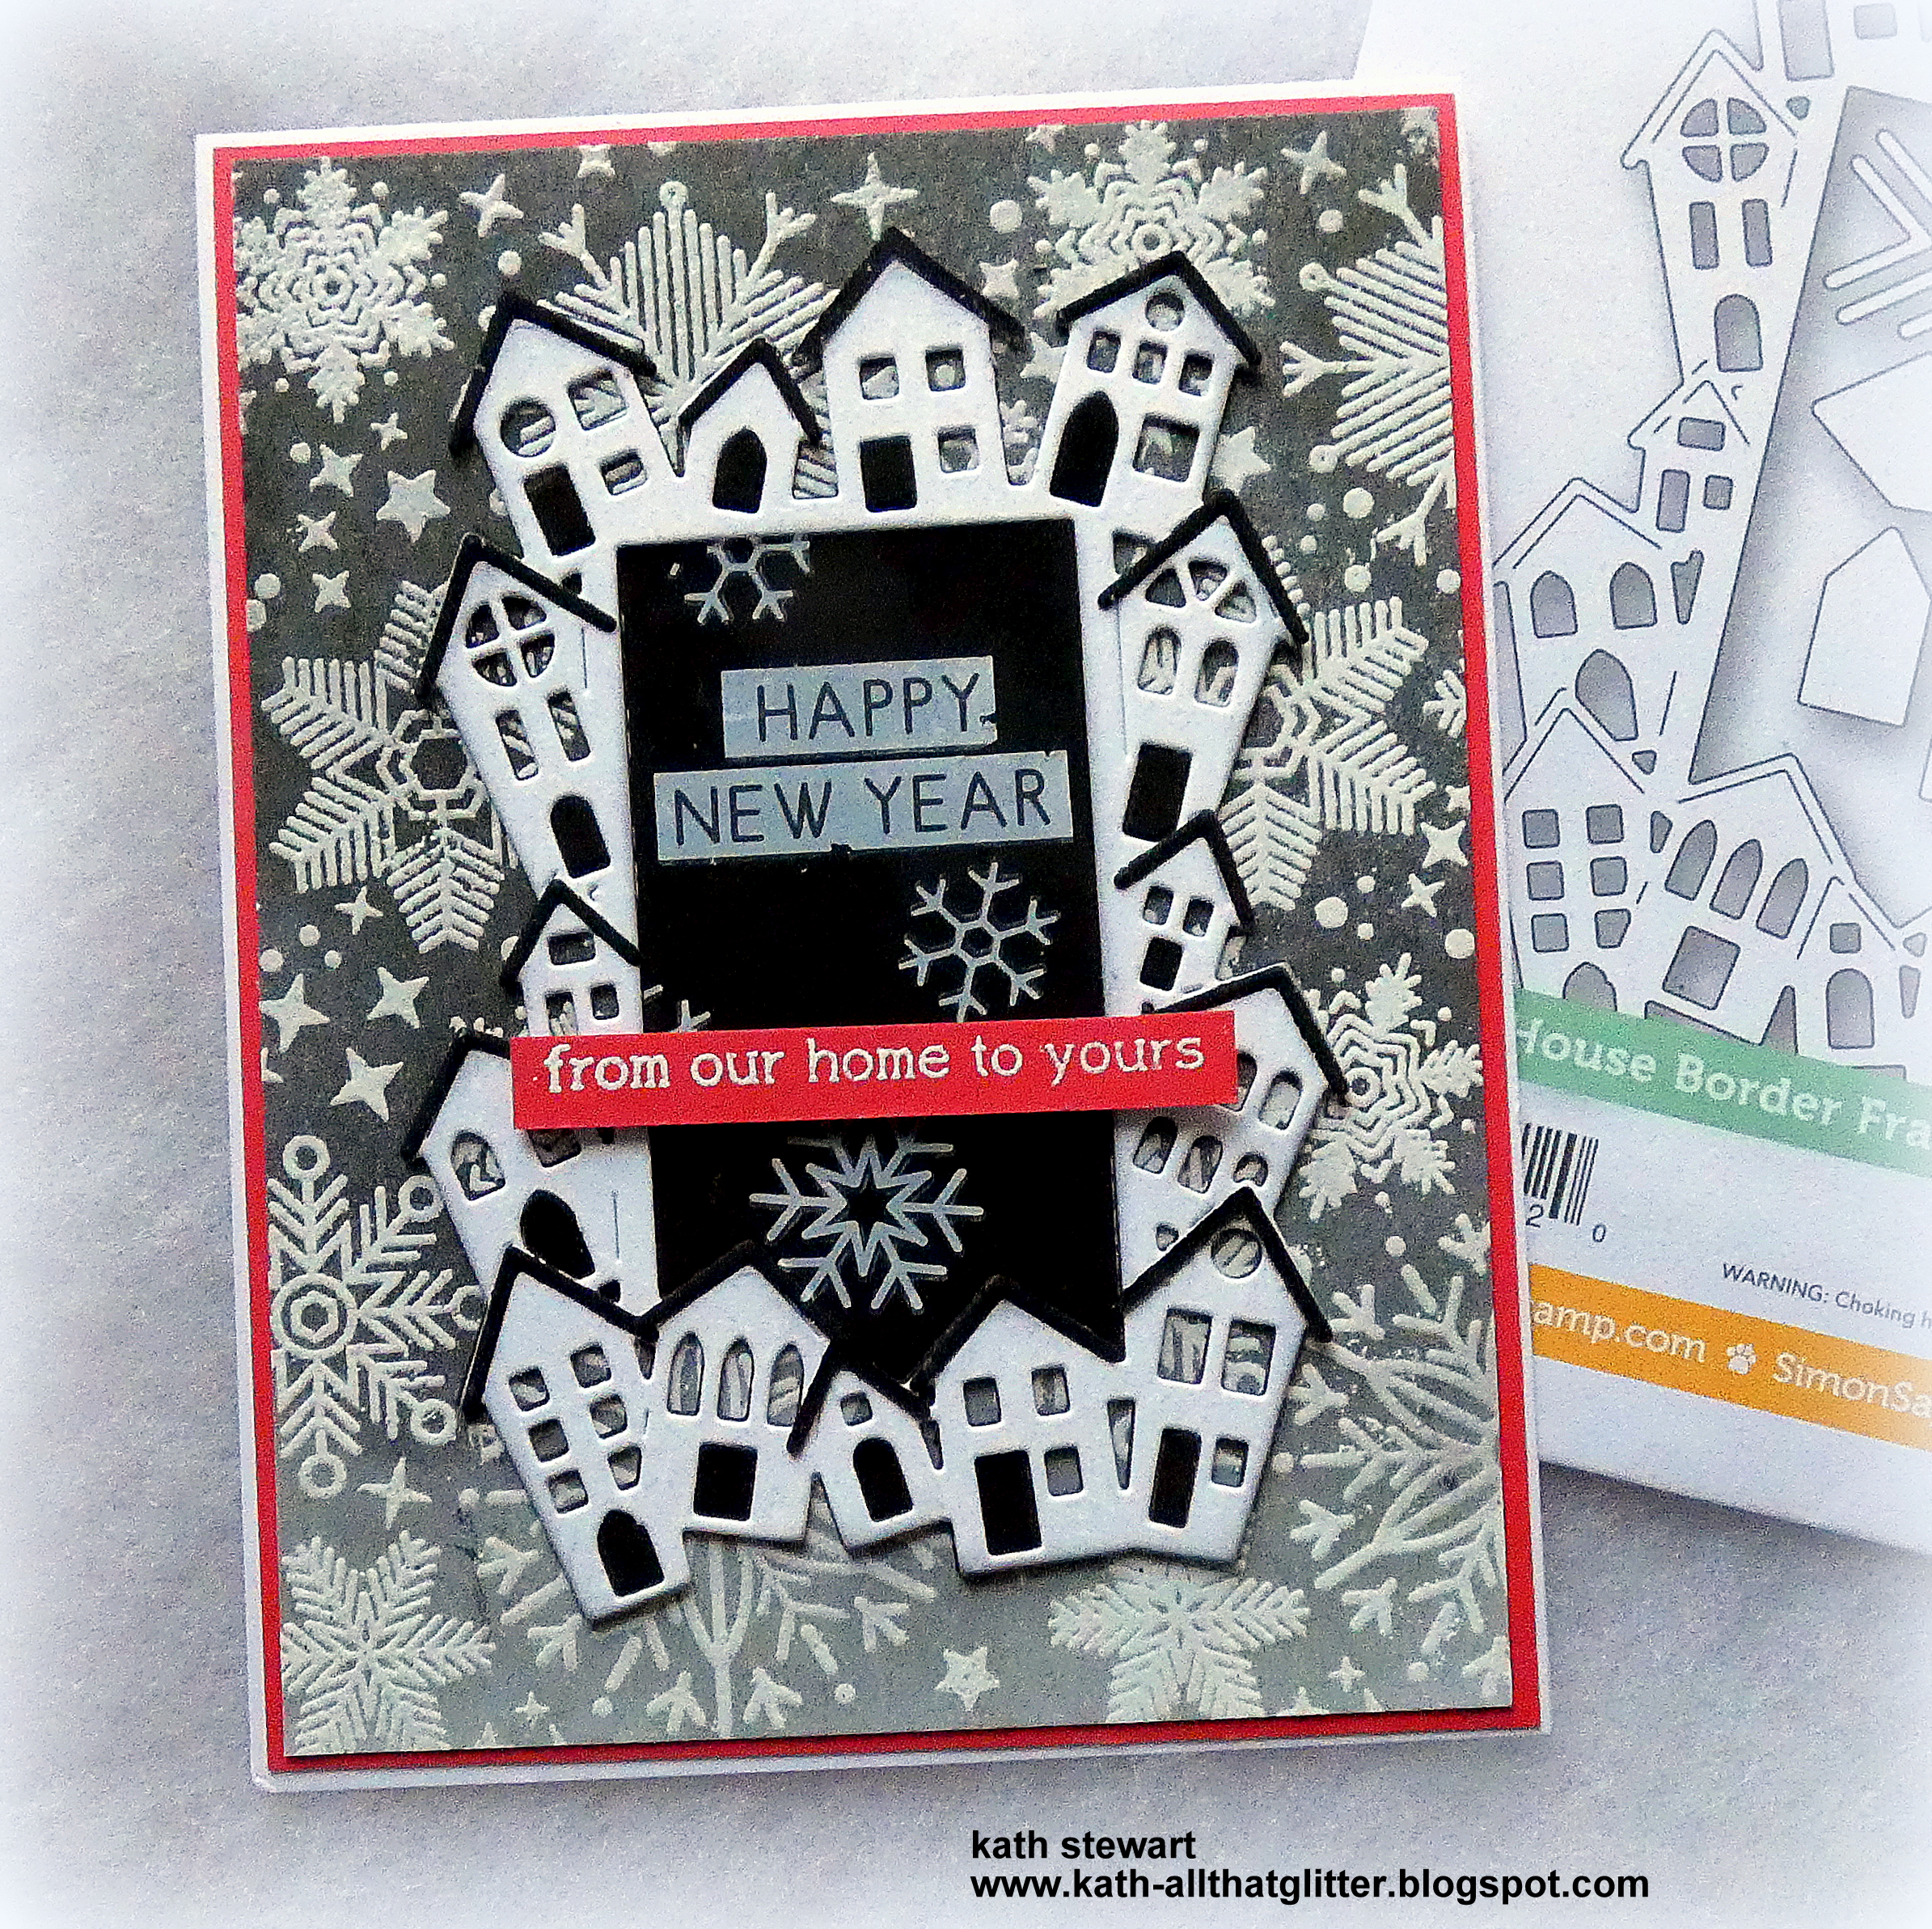
Hello my friends. Where did 2023 go, it's New Year's Eve already, known as Hogmanay to Scots around the world when we get together with family, friends and neighbours to reflect on the old year and toast the arrival of the new with a dram of the water of life. I created a card to wish you all Health and Happiness in 2024 using Simon Says Don't Flurry, Be Happy stamp set, House Border Frame dies, Hero Arts Holiday Message Strips Rub-Ons and Simon Says Home for Christmas stamp set for the sentiment.
I trimmed Distress Watercolor card to 4" x 5.1/4" and stamped the snowflake border from Simon Says Don't Flurry, Be Happy twice, inked with Simon Says Embossing Ink, sprinkled with Simon Says White Detail Embossing Powder and heat set. I applied Black Soot Distress Oxide ink over the panel using a mini round blending tool and wiped the ink off the embossed detail with a soft cloth.
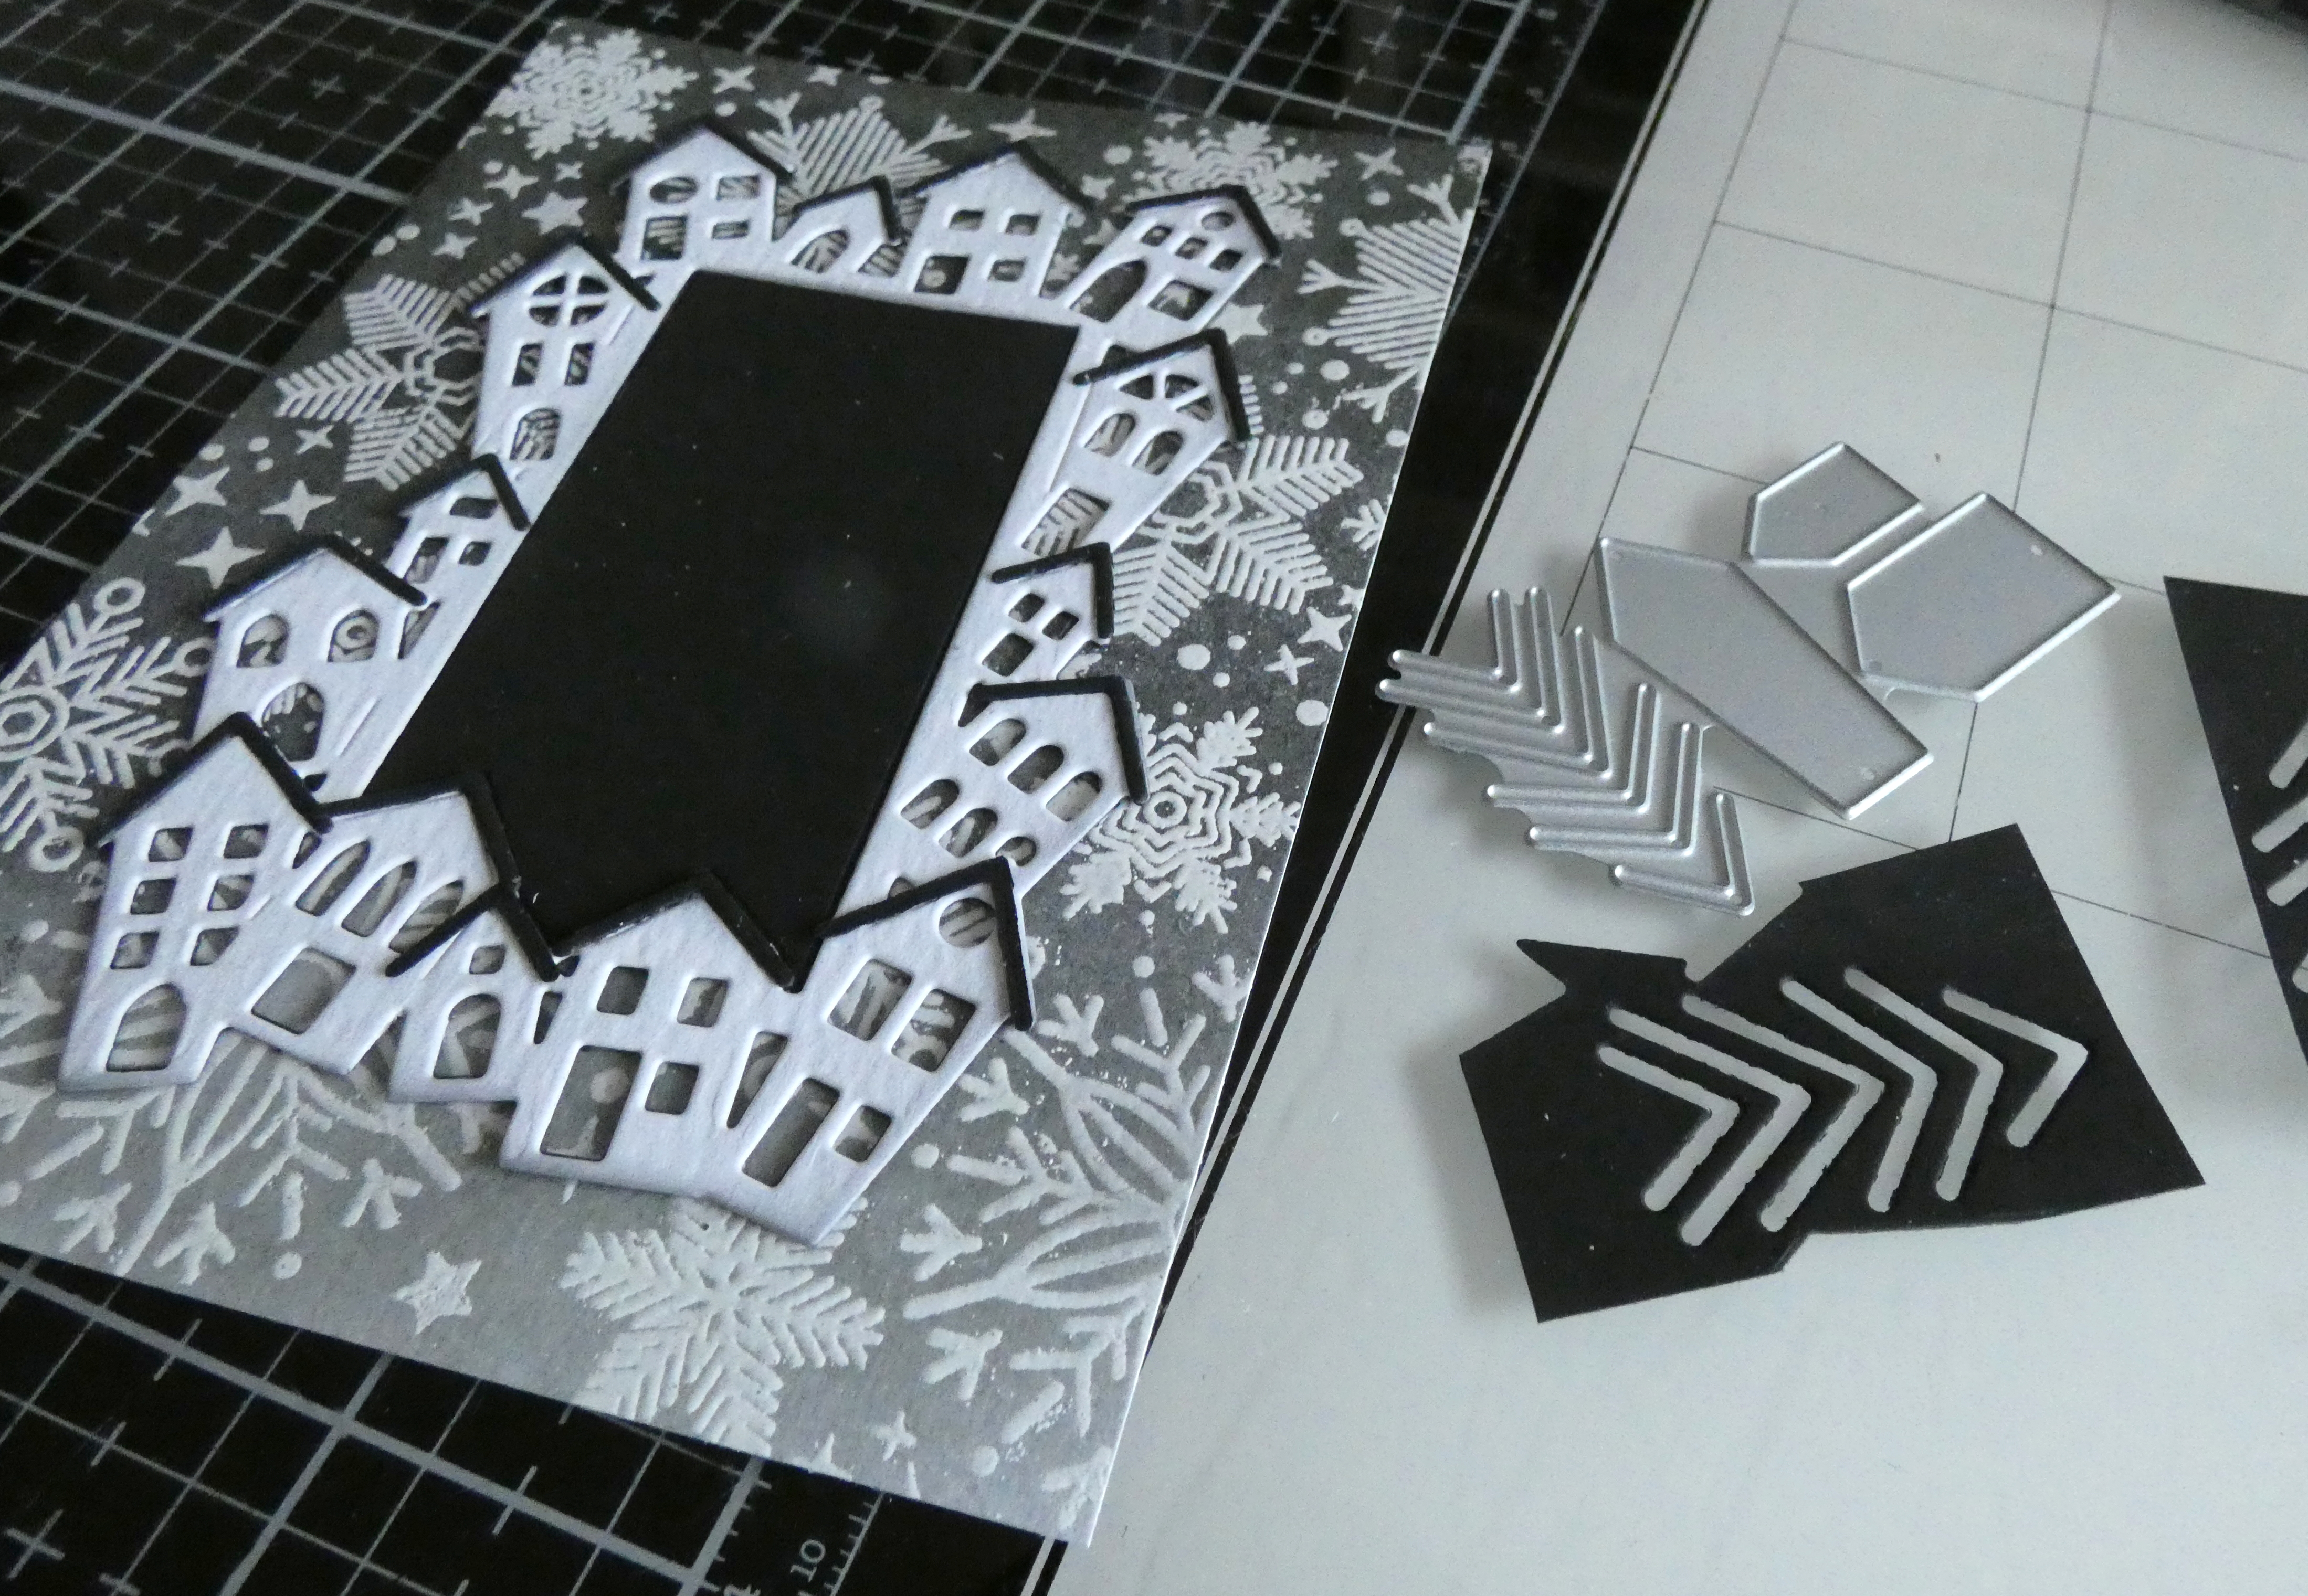
I fixed Sizzix Adhesive Sheets to the back of Distress Black HeavyStock and Distress Watercolor card and die-cut Simon Says House Border Frame. I removed the adhesive carrier sheet and fixed the Black HeavyStock frame and insert to the panel.
I added the Distress Watercolor card frame on top and added the roof lines die-cut from the Black HeavyStock. It doesn't show in this photo but I replaced the Black Heavy/Stock door pieces back into the negative spaces.
I stamped the sentiment from Simon Says Home For Christmas, inked with Simon Says Embossing Ink, on to a scrap of Simon Says Lipstick Red cardstock, sprinkled with Simon Says White Detail Embossing Powder, heat set and trimmed to create a sentiment strip.
I added Hero Arts Holiday Message Strips and snowflake Rub-Ons and added the stamped sentiment, popped up on foam squares.
To finish I matted the panel on to Simon Says Lipstick Red cardstock trimmed 1/8" larger and fixed to a top folding A2 white card blank.
I'm looking forward to tucking in to our traditional New Year's Day dinner of Roast Beef, Yorkshire Puddings, Roast Potatoes, Brussel Sprouts, Mashed Turnips and lashings of yummy thick gravy followed by Trifle, Clootie Dumpling and Biscuits and Cheese. I'll be back tomorrow to share my DT project for the first Simon Says Monday Challenge of 2024.