Tuesday, March 29, 2022

Idea-ology Ephemera Snippets Update

Hi everyone, I'm sharing an update on the books I made yesterday to store my Idea-ology Ephemera Snippets. My friends will tell you I am definitely one of those people that once I start a task, I'm hell bent on finishing it. So I looked out the removeable adhesive tape runner and set to work inserting the Idea-ology Field Notes, Curator and Number Strips Snippets into the books. I'm not going to lie, this was a real labour of love, requiring lots of patience and more than a few coffees. The Curator snippets were the most fiddly but hey, I stuck with it, forgive the pun and oh boy was it worth it. For me, being able to just flip the pages and choose what I want is going to be a big time saver/game changer.


But it seems I'm also a glutton for punishment because I then decided to make another 4 books to store the Idea-ology Paper Dolls Mini, dividing them into categories - Groups, Male/Female, Pairs and Children and decorated the covers with Idea-ology Memoranda Paper, Design Tape, Idea-ology Eccentric Remnant Rubs and the relevant Paper Dolls Mini.


It was a long day but worth every moment and I rewarded myself with a few, well-deserved if I say so myself, glasses of something cold and alcoholic at the end of it. Have fun with whatever you're making.
If you want to know how I made the books, click HERE
Hugs Kath xxx

Monday, March 28, 2022

Simon Says - Recycle

Hi Everyone...welcome to another week on the Simon Says Stamp Monday Challenge Blog. Thank you for joining us for last week's challenge and we hope you can join us this week too because


and the theme for this week is...
RECYCLE
I was inspired by an idea from my crafty friend Nathifa to make small storage books to hold all my Idea-ology Ephemera Snippets so that I could see at a glance what I had instead of dumping the whole package out on to my workdesk and rummaging through to find what I wanted, so frustrating, right. And I'm a hoarder that keeps all my Idea-ology packaging so it was a great opportunity to recycle some  to make decorative covers for the books.
I trimmed, scored and folded Distress Kraft HeavyStock to make 3 - 4.1/4" x 5.1/2 covers.
I trimmed Distress Media Heavystock to 4" x 5.1/4" to create 3 panels for the inside of each book and fixed a panel either side of the fold.  I trimmed 1/4" off the bottom of the third panel and fixed to the left panel with Idea-ology Trims Design Tape to create a flip up panel.
With the panel open, I added another strip of Idea-ology Design Tape to reinforce the hinge and added pieces of the Idea-ology Trims Design Tape randomly to decorate. I now have 4 panels in each book to use without creating too much bulk.
My idea is to fix the Ephemera Snippets on to the panels using a removeale adhesive tape runner and now I will be able to see at a glance what I have.
I created the panels to decorate the books using the left over Idea-ology packaging which I trimmed to 4" x 5.1/4". At this stage I wasn't sure how I was going to decorate them so for good measure I applied two layers of White Gesso using my small Distress Brayer which gave the slick surface some tooth. I decided to create a collage on each panel and decorated with Idea-ology Pocket Cards and the Ephemera Snippets which were going to be stored in the books - Number Strips, Curator and Field Notes.  I rounded the corners on the Idea-ology Packaging and Pocket Cards and fixed everything in place with Distress Collage Medium.
I trimmed and fixed the typography from each individual package in place, added Idea-ology Trims Design Tape and applied a coat of Distress Collage Medium over the panels. I created shadows around the collaged pieces using Walnut Stain Distress Crayon and applied Distress Texture Paste Matte through the Tim Holtz/Stampers Anonymous Bubbles Mini Layering Stencil from Set 5.

I rubbed Distress Walnut Stain Distress Crayon around the edges of the panels and fixed to the covers.


I added the picture from the Idea-ology packaging on the back of the covers
Now I need to get busy with the tape runner and the books can be stored safely in a Sizzix Envelope

You can find all the products I used over at Simon Says Stamp, just click on the links below


Why don't you pop over to the Monday Challenge Blog and check out the amazing creations from my very talented Design Team mates and as always you have until Monday 8am Ohio time...1pm UK time...2pm CET to join in with the chance to win a $25 voucher to spend online at Simon Says Stamp


You can also follow Simon Says Stamp on Instagram
and if you use Instagram...
please add #sssmchallenge to your entry uploads so we can see them on there too

I look forward to seeing what you create this week...
Have Fun and Happy Crafting
Hugs Kath xxx

Saturday, March 26, 2022

Time For A Party

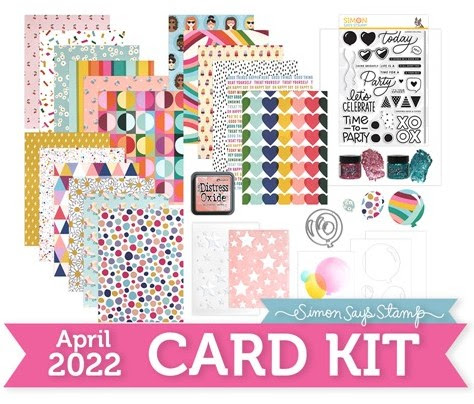
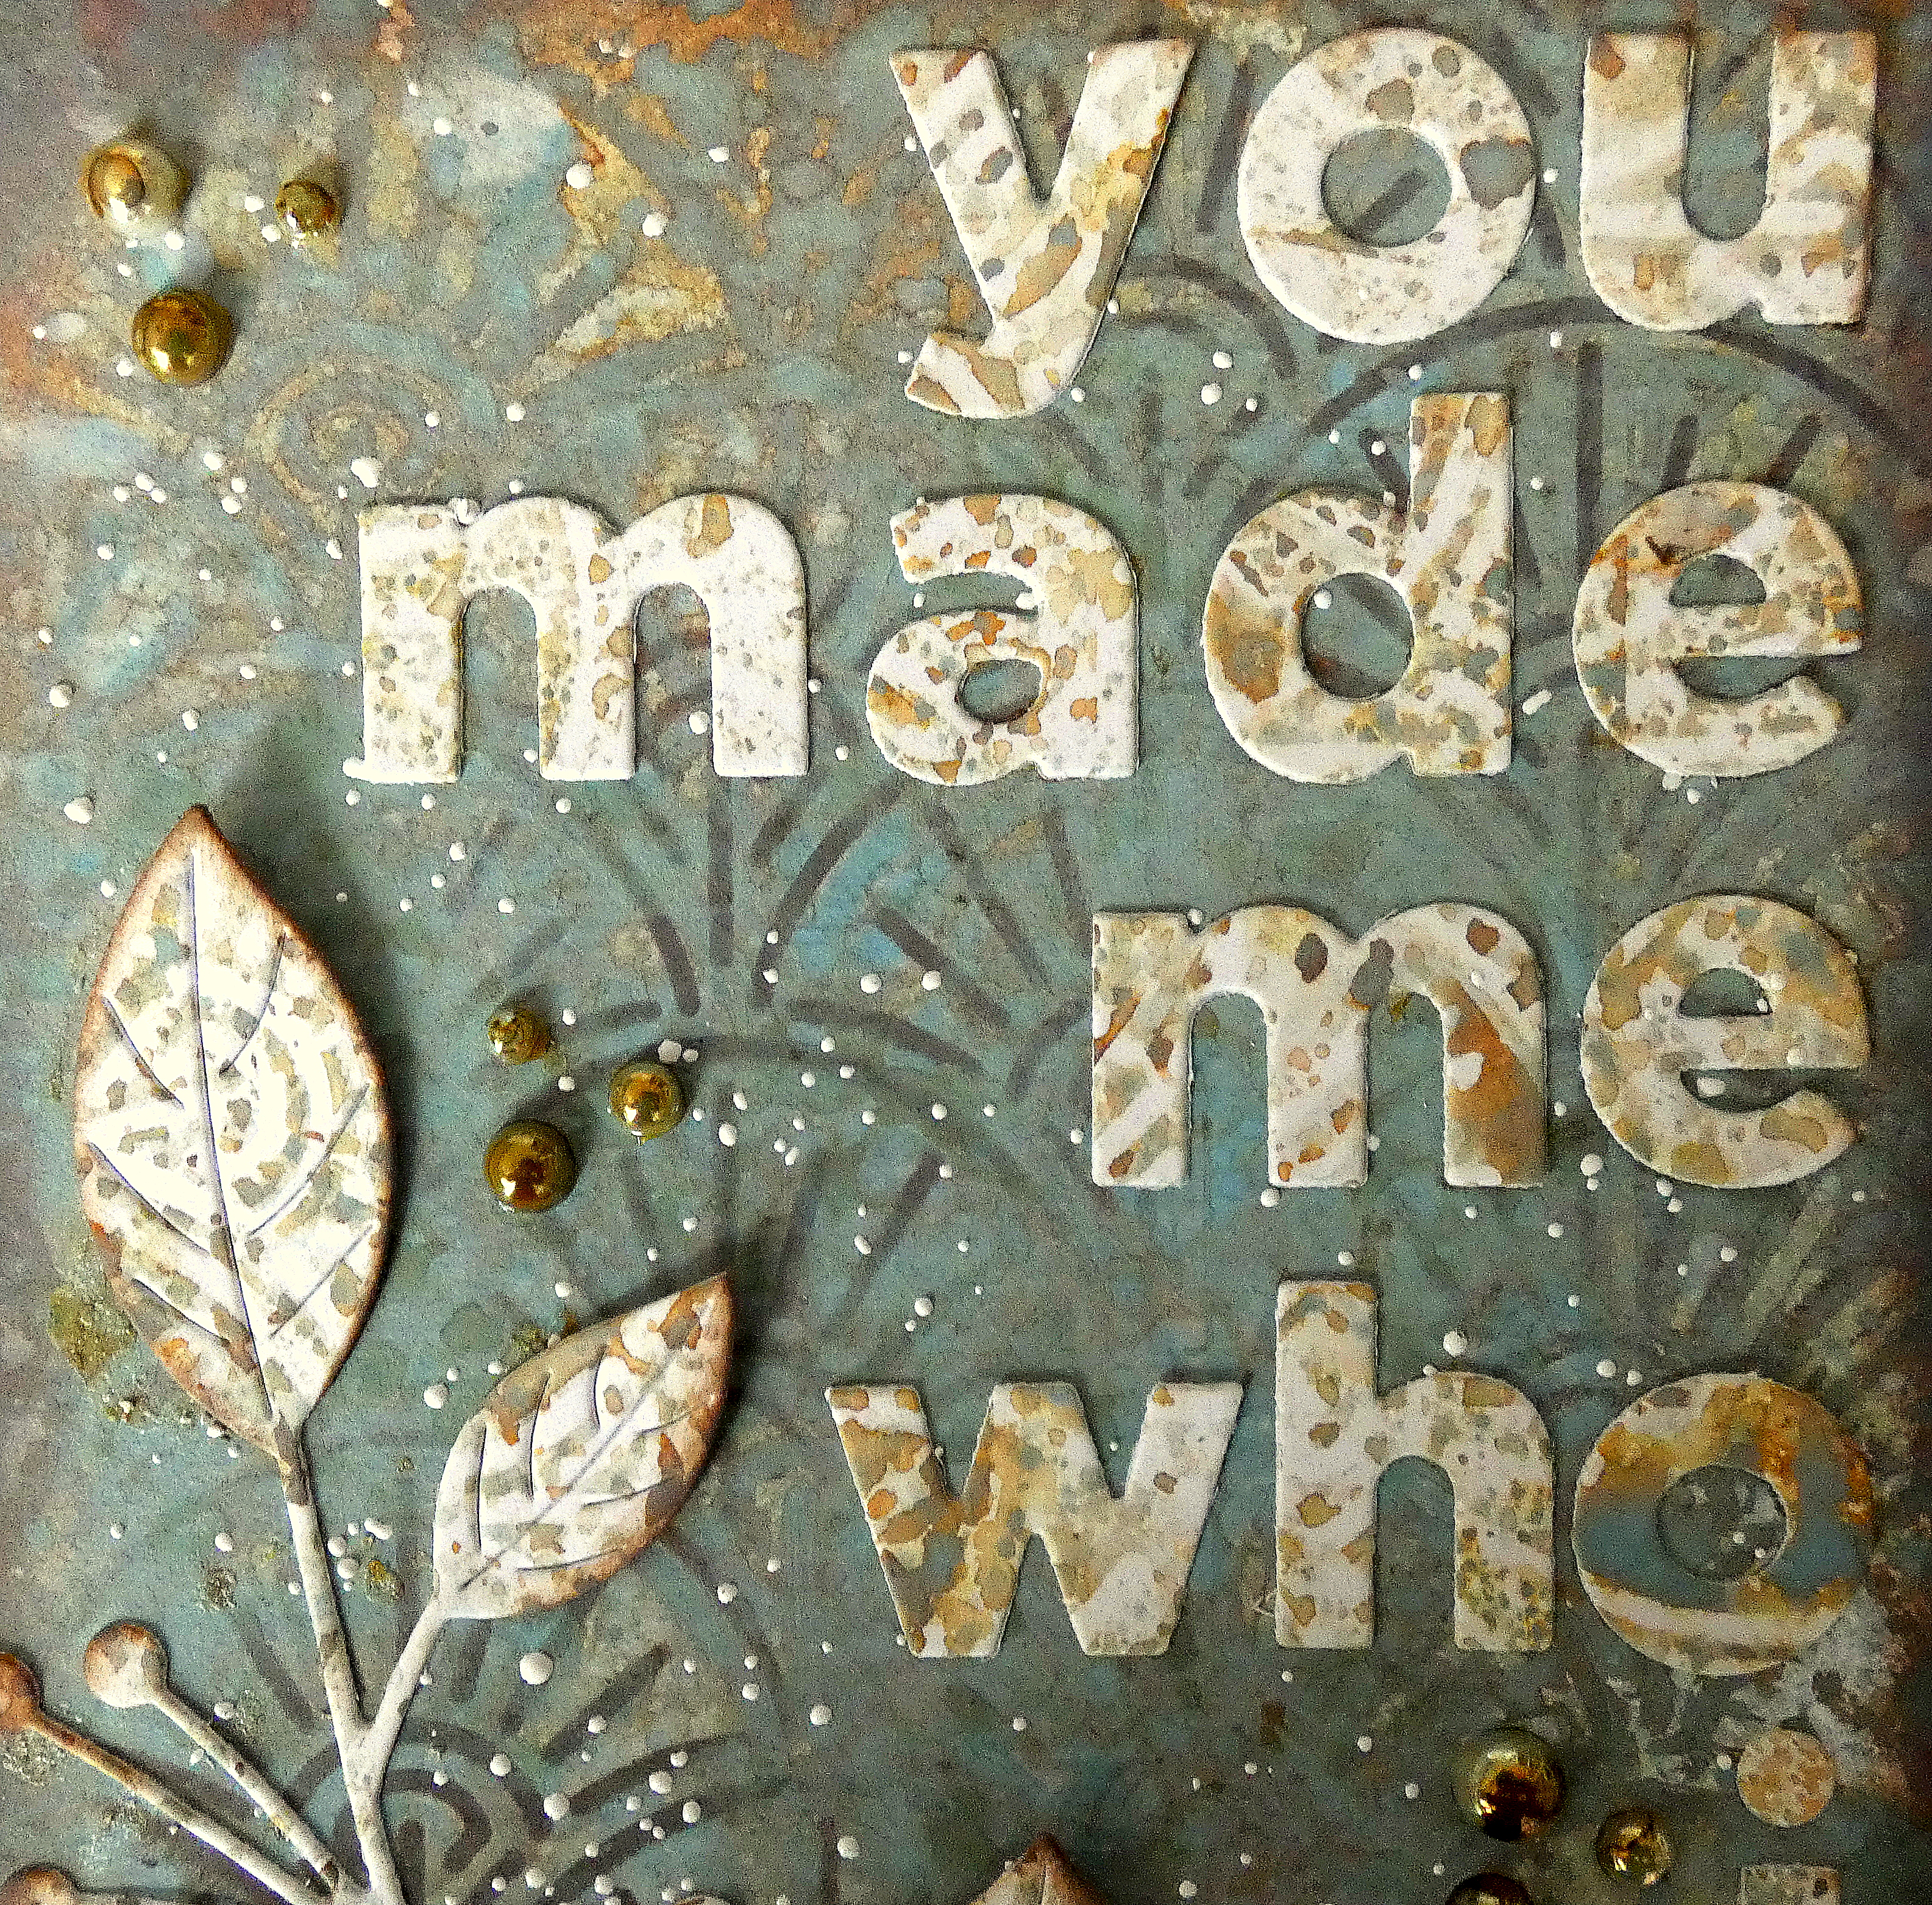
Hi my friends, I'm sharing a card made with the Balloon Trio dies, Life Is A Party stamp set and Saltwater Taffy Distress Oxide ink pad which all came in Simon Says Life Is A Party April 2022 Card Kit. The kit is still available to buy at the time of writing but you can also purchase the individual items  from the kit HERE.


I trimmed Distress Watercolor card to be slightly smaller than A2, smooshed the Saltwater Taffy Distress Oxide ink pad on to the craft mat on my Glass Media Mat, spritzed with water and laid the panel into the ink, dried and tapped back in repeatedly to pick up the remaining droplets, drying between layers. I die-cut the panel with the largest of the Balloon dies, lined up the middle sized balloon slightly overlapping and die-cut.
I die-cut the largest balloon 3 more times from Distress Watercolor card. I fixed the panel to white cardstock and fitted one of the die-cuts into the negative space along with the middle size balloon, die-cut from the coloured panel.
I inked the balloon strings with Simon Says Stamp Intense Black and stamped overlapping the balloon die-cuts.
I coloured over the Saltwater Taffy on the large balloon die-cut with Carved Pumpkin Distress Oxide ink using a mini round blending tool and over-stamped with the background from Tim Holtz/Stampers Anonymous Lumberjack to create a tone on tone effect.
I fixed the large balloon in place slightly offset to create a highlight on the left side. I die-cut the middle and smaller balloons twice from Distress Watercolor card, inked the top layer with Salvaged Patina and Mustard Seed Distress Oxide inks, over-stamped with the background from Tim Holtz/Stampers Anonymous Composition and Lined, inked in the corresponding colours of Distress Oxide inks. I layered the die-cuts slightly offset and fixed in place with Distress Collage Medium. I stamped the sentiment from Life Is A Party inked with Versamark ink on to a scrap of Alcohol Ink Black Cardstock, sprinkled with Ranger Superfine White Embossing Powder, heat set and fixed to the large balloon using foam adhesive.
I added clear drops fixed in place with Distress Collage Medium and matted the panel on to an A2 white card blank.


Today's card is a little reminder of today's fun YouTube Live Easter Inspiration Party over at Tim and Mario's place. 9am PT, 12pm ET, 4pm UK, 5pm Europe, get your snacks ready and I'll meet you there.
Hugs Kath xxx

Friday, March 25, 2022

A "Using Up The Left Overs" Card

Happy Friday my friends, just a quick post today to share the card I made with the left over Simon Says Etched Berry Branch and You Made Me die cuts, cut from the background on yesterday's card.

I trimmed Distress Watercolor card to slightly smaller than A2 and spritzed Speckled Egg and just a little Frayed Burlap Distress Oxide Sprays on to the craft mat on my Glass Media Mat. I spritzed with water, laid the panel into the ink, dried and tapped back in to pick up the remaining droplets. I tapped Simon Says Fanfare Stencil on the remaining droplets and pressed on to the panel. I smooshed a Ground Espresso Distress Oxide ink pad on to the back of the stencil, spritzed with water and used to create a random monoprint effect on the background.
I fixed the die-cuts from yesterday's background in place with Distress Collage Medium, coloured Trinity Stamps pearls with Mushroom Alcohol ink, fixed in place and matted the panel on to an A2 white card blank.

I'm leaving behind the muted colour palette and going all out bright and cheerful with a week of Chapter 2 sneaky peeks and cards made with Simon Says Life Is A Party April Card Kit. In the meantime, have a great weekend whatever you have planned and I'll be back on Monday to share my DT project for Simon Says Monday Challenge. 
Hugs Kath xxx

Thursday, March 24, 2022

You Made Me Who I Am - Take 2

Hi my friends, I'm back to share a card I made using Simon Says Stamp Fanfare 6" x 9" Stencil from the Hello Gorgeous release to create backgrounds and I just couldn't resist using the CZ Designs You Made Me die again. Can you tell I have a thing about big word dies, in fact you could say it's a bit of an addiction. You can also check out the rest of the fabulous products from this release HERE.

I trimmed an A4 sheet of Distress Watercolor card in half and spritzed Speckled Egg and Frayed Burlap Distress Oxide Sprays through the Fanfare Stencil, lifted the stencil, spritzed the panel lightly with water to make the inks wick, dried and trimmed in half to make A2 panels.At this stage, there is always excess ink that has soaked through to the back of the stencil, so I pressed the stencil on to the other half of the Distress Watercolor card, covered with kitchen towel and pressed to transfer the ink to the card. Again I spritzed lightly with water, dried and trimmed to make A2 panels. One application of Distress Oxide sprays and I have 4 - A2 backgrounds to play with.I spritzed an A2 panel of Distress Watercolor card with Speckled Egg and Frayed Burlap Distress Oxide Sprays, die-cut using CZ Designs You Made Me die and set the letters aside to use later.I spritzed another A2 panel of Distress Watercolor card with Frayed Burlap and a little Speckled Egg Distress Oxide spray and die-cut using Simon Says Etched Berry Branch.I die-cut one of the original A2 background panels using the Etched Berry Branch and You Made Me dies, fixed the panel to white cardstock and set the die cuts aside.I die-cut both dies another 3 times from Distress Watercolor card, fixed one set of die-cuts into the negative spaces, layered the other two on top and finished by adding the coloured die-cuts to create lots of dimension.
I inked the edges of the panel with Ground Espresso Distress Oxide ink and added splatters of the same colour by smooshing the ink pad on to my craft mat, spritzted with water and picked up on my Distress Splatter Brush. To finish I matted the panel on to a 4.1/2" x 5.3/4" white card blank.

The left over branch and letters from die-cutting the background are sitting on my workdesk, so no doubt, there will be another card coming soon. In the meantime, have fun with whatever you are making.
Hugs Kath xxx