Thursday, November 30, 2023

Wintermas Countdown to Christmas - Day 8

Hello my friends, can you believe it's the last day of November already. Christmas is coming whether we're ready or not and today I'm sharing another project using products from my Simon Says Wintermas Wonder Box. Behind Door No 8 was - 5 Black Circle Tags and a bobbin of White/Sparkle twine.

I used the tags to make a banner to hang on the tree or on the mantle using Tim Holtz/Stampers Anonymous Bottle Brush Trees, the Snowflake Block stamp from Day 5 and Tim Holtz/Sizzix Alphanumeric Classic Upper Thinlits die-cut from Simon Says Silver Luxe Glitter cardstock to create the letters.
I dusted the tags with Simon Says Anti Static Powder Tool, stamped the Tim Holtz/Stampers Anonymous Bottle Brush Trees on to the tags, inked with Versamark ink, sprinkled with Simon Says White Detail Embossing Powder and heat set.
I repeated this process with Simon Says Snowflake Block stamp which was behind Door 5 in the Wintermas Wonder Box.
I die-cut Tim Holtz/Sizzix Alphanumeric Classic Upper Thinlits from Simon Says Silver Luxe Glitter Cardstock and fixed in place with Distress Collage Medium.
To finish I threaded the Simon Says White/Silver Sparkle Twine through the tags ready for hanging.

The countdown to Christmas starts in earnest now, so much to do and so little time. Good Luck my friends, if like me, you are furiously playing catch up with the Christmas list.
Hugs Kath xxx

Wednesday, November 29, 2023

Christmas Advent Calendar Box - Part 2

Hi my friends, I'm back to share how I decorated the shelves on my Christmas Advent Calendar Box and there is something so magical about creating little scenes with Tim Holtz/Sizzix Paper Village Thinlits, Idea-ology Woodland Trees, Bubbles, Christmas Confections and Christmas Salvaged Reindeer, Distress Mica Flakes, Distress Rock Candy Glitter and Idea-ology Tiny Lights. If you missed yesterday's post with a link to the tutorial for creating the box and the advent boxes, you can find all the details HERE

I coloured Idea-ology Woodland Trees with Peeled Paint and Rustic Wilderness Distress Spray Stains, tapped on Distress Collage Medium with my fingers and dusted with Distress Mica Flakes. I coated my fingers with Distress Collage Medium, rolled the Idea-ology Christmas Confections and Bubbles around and then tossed into a tub of Distress Rock Candy Glitter and left to dry. I painted the Idea-ology Christmas Salvaged Reindeer with Frayed Burlap Distress Paint, distressed with Walnut Stain Distress Crayon and added Distress Grit Paste and Distress Rock Candy Glitter to the antlers.
I die-cut the houses from Distress Watercolor card and Simon Says Lipstick Red and Green Apple cardstock using Tim Holtz/Sizzix Paper Village Thinlits, assembled, added Distress Grit Paste to the roofs and dusted with Distress Rock Candy Glitter. I placed the Tiny Lights battery pack in the box, fed the wire up through the hole on to the shelf and with a rough idea where the houses and trees were going to go, I fixed in place with hot glue. I fixed all the decorations in place with hot glue and applied a layer of Distress Grit Paste to hide any of the wires that were showing and sprinkled with Distress Rock Candy Glitter.
Then it was time to switch on those magical Tiny Lights.

Time to fill each box with a chocolate treat ready for December 1st.
Have fun if you decide to make yourself a Christmas Advent Calendar Box or whatever you are making for Christmas Decor.
Hugs Kath xxx

Tuesday, November 28, 2023

Christmas Advent Calendar Box - Part 1

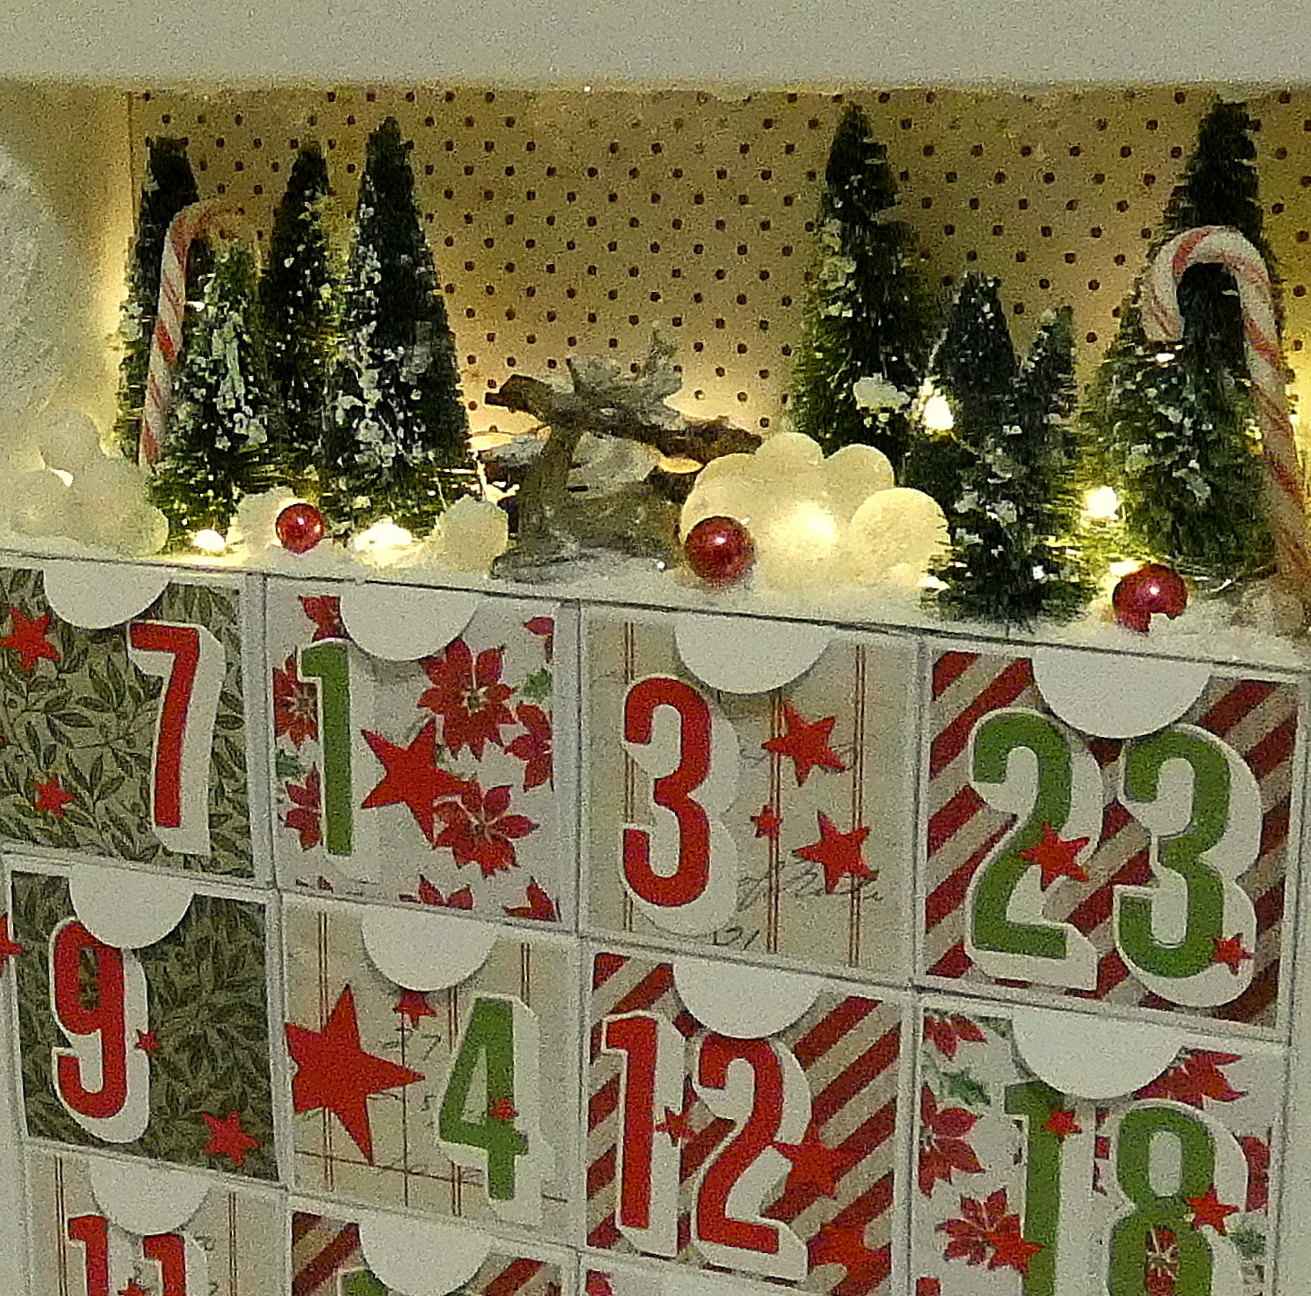
Hello my friends, my Christmas Advent Calendar Box is finally finished, decorated with Tim Holtz/Idea-ology Christmas 2023 Backdrops paper and Sizzix Shadow Numbers and Falling Stars Thinlits. It certainly was a labour of love and although there are maybe things I would do differently, I'm really happy with how it turned out. I'm not going to lie, it was a time consuming project but if you break it down into sections, it really was so easy to make. I am not sharing all the step by step photos because I found a great tutorial on YouTube HERE and this might explain the process better if you are a visual learner rather than following written instructions.


Once I had made all 24 boxes, I die-cut 24 - 1/2" circles using Tim Holtz/Sizzix Stacked Tiles Circles Thinlits or if you don't have these dies, a set of nesting circle dies or circle punch would work too.
I trimmed papers from Tim Holtz Idea-ology Christmas 2023 Backdrops to measure 1.7/8" square, fixed to the front of the boxes using Distress Collage Medium. I die-cut Tim Holtz/Sizzix Shadow Numbers Thinlits from Distress Watercolor card and fixed the shadows and the numbers in place with Distress Collage Medium. I die-cut the numbers again from Simon Says Stamp Lipstick Red and Green Apple cardstock and fixed in place over the original numbers. To finish I attached Sizzix Adhesive Sheet to Simon Says Lipstick Red cardstock, die-cut Tim Holtz/Sizzix Falling Stars Thinlits and used to decorate each door.
I constructed the frames following the YouTube tutorial, added card, trimmed to be slightly smaller, to the back of each frame. I trimmed strips of Tim Holtz/Idea-ology Christmas 2023 Backdrops paper to measure 8.1/4" x 3" and fixed inside the frames at the top edge.
I trimmed the same Tim Holtz/Idea-ology Christmas 2023 Backdrops papers that I used to decorate the boxes into 1.7/8" squares and fixed around the edges of the back panels using Distress Collage Medium. Unfortunately I ran out of some of the papers, had to improvise and fit in some small strips but I won't tell if you don't.
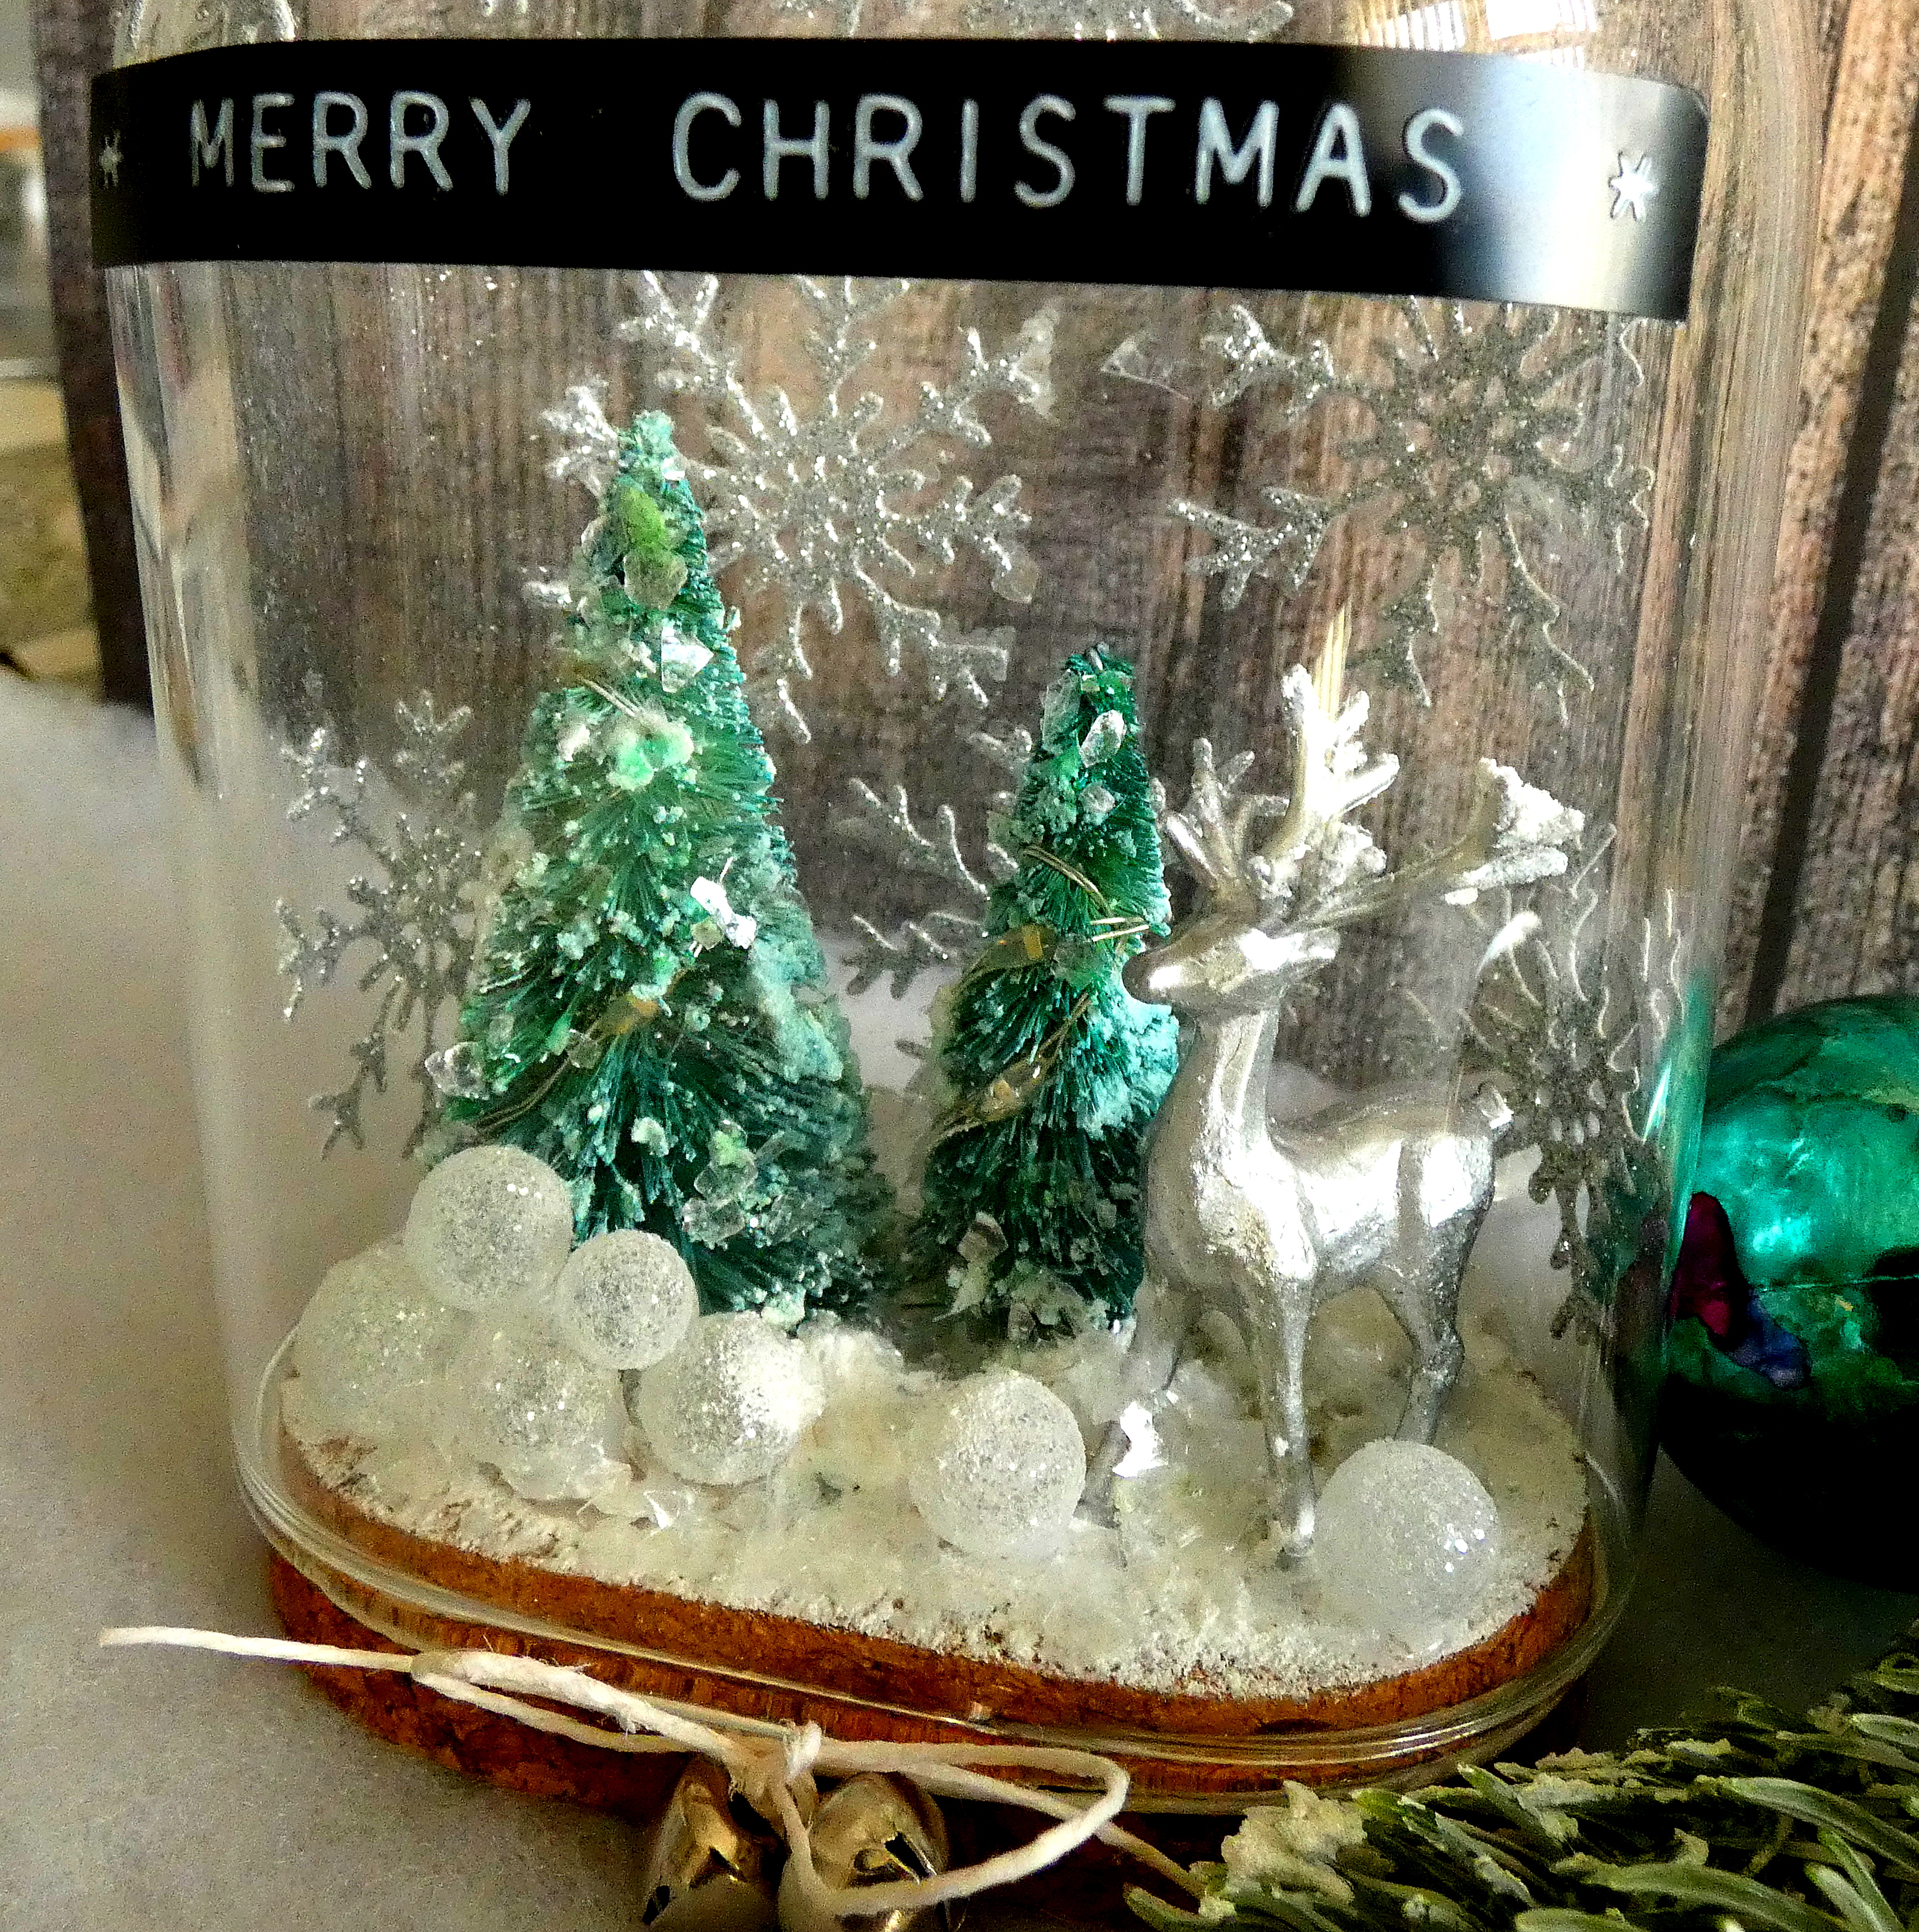
I decorated what will be the front of the box with another paper from the Christmas 2023 Backdrops and added ephemera from Tim Holtz/Idea-ology Christmas Layers.
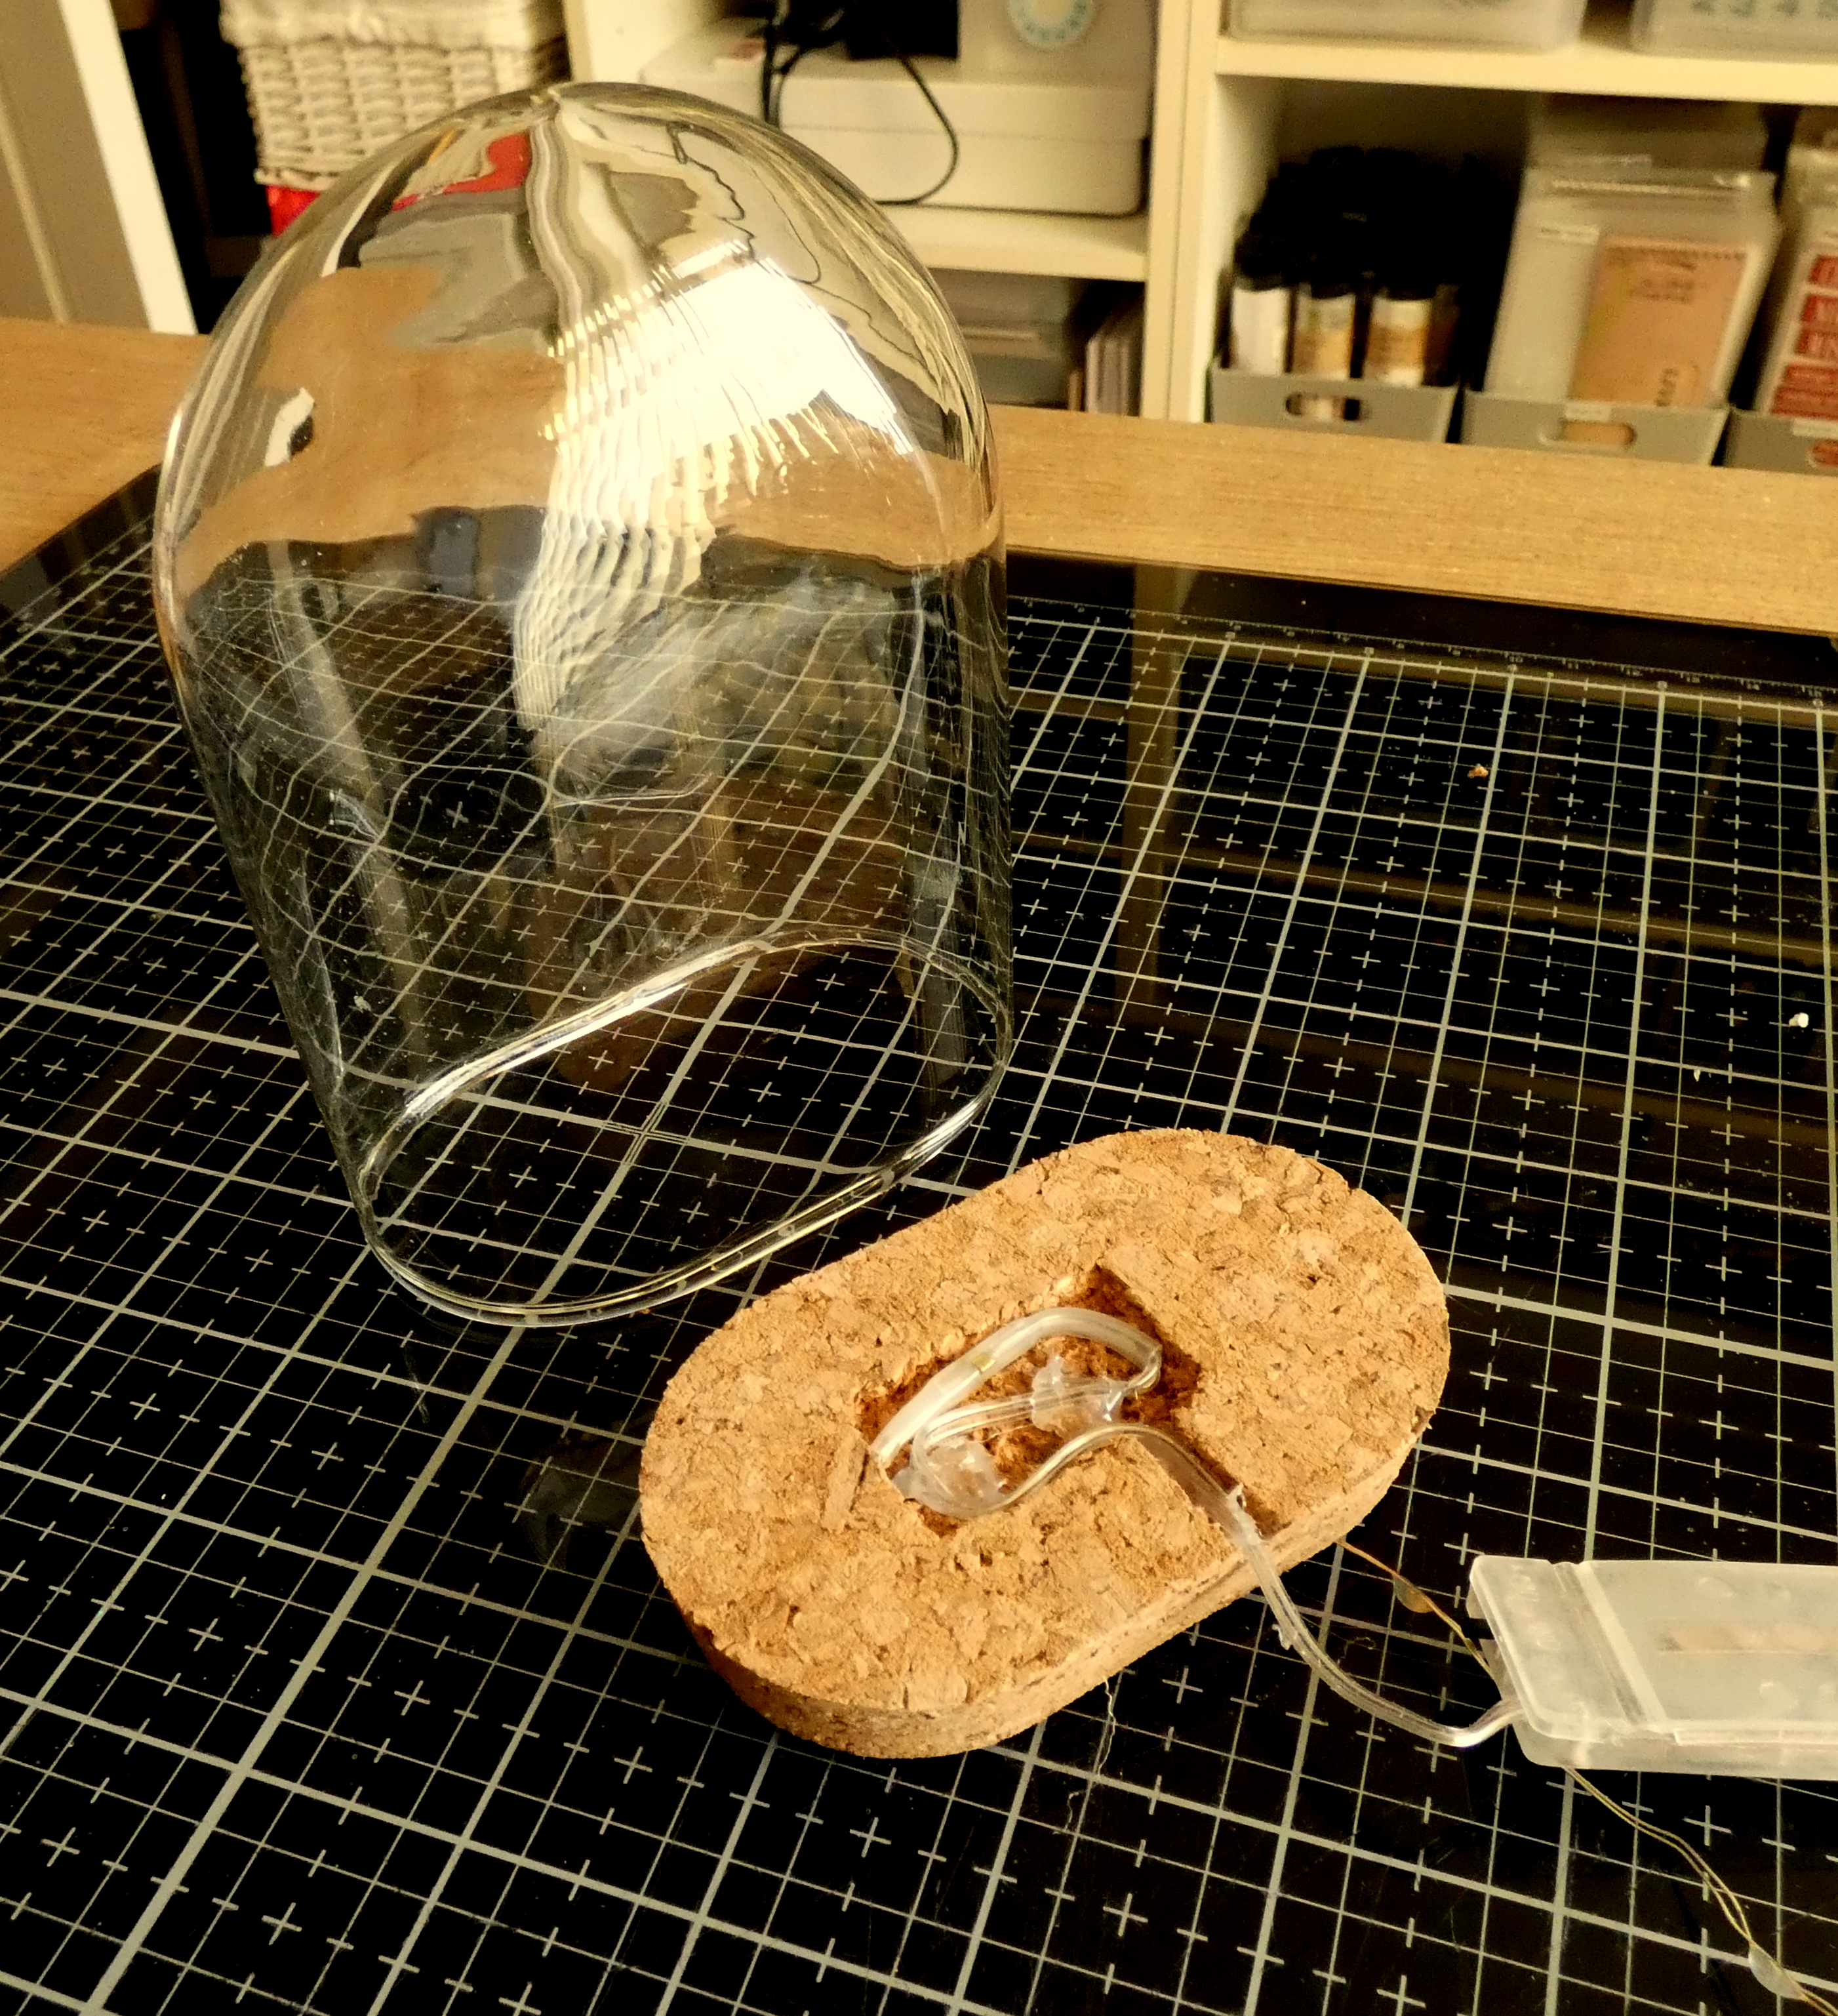
I fixed the boxes into the frames using hot glue and punched a hole in the lids of the last boxes on the top row which will hold the battery packs for the Idea-ology Tiny Lights.
I coloured Idea-ology Crinkle Ribbon with Lumberjack Plaid Distress Spray, fixed to strips of Christmas Backdrops paper and fixed to the opening sides of the frames. I added the hinge section to the other side of the frames to open and close the box and fixed strips of the same paper to these sections and the top edges of the box.
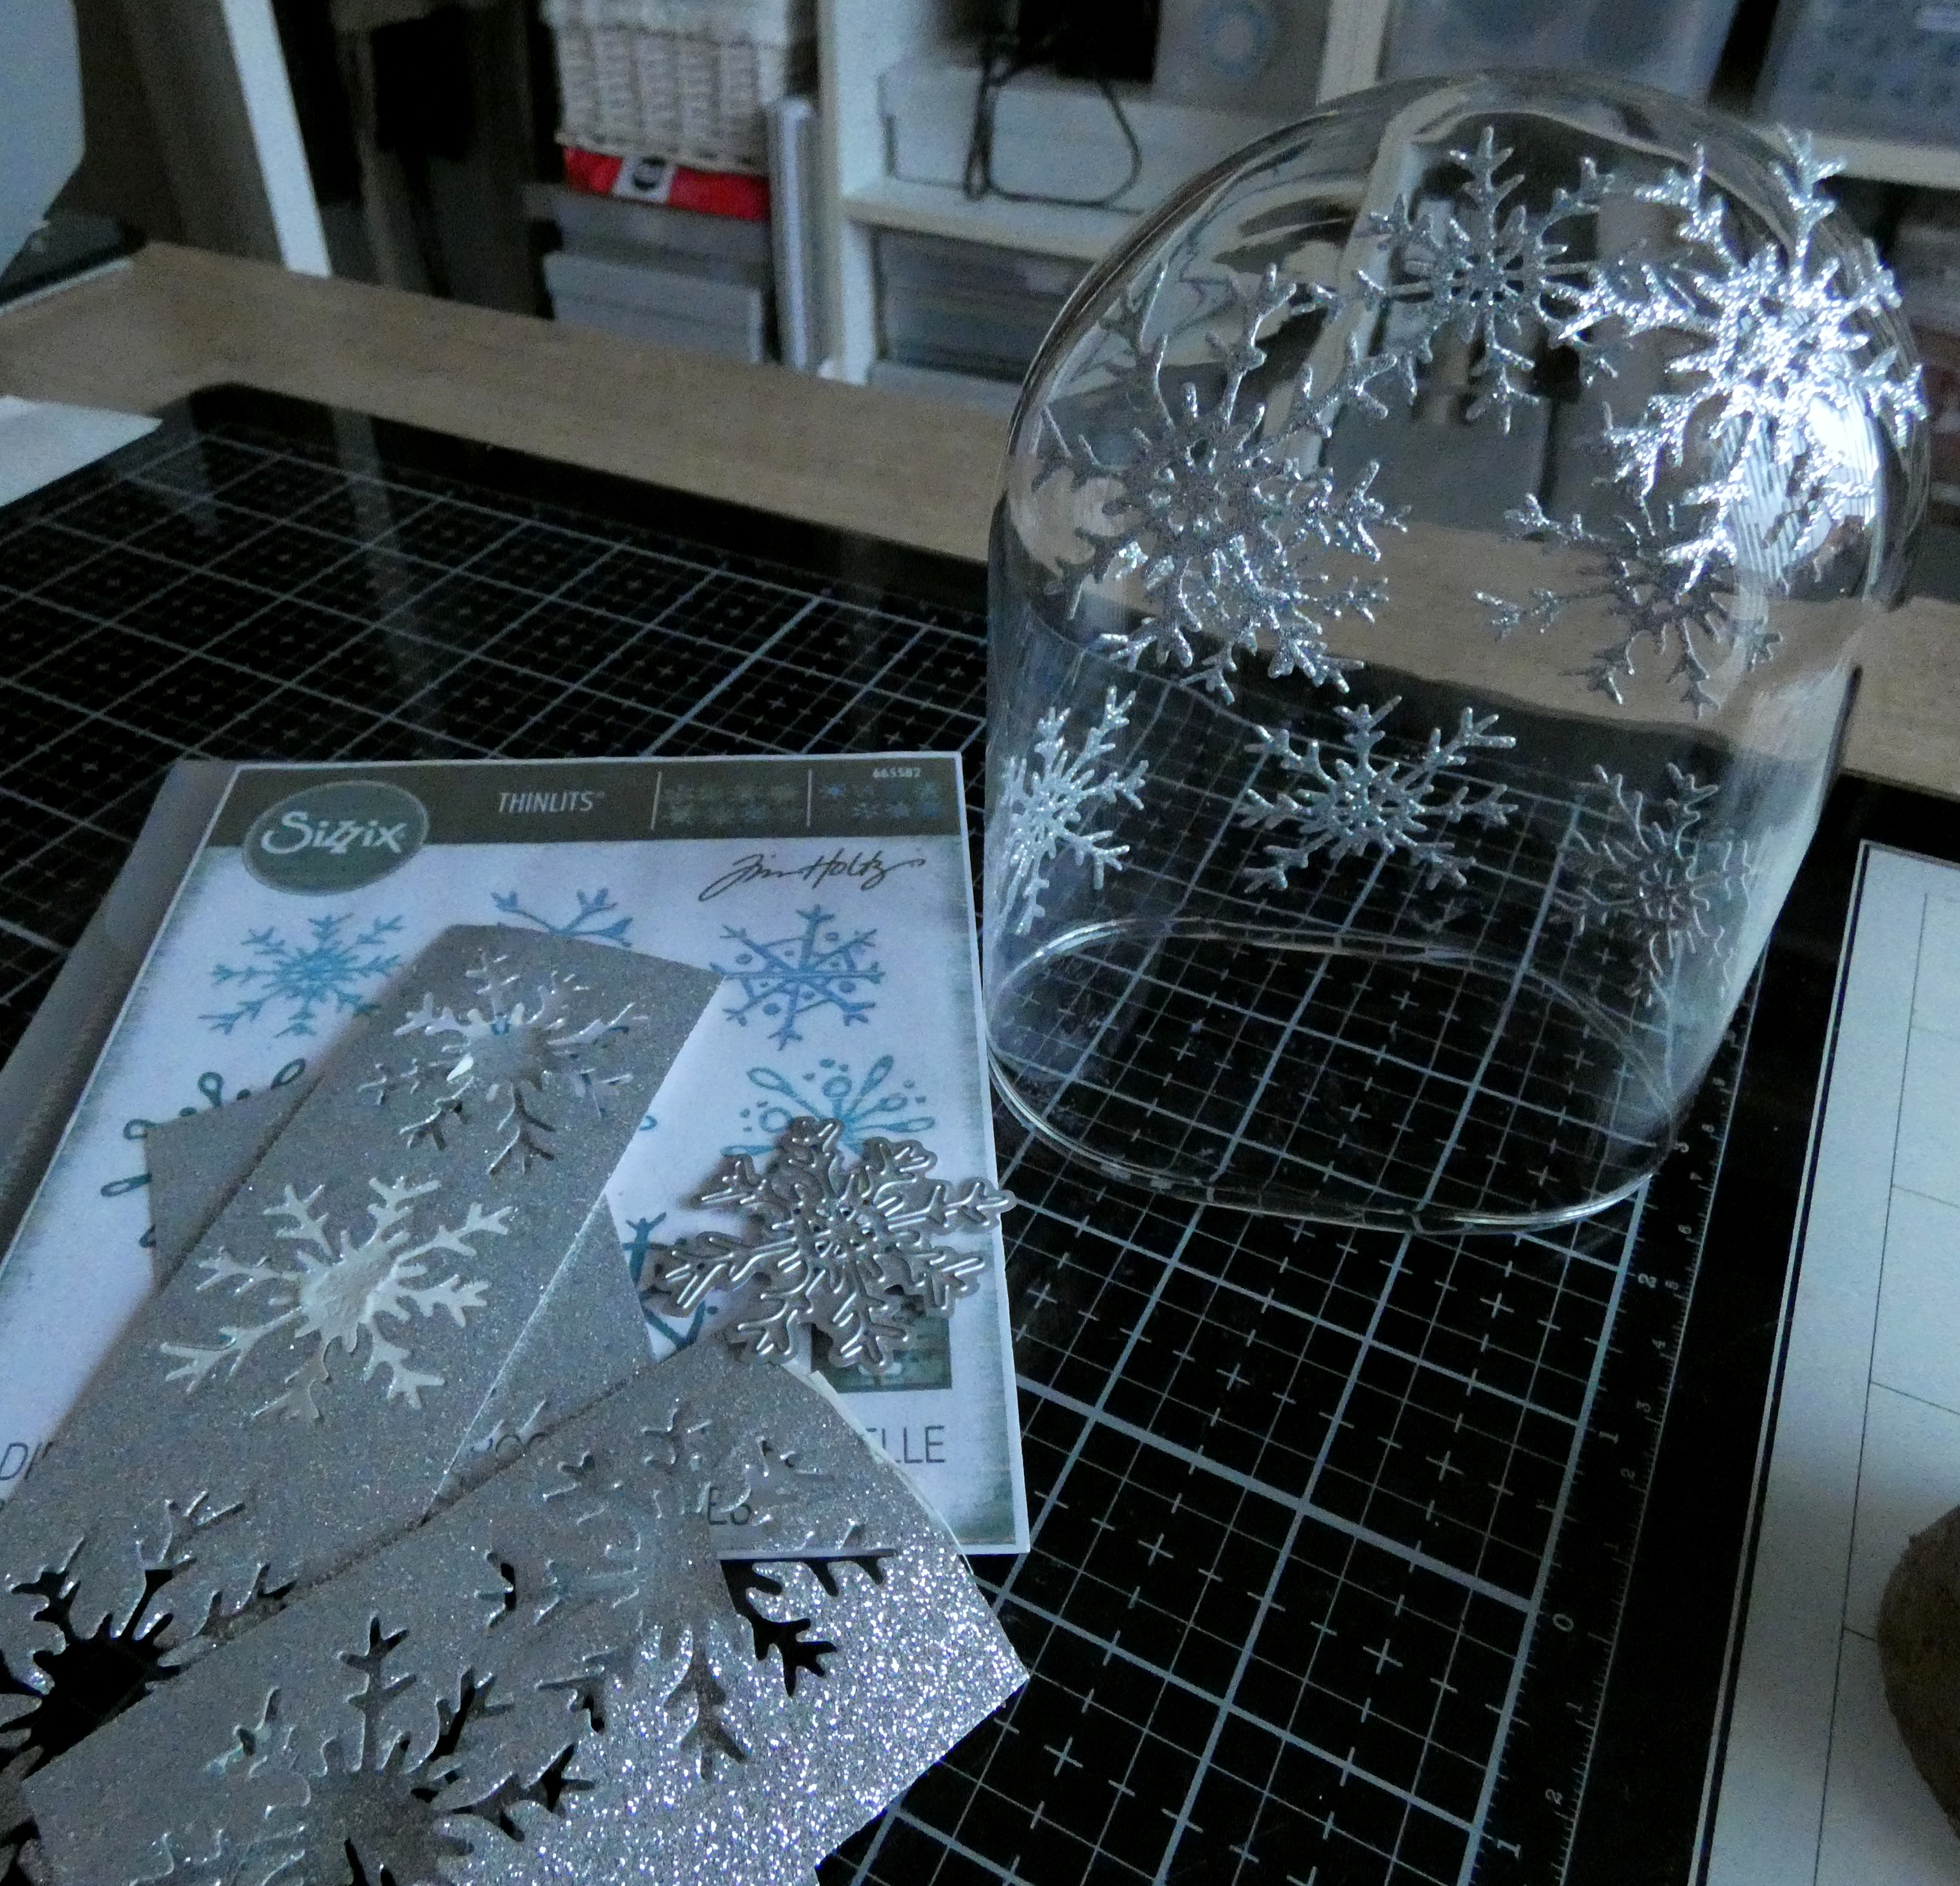
I applied Distress Snowfall Grit Paste through Tim Holtz/Stampers Anonymous Snowflakes Layering Stencil to add a little bit of sparkle to the front of the box.

I'll be back tomorrow to share how I decorated the shelf at the top of each frame, all lit up with the Idea-ology Tiny Lights.
Hugs Kath xxx

Monday, November 27, 2023

Simon Says - Trees

Hi Everyone...welcome to another week on the Simon Says Stamp Monday Challenge Blog. Thank you for joining us for last week's challenge and we hope you can join us this week too because


and the theme for this week is...
TREES
I created a woodland scene in a Tim Holtz/Idea-ology Reliquary Dome using Idea-ology Woodland Trees, Christmas Salvaged Reindeer, Bubbles and lots of Distress Rock Candy Glitter, all illuminated with Idea-ology Tiny Lights. I die-cut Tim Holtz/Sizzix Scribbly Snowflakes Thinlits from Simon Says Silver Glitter card and Tear-Rific Adhesive Sheets and used the decorate the dome.

began by cutting out a well in the cork base of the Idea-ology Reliquary Dome with a craft knife to fix the excess wiring from the Idea-ology Tiny Lights in place and a channel for the wiring to the battery pack so that base would sit flat.
I fed the lights through the hole, tested and applied a thin layer of Distress Grit Paste to cover the top of the base.
I selected the decorations for the dome from Idea-ology items previously decorated. Woodland Trees sprayed with Pine Needles Distress Spray Stain, tipped with Distress Grit Paste and sprinkled with Distress Collage Medium. Idea-ology Bubbles rolled in Distress Collage Medium and also sprinkled with Distress Rock Candy Glitter and an Idea-ology Christmas Salvaged Deer painted with Sterling Foundry Wax and also given the Distress Grit Paste/Distress Rock Candy Glitter treatment on his antlers.
I fixed the items and the Tiny Lights wiring on to the base using hot glue, being careful to avoid the actual lights and applied a coat of Distress Grit Paste over any of the wires that were visible.
I applied double sided adhesive sheet to Simon Says Silver Glitter card and die-cut using Tim Holtz/Sizzix Scribbly Snowflakes Thinlits.
I removed the backing, pressed the snowflakes inside the dome on the back and two snowflakes on the front at the top of the dome.
I sprinkled Distress Mica Flakes on to the base, pressed the dome into place and added twine with Idea-ology Christmas Holiday Bells attached around the cork base.
I placed the dome on to a scrap of felt, marked around the edge with a pen, trimmed and fixed to the bottom using Distress Collage Medium.
I trimmed a piece of Idea-ology Christmas Label Tape which is self adhesive and fixed to the front of the glass.
Time to switch on the lights and the realisation that taking photos of glass, glitter, sparkle, reflection  and Tiny Lights are what us crafters have nightmares about.


You can find all the products I used over at Simon Says Stamp, just click on the links below


Why don't you pop over to the Monday Challenge Blog and check out the amazing creations from my very talented Design Team mates and as always you have until Monday 8am Ohio time...1pm UK time...2pm CET to join in with the chance to win a $25 voucher to spend online at Simon Says Stamp


You can also follow Simon Says Stamp on Instagram
and if you use Instagram...
please add #sssmchallenge to your entry uploads so we can see them on there too

I look forward to seeing what you create this week...
Have Fun and Happy Crafting
Hugs Kath xxx

Friday, November 24, 2023

Wintermas Countdown to Christmas - Day 7

Hello my friends, it's Friday already and here we are at Day 7 on my Wintermas Wonder Box adventure. Behind today's door was a pack of gorgeous Wintermas sparkly sequins and snowflakes.

I made a simple card using the Wintermas Embellishment Mix to decorate the tree shape stencilled on to Distress Black HeavyStock and added a Simon Says Bold Acetate Christmas Sentiment Strip.
I die-cut the tree shape from scrap card using Tim Holtz/Sizzix Stacked Tiles Triangles to create a stencil. I fixed the stencil to a 4" x 5.1/4" panel of Distress Black HeavyStock and used Simon Says Stamp White Pigment ink with a Detail Round Blending Brush to create the tree and the trunk.

I fixed the sequins and snowflakes from the Wintermas Embellishment Mix in place with Distress Collage Medium.
I sprinkled Stampendous Frantage Aged Silver and Chunky White Embossing Enamels over the background and heat set from underneath.
I added Trinity Stamps Frosty Snowflakes on to the background and on top of the sequin snowflakes to add a little dimension.
I pounced Simon Says White Pigment ink around the edges of the panel to create a snowy look. I trimmed Simon Says Bold Acetate Christmas Sentiment Strip, fixed to a scrap of white card and added to the panel using Distress Collage Medium.
To finish I matted the panel on to a white card blank and trimmed to leave a small border
Today is Black Friday in the US and I have many happy memories of November trips to New York and the crazy shopping frenzy and amazing bargains in Macys.
with frequent "catch our breath and rest our feet" pit stops at Bryant Park for delicious coffee and apple cinnamon crepes.
My Black Friday shopping is now confined to online, sitting on the sofa with a cuppa and my laptop. Not as much fun but definitely easier on the feet and less stressful.
Hugs Kath xxx