Happy Friday my friends and it's "Happy Dance" day in the cubbyhole, still November and I'm sharing the first of my Christmas 2021 Home Decor makes using products from the Tim Holtz Christmas 2021 Idea-ology release. I have to confess that I failed miserably in the making department for Christmas 2020 so I'm determined not to go down that route this year and woohoo, I kicked off this fun Christmas making party by decorating a Tim Holtz Idea-ology Vignette Display Panel.

I began by fixing Tim Holtz Idea-ology Collage Tiles to the Idea-ology Vignette Display panel using Distress Collage Medium. The tiles are pre-trimmed to 1.1/2" square and fit perfectly on the 8" x 8" panel. There are 72 tiles in the pack which means there are enough to decorate 2 panels, great value for money. I added strips of Idea-ology Christmas Backdrop Papers to the edges. I drilled a hole in the back of the panel using my trusty Dremel and fixed the Idea-ology Tiny Lights battery pack to the panel using hot glue. I fixed 4 layers of Tim Holtz/Stampers Anonymous Etcetera Scalloped Trims together using Distress Collage Medium Matte to create a shelf and set aside to dry.

I painted the Etcetera shelf with White Gesso and applied Distress Snowfall Grit Paste with a palette knife. I spritzed the Idea-ology Woodland Tree with Rustic Wilderness Distress Spray Stain and once dry, I sprayed again with Distress Resist Spray to seal the colour and allow me to add Distress Grit Paste to the tips with my fingers and it not discolour. I trimmed the frame from Idea-ology Baseboards in half, fixed a piece of vellum on the reverse and added Distress Icicle Crackle Paste with my fingers and set aside to dry. I applied Distress Snowfall Grit Paste randomly on both Idea-ology Baseboard frames with my finger and sprinkled Distress Rock Candy Glitter over the frames, Etcetera shelf and tree. I dropped the Idea-ology Bubbles into a small plastic cup, added drops of Crimson Alcohol ink and Deception Pearl Alcohol ink, swirled them around to colour and tipped out on to kitchen towel to dry.

I applied a mix of Distress Grit Paste and Snowfall Grit Paste around the edges and sides of the panel with my fingers and sprinkled with Distress Rock Candy Glitter. I wound the Idea-ology Tiny Lights around the tree, poking the wires down out of sight, leaving enough left over to add to the Etcetera Trims shelf and temporarily laid the tree on the panel to aid placement of the other elements. I fixed the frames from Idea-ology Baseboards in place with hot glue, added Idea-ology Christmas White Remnant Rubs to the vellum and then fixed the tree in place with hot glue. I added Distress Embossing ink to the poinsettia from Idea-ology Christmas Layers using a Distress Embossing Dabber, sprinkled with Distress Frosted Crystal Embossing Powder and heat set. I scribbled Rustic Wilderness Distress Crayon to my glass media mat and applied over the leaf areas to darken using a Distress Detailer Brush. I fixed in place with foam adhesive and Distress Collage Medium.

I spritzed Idea-ology Crinkle Ribbon with Rustic Wilderness Distress Spray, spritzed with water, scrunched up in my hand and dried. I fixed the ribbon to the Etcetera Trims shelf, fixed the shelf in place with hot glue and added a ribbon double bow.

Then it was time to embellish. I applied a thin coat of Glossy Accents to the Idea-ology Confections, sprinkled with Distress Rock Candy Glitter and fixed to the tree along with the Idea-ology Bubbles using a generous dot of Distress Collage Medium. I used the same process on the stars from Idea-ology Baseboards. I added dots of hot glue to the strip of Tiny Lights to fix it down on the Etcetera Trims shelf and added Idea-ology Bubbles also held in place with hot glue. I applied Distress Grit Paste to the bubbles to create snowballs and sprinkled with Distress Rock Candy Glitter. I added extra bits and pieces from the Idea-ology Baseboards pack, an Idea-ology Christmas Quote Flair button and a scrap trimmed from Idea-ology Christmas Vellum Scenes. To fill in the gap at the left hand side of the panel, I added a "stick" from my garden, painted randomly with white gesso. Once dry, I applied Distress Grit Paste with my fingers and yes, you've guessed it right, sprinked with Distress Rock Candy Glitter.

To finish, I coloured Jingle Bells from my stash with the Alcohol inks and fixed in place beneath the bows with hot glue.
Then it was time to turn on the Tiny Lights and hey it doesn't matter how old you are, there's that magical feeling of wonder that takes you right back to when you were 5 years old and so excited for Christmas and the arrival of Santa.
But before I can get stuck into creating a Christmas "Village"
I need to take one for the team, knuckle down and finish what I started for Christmas 2020.
Have a great weekend whatever you have planned, I'm looking forward to another fabulous Masterclass from my adorable Professor. The Saturday night Stamps and Stencils party will be held over at Tim and Mario's place at 9.00am PT, 12 noon EST or 5.00pm if you're in the UK, so set your alarm, get your snacks ready and I'll see you there.
Hugs Kath xxx


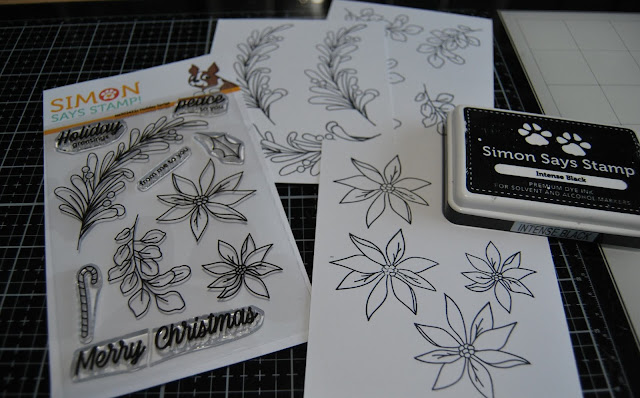 I coloured the images using the matching Holiday Sprigs stencil with Distress Oxide inks using Simon Says Mini Blender Brushes and for this colouring challenged crafter, the stencil made it so easy.
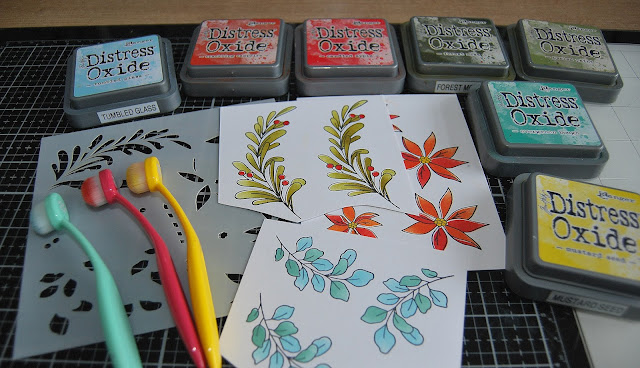 I trimmed a panel of Distress Watercolor card to 4" x 5.1/4" and applied Peeled Paint Distress Oxide ink through the Peace Joy Hope Love stencil placed at an angle and with the stencil still in place, applied Distress Snowflake Grit Paste with a palette knife, sprinkled with Distress Rock Candy Glitter and set aside to dry. A little tip, do not put any paste left on your palette knife back in the jar because chances are it will have picked up some of the green colour and although it looked OK, I was proved right when I wiped it off on paper towel.
 There are matching dies for the Holiday Sprigs stamp set but I don't have them yet so I fussy cut the foliage and two sizes of Poinsettias leaving a small white border and fixed in place with foam adhesive.
 I coloured the images using the matching Holiday Sprigs stencil with Distress Oxide inks using Simon Says Mini Blender Brushes and for this colouring challenged crafter, the stencil made it so easy.
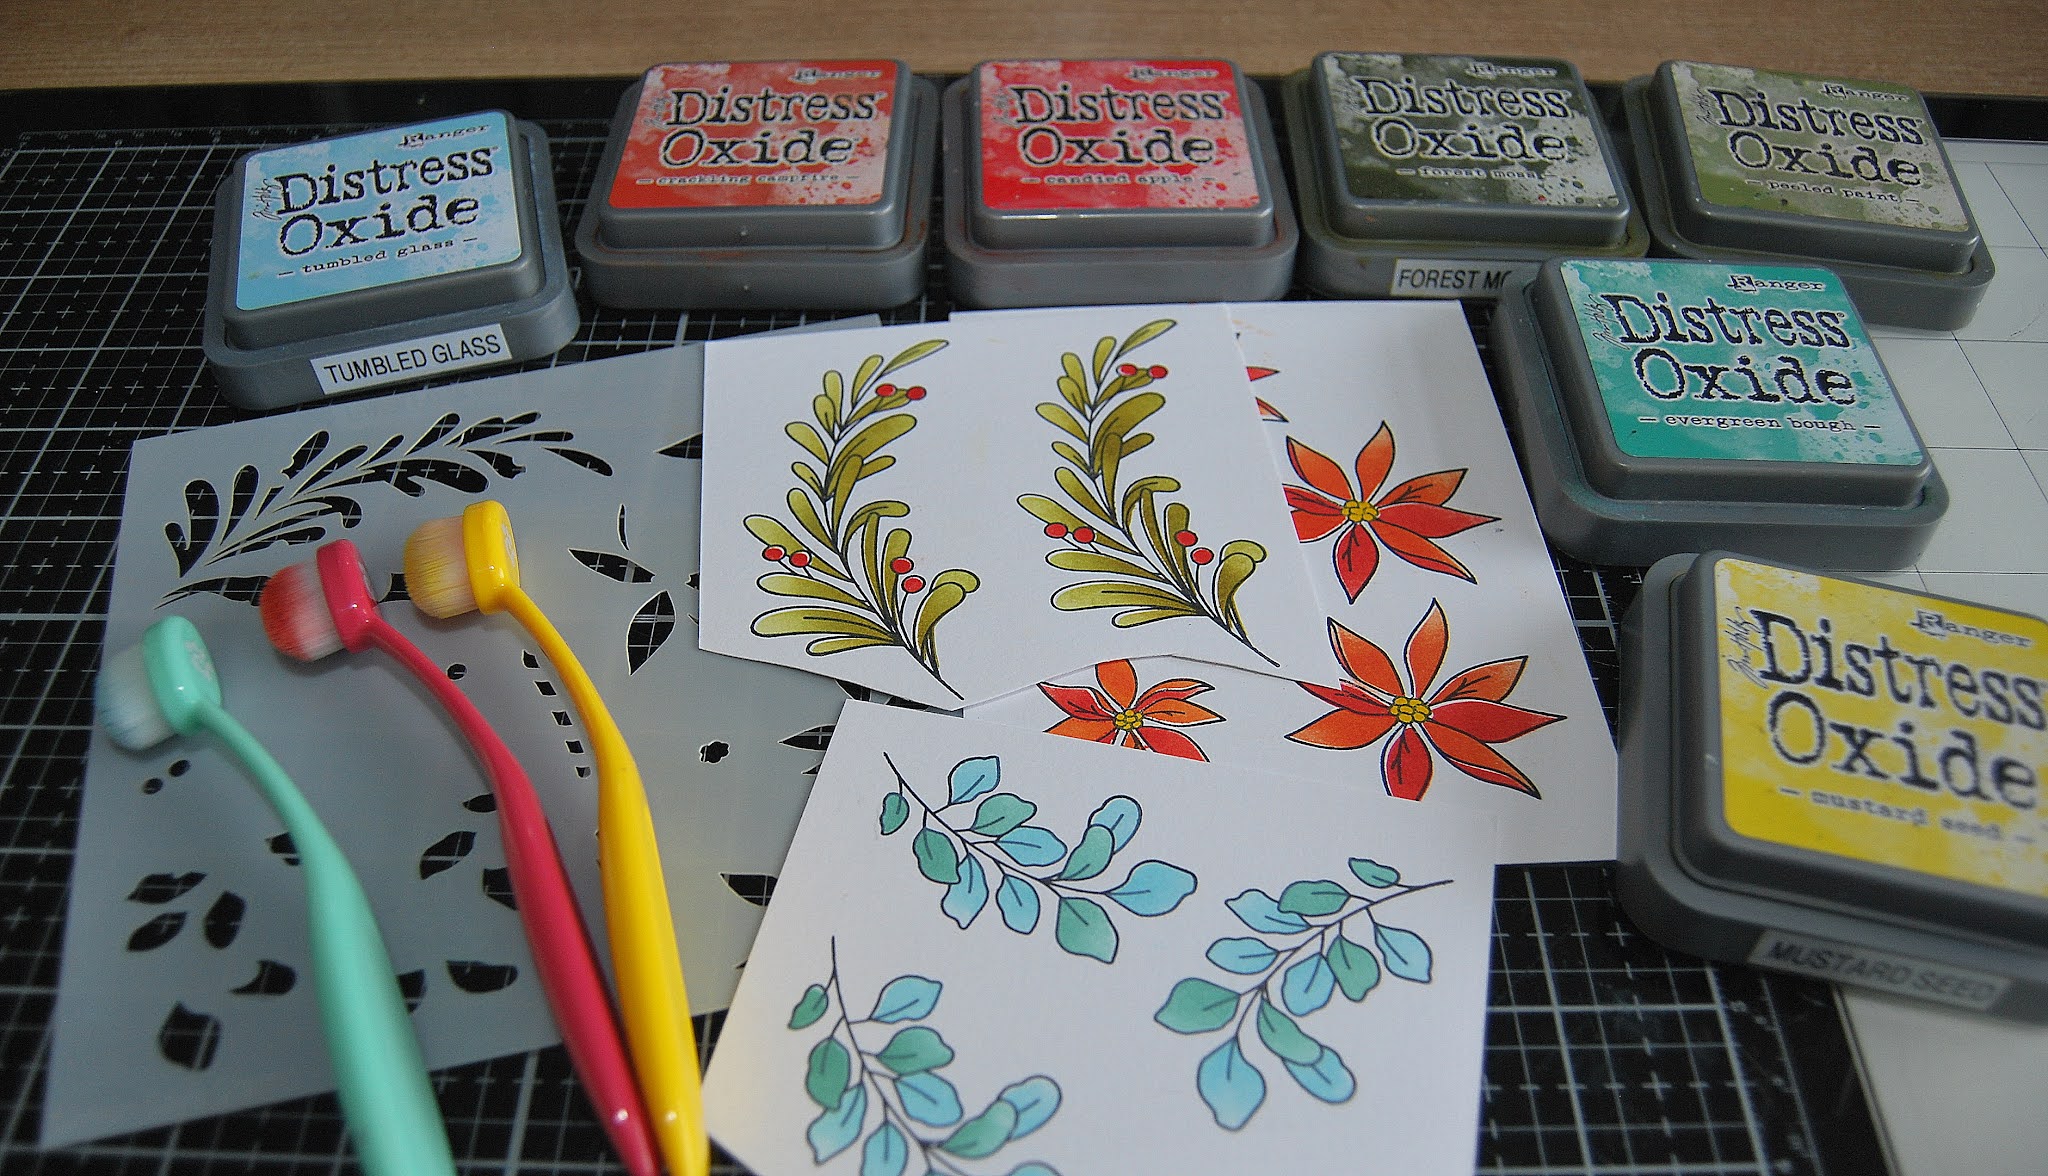 I trimmed a panel of Distress Watercolor card to 4" x 5.1/4" and applied Peeled Paint Distress Oxide ink through the Peace Joy Hope Love stencil placed at an angle and with the stencil still in place, applied Distress Snowflake Grit Paste with a palette knife, sprinkled with Distress Rock Candy Glitter and set aside to dry. A little tip, do not put any paste left on your palette knife back in the jar because chances are it will have picked up some of the green colour and although it looked OK, I was proved right when I wiped it off on paper towel.
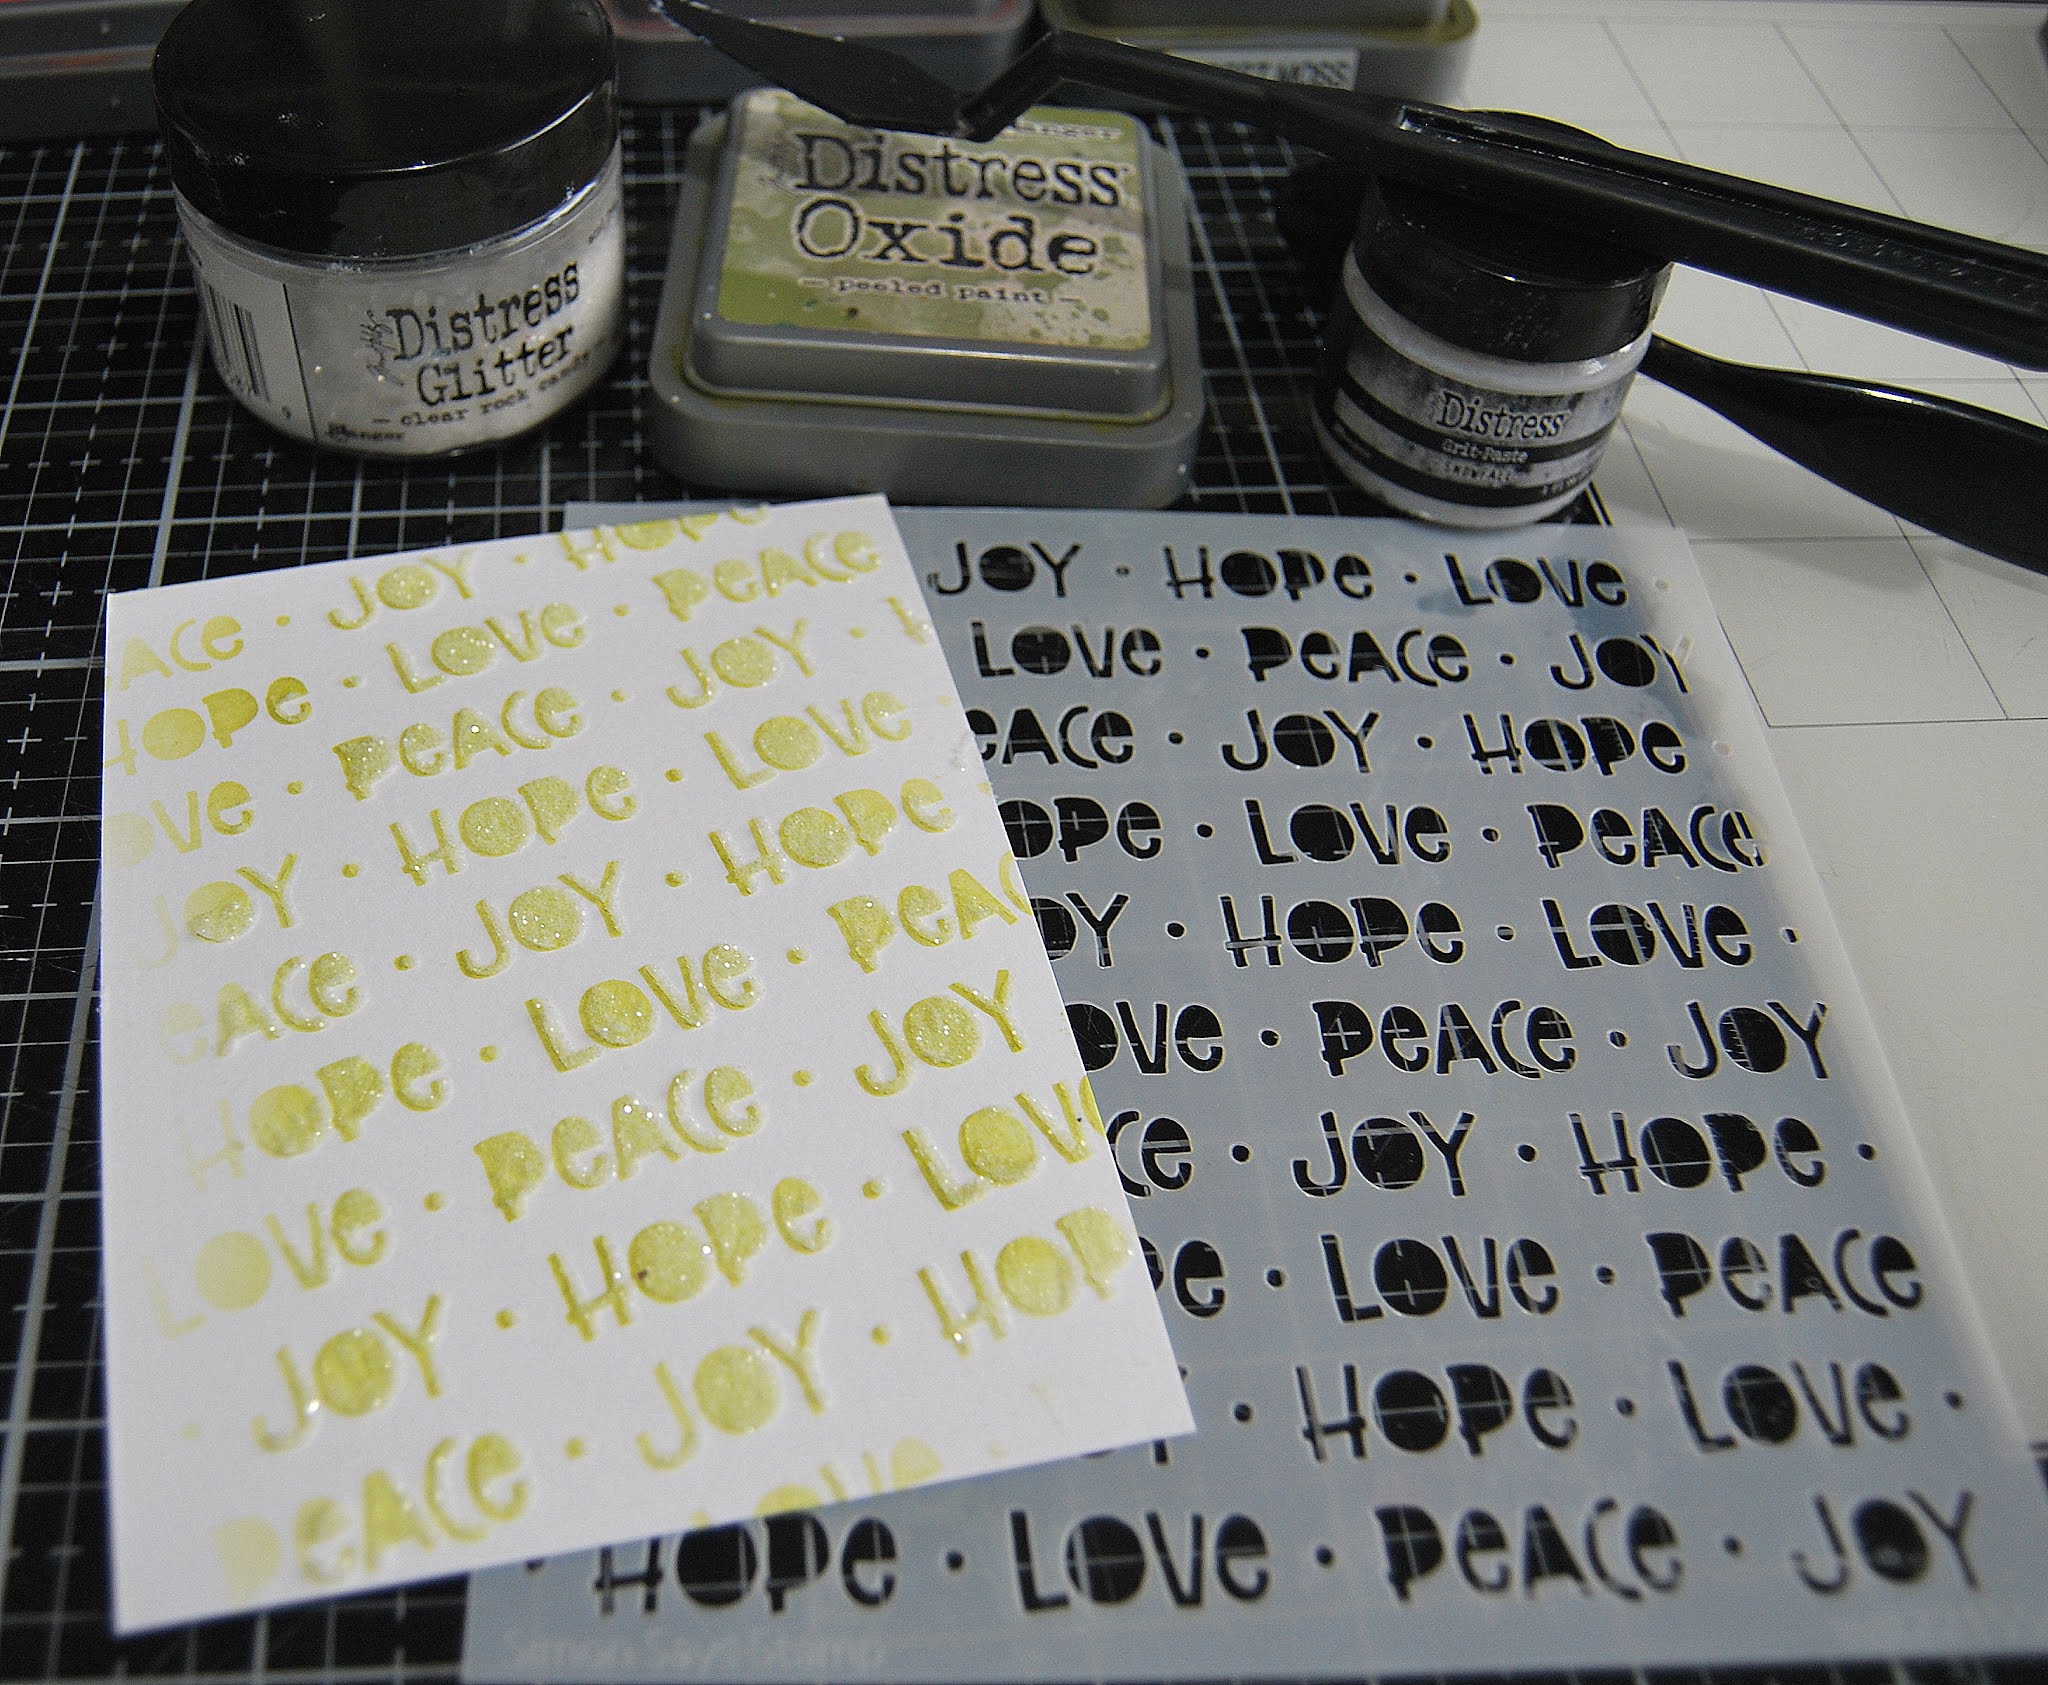 There are matching dies for the Holiday Sprigs stamp set but I don't have them yet so I fussy cut the foliage and two sizes of Poinsettias leaving a small white border and fixed in place with foam adhesive.