

Hi Everyone...welcome to another week on the Simon Says Stamp Monday Challenge Blog. Thank you for joining us for last week's challenge and we hope you can join us this week too because


and the theme for this week is...
THANKS/THANKSGIVING
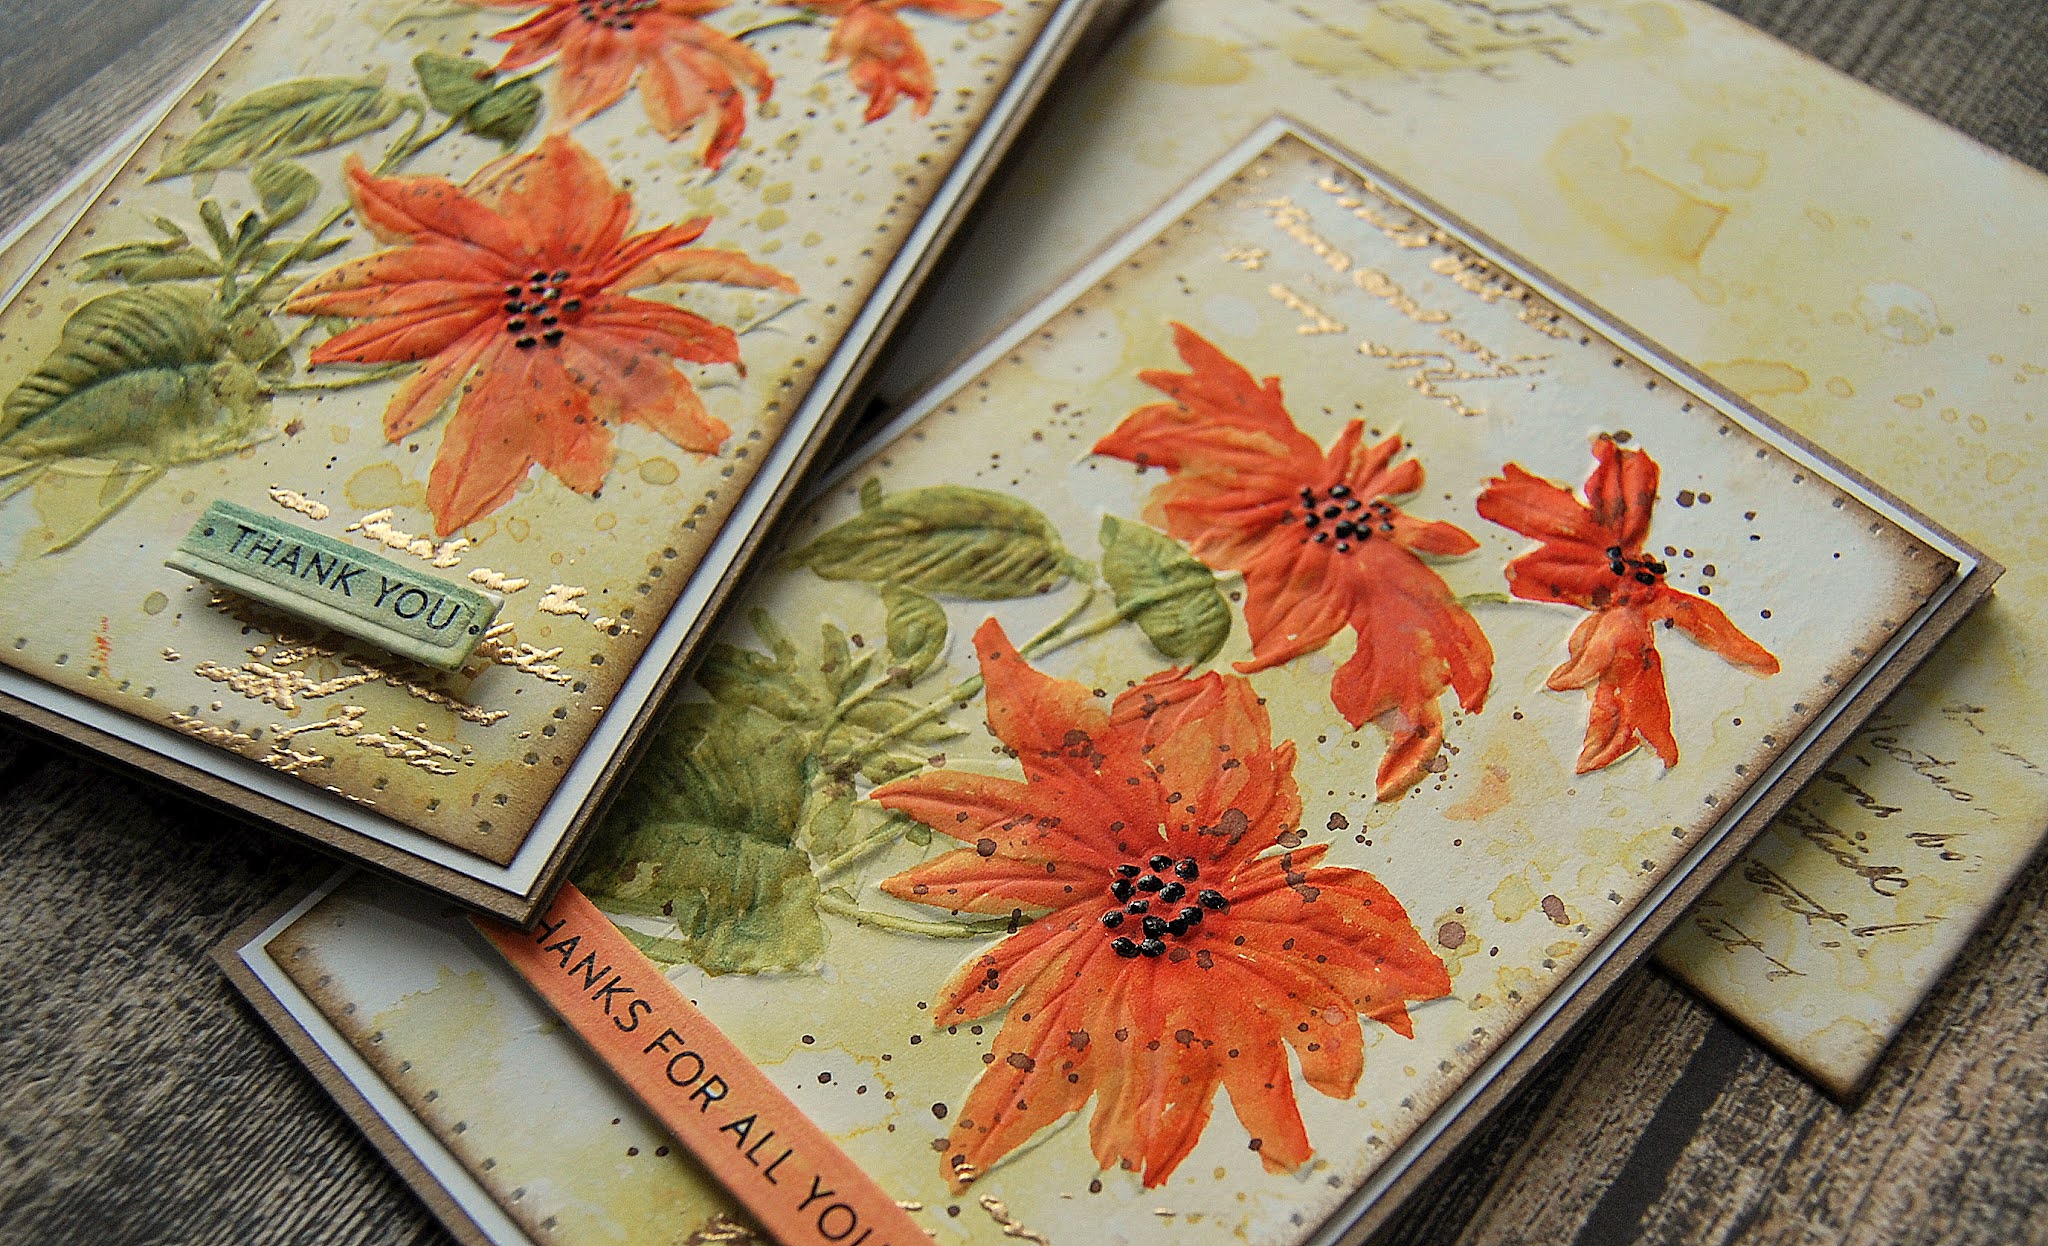
It's that time of year again when the cubbyhole goes into mass production mode making packs of thank you cards and envelopes to donate to one of my favourite local charities. I used the Tim Holtz/Sizzix Mini Poinsettia 3D Texture Fade Embossing Folder, coloured with Crackling Campfire and Shabby Shutters Distress Re-inkers, the script image from Tim Holtz/Stampers Anonymous Dearly Departed, heat embossed with Simon Says Antique Gold Embossing Powder and added Simon Says Thanks Sentiment Strips, coloured to match.


When it comes to mass production, the right tools make the job so much easier and a big thank you to Tim, Mario and Tonic Studios for sending me this mini but mighty little cutie, absolutely perfectly sized for using with smaller projects and sits perfectly on my desk alongside my Sidekick.

I began by smooshing Antique Linen and Old Paper Distress Oxides on to the craft mat on my Glass Media Mat, spritzed with water and dipped Distress Watercolor card into the inks. I dried the panels and tapped back into the remaining droplets until I happy with the neutral backgrounds. I trimmed the panels using my new friend to 2.3/4" x 4.1/4", spritzed water on the back of the panel and embossed using Tim Holtz/Sizzix Mini Poinsettia 3D Embossing Folder.

I coloured the embossed images using Crackling Campfire and Shabby Shutters Distress Reinkers and a Distress Detailer Brush.

I inked the script stamp from Tim Holtz/Stampers Anonymous Dearly Departed with Versamark ink and holding the stamp in my hands, stamped randomly on the panels, sprinkled with Simon Says Antique Gold Embossing Powder and heat set.

I coloured the Simon Says Sentiment Strips with the left over reinkers and die-cut using Simon Says Nested Banners die.


I coloured the envelopes in the same way as the card backgrounds and stamped the script in Walnut Stain Distress Ink. I added stitching detail to the edges of the panels using my sewing machine without thread, inked the edges of the panels and added splatters using the Walnut Stain Distress Ink. I added the sentiment strips popped up on foam adhesive.

I coloured the flower centres with a Sakura Black Glaze Pen.

To finish I matted the panels on to white card trimmed to be 1/8" larger and fixed to 3" x 4.1/2" Distress HeavyStock card blanks.


Why don't you pop over to the Monday Challenge Blog and check out the amazing creations from my very talented Design Team mates and as always you have until Monday 8am Ohio time...1pm UK time...2pm CET to join in with the chance to win a $25 voucher to spend online at Simon Says Stamp

You can also follow Simon Says Stamp on Instagram
and if you use Instagram...
please add #sssmchallenge to your entry uploads so we can see them on there too

I look forward to seeing what you create this week...
Have Fun and Happy Crafting
Hugs Kath xxx
Hi Kath,Happy Monday.Your cards are absolutely mind blowing.Sooo Beautiful in every way.Thanks for all the hard work posting how you achieved the end result.xx
ReplyDeleteHi, I love these cards, please is there a tutorial you do on how to make envelopes please
ReplyDeleteAbs Beautiful card and layout gorgeous vibrant colour used x
ReplyDelete