Monday, July 26, 2021

Simon Says - Wild With Washi

Hi Everyone...welcome to another week on the Simon Says Stamp Monday Challenge Blog. But first I have exciting news to share, the Summer Vacation Kid's Challenge is back over on the Wednesday Challenge Blog and it's time to let your kids loose in your craft room. For all the details on how to enter, click HERE

and there are not 1, not 2 but 3 fabulous Simon Says Stamp Grab Bags for the young budding artists to win...

Thank you for joining us for last week's challenge and we hope you can join us this week too because


and the theme for this week is...
WILD WITH WASHI
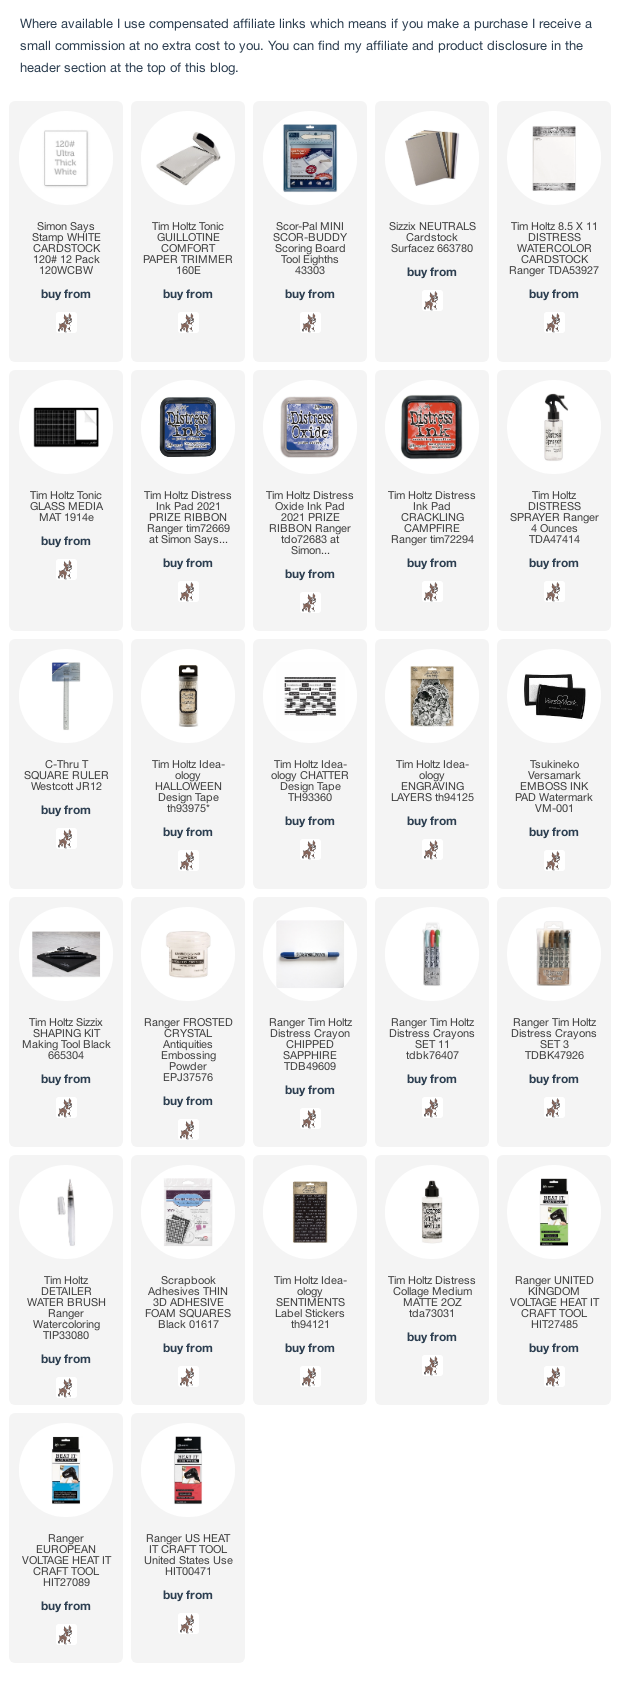
Go Wild With Washi, they said and having been an avid collector for years of Tim Holtz Design Tape, I have more than enough to go wild with.  I made a trio of cards using Prize Ribbon Distress Ink and Distress Oxide ink and Crackling Campfire Distress Ink to colour watercolour card backgrounds, added strips of Design Tape, Idea-ology Layers Engraving, coloured with Distress Crayons and Sentiments Label Stickers.
 

I began by smooshing the 3 ink pads on to the craft mat on my glass media mat, spritzed with water and laid the panels into the ink and dried. I then tapped the panels into the inks to pick up the remaining droplets.
I had a root around in my collection of Tim Holtz Ideaology Design Tape, yes there is a lot and this is only the bottom layer but in my defence I've been collecting from way back in the day and there is such a lot on each roll, my story and I'm sticking to it.
I added the strips of Design Tape using my T Square Ruler to make sure they were straight on the panels.
I selected 3 of the gentlemen images from Tim Holtz Idea-ology Layers Engraving, tapped the Versamark ink pad over each image, sprinkled with Ranger Antiquities Frosted Crystal Embossing Powder and heat set until melted. Tim's Squeezers from the Sizzix Shaping Kit are just the job to hold the images at arm's length out of the way of the "gets very hot" embossing gun.
The Layers Engraving are printed on a coated paper which makes colouring difficult but the Frosted Crystal Embossing Powder gives tooth to the surface and allows you to colour with Distress Crayons. I used Crackling Campfire for the jackets, Chipped Sapphire (as we don't have a Prize Ribbon Distress Crayon yet) Vintage Photo for the hair and moustaches and Antique Linen  for the skin, all applied using a Distress Detailer Brush.
I fixed the Layers Engraving in place using foam adhesive and added Idea-ology Sentiments Label Stickers.
I trimmed the panels to 4" x 5.1/4" and fixed to A2 white card blanks covered with grey/blue card from Sizzix Neutral Cardstock pack.


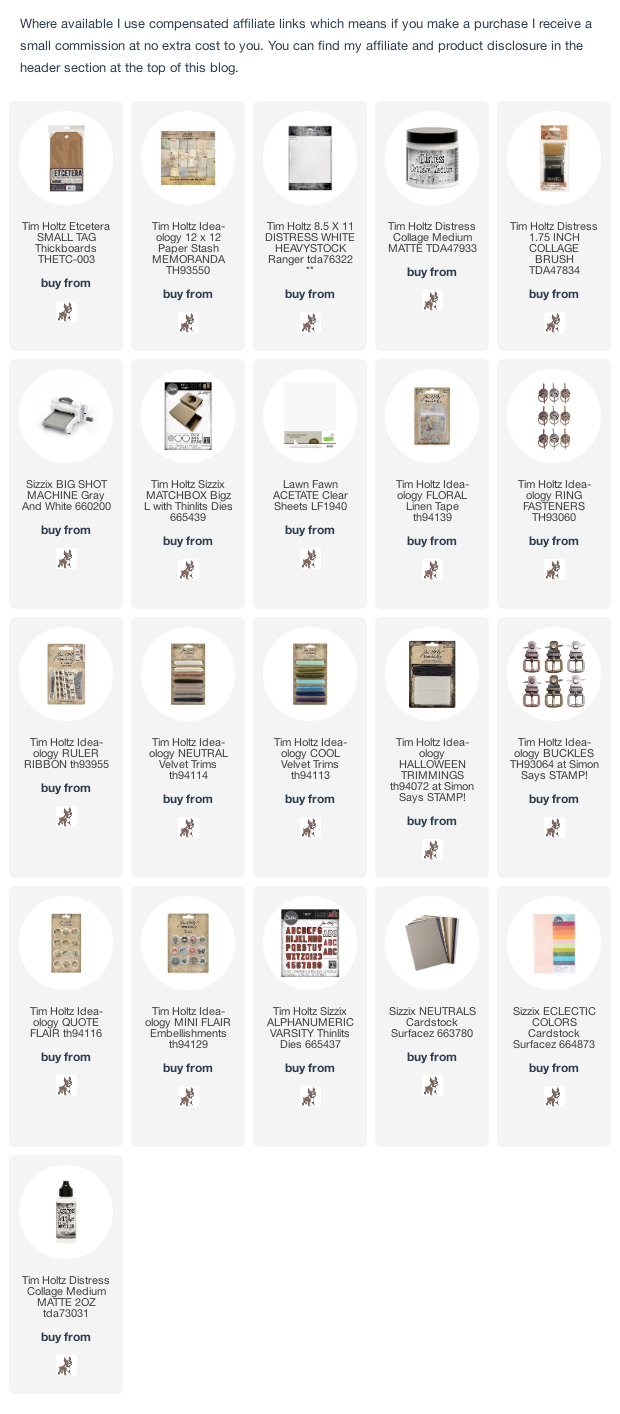
You can find all the products I used over at Simon Says Stamp, just click on the links below


Why don't you pop over to the Monday Challenge Blog and check out the amazing creations from my very talented Design Team mates and as always you have until Monday 8am Ohio time...1pm UK time...2pm CET to join in with the chance to win a $25 voucher to spend online at Simon Says Stamp


You can also follow Simon Says Stamp on Instagram
and if you use Instagram...
please add #sssmchallenge to your entry uploads so we can see them on there too

I look forward to seeing what you create this week...
Have Fun and Happy Crafting
Hugs Kath xxx

Wednesday, July 21, 2021

Tim Holtz/Sizzix Chapter 3 - Matchbox Sewing Tidy

Hi my friends, I'm sharing the Sewing Box Tidy I made for the YouTube Live launch of Tim Holtz/Sizzix Chapter 3 dies using the "this will get so much use" Matchbox BigZ L/Thinlits die. If you missed the Live you can watch the replay to catch up with all the products from this release and feast your eyes on the amazing amazing inspirational projects from the makers over on Tim's blog HERE.


I don't have a step by step tutorial for this project because once I started, I was caught up in the process of  "would it work or not" but it's pretty self explanatory. I die-cut 5 matchboxes from Distress Media White HeavyStock, folded and assembled using the score lines left by the die. Tim shared a demo during the Live on how to assemble the matchboxes on the YouTube Live at approx 30 minutes. I fixed 4 of the matchbox sleeves together using Distress Collage Medium Matte, trimmed Distress Media White HeavyStock, covered with Idea-ology Memoranda paper and fixed in place to create the top and sides, in essence, creating a box around the sleeves. I then turned my attention to the boxes themselves. I fixed Idea-ology Floral Linen Tape which is self adhesive around the outside edges and folded over to the inside. I punched a hole in the front of each drawer and added an Idea-ology Ring Fastener as a drawer pull.
I intended this to be a decor piece rather than a practical item so I applied a generous amount of Distress Collage Medium Matte into the boxes containing the buttons and added more as I layered up the buttons, one, to make them more secure for the journey across the pond and second, I had visions of Tim tipping it up, the buttons flying all over his studio floor and me being on the naughty step. I used the matching Thinlits die that comes with the Matchbox BigZ L to create the centre aperture in the sleeve, added acetate behind and assembled.
And that's it my friends, not nearly as complicated as it might seem. I covered a Small Etcetera Tag with co-ordinating Memoranda papers, fixed the Matchboxes in place with Distress Collage Medium, tucked Idea-ology Ribbons and Trims into the drawers and decorated with various bits and pieces of Idea-ology and cotton reels and buttons from my stash.
To finish I die-cut the word "SEW" from red and cream cardstock using the Alphanumeric Varsity Thinlits.

This is the last of the projects I made for the Chapter 3 launch and I hope you have enjoyed seeing them in more detail as much as I enjoyed making them. I'll be back soon to share sneaky peeks of  "coming soon" makes with more fabulous products from Tim Holtz and Sizzix. In the meantime, have fun with whatever you are making.
Hugs Kath xxx

Monday, July 19, 2021

Simon Says - Food and/or Drink

Hi Everyone...welcome to another week on the Simon Says Stamp Monday Challenge Blog. But first I have exciting news to share, the Summer Vacation Kid's Challenge is back over on the Wednesday Challenge Blog and it's time to let your kids loose in your craft room. For all the details on how to enter, click HERE

and there are not 1, not 2 but 3 fabulous Simon Says Stamp Grab Bags for the young budding artists to win...

Thank you for joining us for last week's challenge and we hope you can join us this week too because


and the theme for this week is...
FOOD and/or DRINK
Did I happen to mention how much I love Prize Ribbon, the latest colour to join the Distress Family, in fact, you could say it is just my cup of tea so I decorated an #8 Etcetera Tag to celebrate it's arrival.

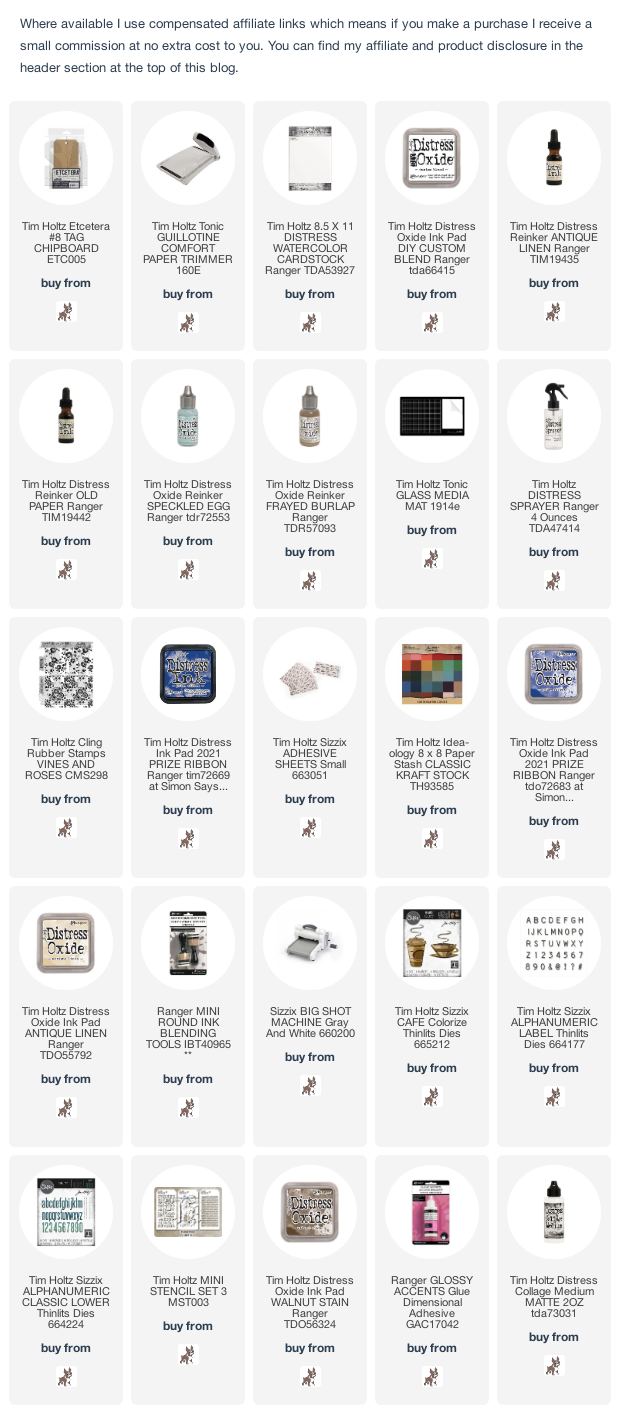
I began by trimming Distress Watercolor card to be slightly larger than the #8 tag, smooshed my favourite Custom Ink Pad (Antique Linen/Old Paper Distress Inks and Speckled Egg and Frayed Burlap Distress Oxide Inks) on to the craft mat on my Glass Media Mat, spritzed with water and laid the panel on to the inks. 
I dried the panel and tapped it back into the inks repeatedly to pick up the remaining droplets, drying between layers.
I inked the background stamp from Tim Holtz/Stampers Vines and Roses with Prize Ribbon Distress Ink, spritzed with water and holding the stamp in my hands, pressed on to the panel.
I fixed Sizzix Adhesive Sheet to Distress Watercolor card, coloured with Prize Ribbon and Antique Linen Distress Oxide inks using a mini round blending tool and brown Classic KraftStock, die-cut the tea cup using 'Tim Holtz/Sizzix Cafe Colorize Thinlits and assembled following the indent marks left by the die on the die-cut pieces.
I die-cut the title from brown Classic KraftStock using Tim Holtz/Sizzix Alphanumeric Label and Classic Lower Thinlits.
I applied Walnut Stain Distress Oxide ink through the Tim Holtz/Stampers Anonymous Splatters Mini Layering Stencil from Set 3
I die-cut small hearts using Tim Holtz/Sizzix Heartfelt BigZ die, coloured with Prize Ribbon Distress Oxide ink, fixed in place with Distress Collage Medium and added Glossy Accents to the hearts and Classic Lower letters.


You can find all the products I used over at Simon Says Stamp, just click on the links below


Why don't you pop over to the Monday Challenge Blog and check out the amazing creations from my very talented Design Team mates and as always you have until Monday 8am Ohio time...1pm UK time...2pm CET to join in with the chance to win a $25 voucher to spend online at Simon Says Stamp


You can also follow Simon Says Stamp on Instagram
and if you use Instagram...
please add #sssmchallenge to your entry uploads so we can see them on there too

I look forward to seeing what you create this week...
Have Fun and Happy Crafting
Hugs Kath xxx

Sunday, July 18, 2021

More Prize Ribbon Love

Hi my friends, here we go again, I'm still in Prize Ribbon mode and sharing another card I made for Simon Says Stamp using this glorious new blue, a great addition to the Distress Family. If you missed the YouTube Live launch of this new colour, you can always catch up with Tim walking us through the new colour products and sharing comparisons of this gorgeous colour with other blues and colours from the Distress Family and the amazing projects from the makers over on his Blog HERE. As luck would have it, the other new kid on the block, the very dapper gent from Tim Holtz/Stampers Anonymous Observations and his sidekick, the Dotted Layering Stencil just happened to be still sitting on my workdesk ready to make another card.


I began by trimming Distress White HeavyStock to 4.3/4" x 6.3/4", spritzed with water and Prize Ribbon Distress Ink and Prize Ribbon and Vintage Photo Distress Oxides. I'm loving the blue and brown mix and the gorgeous undertones from Prize Ribbon Distress Oxide, me thinks this will be a favourite combo in the future.
I placed the panel in the bottom left corner of my stamp platform and stamped the gent inked with Black Soot Distress Archival Ink. I left the stamp on the lid of the platform, important for the stamp, paint, stamp technique I used on this card.
I applied Prize Ribbon Distress Oxide ink through the Dotted Layering Stencil using a mini round blending tool
and repeated this step using White Gesso to add a halo/highlight effect
I painted the gent using Antique Linen, Vintage Photo and Prize Ribbon Distress Paint. The paint will reactivate the sprays underneath so it is important to dry between layers and repeat as necessary until you are happy with the effect.
I re-stamped the image without re-inking to define the detail of his eyes, eyebrows, nose, mouth and moustache so that I could add some shading using Vintage Photo Distress Paint and White Gesso on his eyes. I can't stress enough how important it is to make sure the painted surface is completely dry before moving on to the final step. I know he looks horrendous at this stage but don't be despondent because...
I re-inked the stamp and voila, didn't he scrub up well with his top coat of Black Soot Distress Archival ink.
I inked the gears image from the stamp set with Versamark ink, stamped randomly on the background, sprinkled with Simon Says Stamp Antique Gold Embossing Powder and heat set.
To finish I inked one of the sentiments from the stamp set with Black Soot Distress Archival, stamped on to a scrap of card coloured in the same way as the background and heat embossed with Ranger Superfine Clear Embossing Powder. Although Distress Archival inks are permanent, they don't have an immediate drying time so are perfect for using with embossing techniques. I fixed the sentiment strip to the panel and trimmed using Tim Holtz/Tonic Studios Deckle Edge Trimmer. I covered the gent image with a scrap of paper and added splatters of Tarnished Brass Distress Paint. I fixed the panel to a slightly bigger panel of neutral card and attached to a 5" x 7" white card blank.
I can't wait to try out this beautiful blue with other colour combinations, in the meantime, have fun with whatever you are creating.
Hugs Kath xxx