Friday, June 30, 2017

Happy Birthday Buddy...

Hi folks...where does time go...is it really 11 years since this bundle of snuggliness came into my life...
and oh boy was that a culture shock...he ate everything in sight...from the flowers in the garden...poisonous daffodil bulbs and Cotoneaster berries...his Dad's socks...a whole pizza box and many more unmentionables...all with no adverse effects and despite his advancing years is still prone to the odd naughty hooligan moment.
there are now 2 senior citizens in the cubbyhole crew with more silver threads in their hair than gold but we rub along nicely together and my furry elder statesman takes all the crafty tantrums and grumpy moments in his stride...only commenting with the occasion sigh. He's my 24/7 best friend...cosy hot water bottle...cubbyhole and sofa companion and likes nothing better than snuggling up for a "it's a dog's life" afternoon snooze...
or supervising when I'm working in the garden...
but age is just a number and he can't count so I'm not expecting he'll be acting his age instead of his shoe size anytime soon and I wouldn't have it any other way. I'm looking forward to many more happy hooligan years with my adorable best friend and trusty cubbyhole partner.
HAPPY BIRTHDAY BUDDY
LOVE YOU LOADS
Hugs Kath xxx

Thursday, June 29, 2017

Snug As A Bug...

Hi everyone...I decided to hang up my stamping/inking hat yesterday and look out the sewing machine to have some fun with the pile of gorgeous Eclectic Elements fabrics that Tim and Mario so generously shared with me...
and made this with two fabrics from the beautiful Wallpaper Collection...can you guess what it is...a hot water bottle cover perhaps...well you're thinking along the right lines

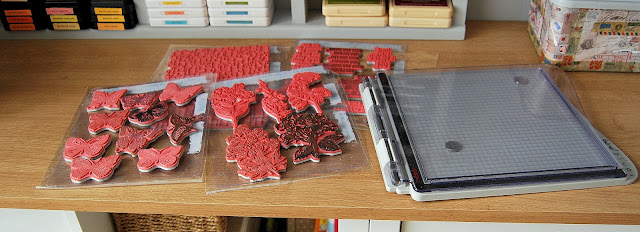
it's a SNUG AS A BUG IN A RUG sleeve for my Stamp Platform...
and before you get the impression that I'm a quilting clever clogs...I have to say a big thank you to my lovely friend Linda for sharing this amazing material with me...an iron-on vilene with "quilting for idiots" stitching lines...
 just follow the lines and voila...so easy even I managed it...

 and of course I couldn't resist adding a little bit of Idea-ology decoration...

and a big bow to finish it off...it took longer to turn this very long strip of fabric right side out than it did to make the sleeve...
and there's good news on the cubbyhole make-over...hunky joiner is coming today to measure up and will be back next week to finish everything off...yeeehaaa.
Hugs Kath xxx

Tuesday, June 27, 2017

Another problem bites the dust...

Hi Everyone...I have a question for you...why is it when you have an idea in your head and you're looking for something in particular you can never find it. I've been searching local stores for storage baskets to sit on my countertop to hold the piles of stuff that seem to clutter up my happy space but everything was either NEON BRIGHT/FRILLY and FLOUNCY/TOO BIG or TOO SMALL.
And what do you know...the solution was right under my nose in the kitchen...if I could transform the cheap as chips but sturdy enough to cope with subzero temperatures in the freezer plastic storage containers with a bit of magic fairy decoupage wand waving...they would be ideal.
So armed with a Distress Collage Brush...a tub of Mod Podge that I found in the darkest depths of the cubbyhole whilst decluttering and the scraps from TWO...yes how did I land up with TWO pads of Tim's fabulous Correspondence papers I set to work ...not entirely sure if my latest hare-brained idea would work but hey ho...in for a penny...in for a pound.
I fixed down the larger torn pieces first...
followed by layers of smaller pieces and set aside to dry. I did cover the inside bottom of the boxes but because the papers are double sided...didn't bother with the sides...
I gave the lip of each box two coats of paint and then applied two coats of Mod Podge inside and out to seal...
and for the price of two cheap containers, half a pot of  Modge Podge and an hour of my time, I now have a container to keep "happy mail" new arrivals tidy until I get round to playing with them...
 and a container for card scraps, handy for stamping or die-cutting...
a killing two birds with one stone "another problem bites the dust" adventure which has made a little bit of a dent in that mountain of paper stash and solved the clutter problem at the same time but it's time to head back to the crafty production line today starting off with a red rubber inking session for a magazine commission...
I'm on a mission...determined to get up to speed with the crafty list so that I'll be ready for a much loved treat...my annual "anyone for tennis/strawberries and cream " Wimbledon couch potato fortnight.
Hugs Kath xxx

Monday, June 26, 2017

Simon Says...Stencil It

Hi Everyone...welcome to another week on the Simon Says Stamp Monday Challenge Blog...thank you for joining us for last week's challenge...we hope you can join us this week too because...

and the theme for this week is...
STENCIL IT
I love stencils...they are truly my go-to favourites when it comes to creating depth and interest on backgrounds so I looked out my Dylusions Journal for some fun playtime with Distress Oxide inks. I started off with a light wash of Cracked Pistachio applied with a baby wipe and then smooshed (technical term) Cracked Pistachio and Fossilized Amber on to a small piece of non-stick craft mat, spritzed with water and pounced the mat on to the pages...dried with the heat tool and repeated until I was happy with the coverage.
I then applied Ranger Opaque Texture Paste through the beautiful Circular Lace stencil from Simon Says and left to dry.
Time to look out some of my favourite Idea-ology Mini Layering Stencils...Mosaic from Set 28 using Fossilized Amber...
Ringer from Set 7 using Worn Lipstick and the beautiful Roses from Set 25 using Cracked Pistachio...I just love how the Distress Oxide colours layer over each other...
I die cut flowers from Sizzix/Tim Holtz Wildflowers 2 Thinlits and coloured with Worn Lipstick...Fossilized Amber and Cracked Pistachio...
fixed to the journal page with Distress Collage Medium Matte. I also stamped the background with the script stamp from Tim Holtz/Stampers Anonymous Victorian using Potting Soil Archival Ink...
added Idea-ology Butterfly Design Tape...
and created shadows around the Wildflowers with the Walnut Stain Distress Marker using Ranger's Detailer Brush...
I used my favourite stamping trick...stamping the sentiment from Tim Holtz/Stampers Anonymous Way With Words on to Plain Tissue Wrap using Potting Soil Archival Ink.
cut the sentiment into sections and fixed in place with Distress Collage Medium Matte...


And if you love Distress Oxides as much as I do...Tim will be sharing  with us the 12 new colours joining the Oxide family soon on Facebook Live today...9.00am PT/12.00 noon ET/5.00pm if you're in the UK and 6.00pm in Europe...woohoo...I've got my front row seat booked...hope to see you there.

You can find all the products I used on my project over at the fabulous Simon Says Stamp online store...just click on the links below...

Why don't you pop over to the Monday Challenge Blog and check out the amazing creations from my very talented Design Team mates and our fabulous Guest Designer Anne. As always you all have the chance to win a $50 gift voucher to spend at Simon Says StampYou have until Monday 8am Ohio time...1pm UK time...2 pm CET to join in...

You can also follow Simon Says Stamp on Instagram
and if you use Instagram...
please add #sssmchallenge to your entry uploads so we can see them on there too
I look forward to seeing what you create this week...
Have Fun and Happy Crafting
Hugs Kath xxx
v