Friday, October 30, 2020

Inspired by Autumn and Tim Holtz

Hi my friends, it's been a very inky week in the cubbyhole, my trusty splatbox has been working flat out to create lots of backgrounds ready for the next Distress Ink Facebook Live instalment from my adorable Professor and his fabulous sidekick Mario, tomorrow at 5pm (due to the clocks going back last weekend) if you're in the UK. If you missed last week's amazing, inspiring masterclass, you can watch it on Tim's blog HERE. I'm sharing a card I made with one of those backgrounds.


I used the background on the right, a 4.1/4" x 5.1/2" panel of Distress Mixed Media HeavyStock and used Peeled Paint and Crackling Campfire Distress Spray Stains and Distress Oxides Sprays, with a little Speckled Egg and Ground Espresso Distress Oxide Sprays added to the mix, Distress Texture Paste Matte applied through the Script Mini Layering Stencil from Set 49 and leaves from Tim Holtz/Stampers Anonymous Nature's Wonder stamped with Distress Embossing ink and heat set with Simon Says Stamp Antique Gold Embossing Powder.
I die-cut an aperture in the panel using Tim Holtz/Sizzix Stitched Rectangles Thinlits and saved the inner section to use on another card.
At this stage I intended to make a shaker card so I taped 2 of the rectangle dies together and die-cut a frame, which I heat embossed with Simon Says Stamp Antique Gold Embossing Powder and used Ground Espresso Distress Crayon to add shading and accentuate the stitching details.
I trimmed Distress Watercolor card to the same size, spritzed with Antique Linen Distress Oxide Spray, dried and coloured lightly with Crackling Campfire Distress Oxide using a blender brush. I applied Peeled Paint and Crackling Campfire through the Script Mini Layering Stencil, spritzed with water and dabbed to create that water droplet effect.
I placed a spare craft mat from my Glass Media Mat into my splatbox and spritzed panels of Distress Watercolor card with Peeled Paint and Crackling Campfire Distress Sprays. After drying I tapped them back into the remaining droplets and repeated until I was happy with the background. I inked the leaf images from Tim Holtz/Stampers Anonymous Nature's Wonder with Ground Espresso Distress Archival ink and fussy cut.
I decided to ditch the idea of a shaker card, fixed the panels together and arranged the leaves around the frame using Distress Collage Medium. I left the edges of the leaves loose and curled them slightly with my fingers to create dimension.  I added splatters of water to the background, sprinkled with Antique Gold Embossing Powder and heat set. I cut an Idea-ology Transparent Wing in half and tucked it under the edge of the frame on the left and fixed the other on the bottom corner of the frame using Distress Collage Medium Matte.
I inked the sentiment from Nature's Wonder with Crackling Campfire Distress Oxide ink, stamped on to scrap of Distress Watercolor card, lightly coloured with Antique Linen Distress Oxide Spray and heat embossed with Crackling Campfire Distress Embossing Glaze. I trimmed the sentiment into two strips, darkened the edges with Ground Espresso Distress Marker and fixed in place with Distress Collage Medium Matte.
I sprayed Antique Bronze Distress Mica Spray on to my Glass Media Mat and picked up with the Splatter Brush to add splatters to the leaves.

Have a great weekend whatever you have planned and I'll see you all on Monday to share my DT project for Simon Says Stamp Monday Challenge.
Hugs Kath xxx
Where available I use compensated affiliate links which means if you make a purchase I receive a small commission at no extra cost to you. You can find my affiliate and product disclosure HERE

Tuesday, October 27, 2020

Tim Holtz/Sizzix Chapter 4 - Leaf Print

Hi my friends, I'm sharing the last card I made for the Facebook Live launch of Tim Holtz/Sizzix Chapter 4 release using Leaf Print Thinlits. If you missed the Facebook Live, you can catch up with all the products and inspirational samples over on Tim's Blog HERE.  


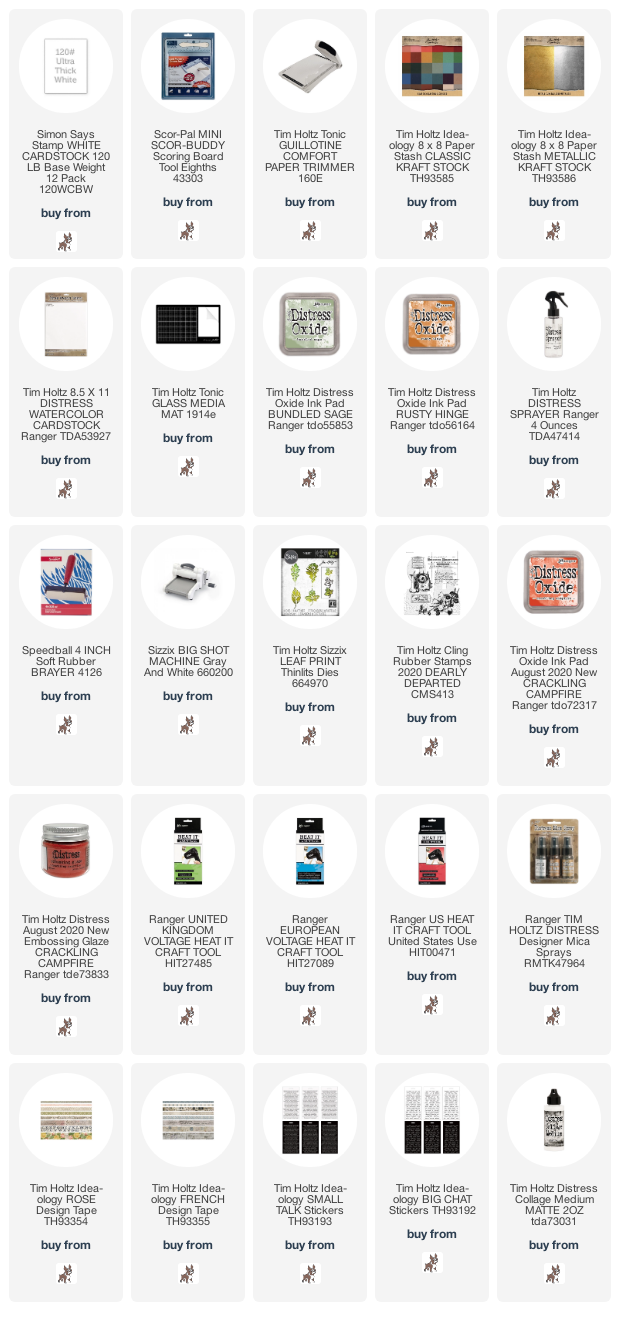
I trimmed Distress Watercolor card to 5" x 7". I smooshed Rusty Hinge and Bundled Sage Distress Inks on to the craft mat on my Glass Media Mat, spritzed lightly with water and applied the inks separately using a brayer drying between layers. I spritzed the inks with water again and tapped the card panel into the inks several times to pick up the remaining droplets, again drying between layers. I die-cut the apertures using the Tim Holtz/Sizzix Leaf Print Thinlits and fixed the panel to a panel of Brown Classic KraftStock. I die-cut the leaves using the inner detailed die and fixed them back into the negative spaces using Distress Collage Medium Matte.
I inked the script from Tim Holtz/Stampers Anonymous Dearly Departed with Crackling Campfire Distress Ink and heat embossed with the matching Distress Embossing Glaze. I added splatters of Tarnished Brass Distress Mica Spray. I added Idea-ology Design Tape and Small Talk and Big Chat Stickers.
To finish I matted the panel on to a slightly larger panel of Idea-ology Gold Metallic KraftStock and fixed to a 6" x 8" white card blank covered with Brown Classic KraftStock

Hugs Kath xxx

Where available I use compensated affiliate links which means if you make a purchase I receive a small commission at no extra cost to you. You can find my affiliate and product disclosure HERE


Monday, October 26, 2020

Simon Says - Movie Inspired

Hi Everyone...welcome to another week on the Simon Says Stamp Monday Challenge Blog. Thank you for joining us for last week's challenge and we hope you can join us this week too because


and the theme for this week is...
MOVIE INSPIRED
I was inspired to create a card for a friend's young grandson who is a wannabe Captain Jack Sparrow and big fan of Pirates Of the Caribbean. I used Tim Holtz/Sizzix Skelly Colorize, Steampunk Parts, Alphanumeric Classic Lower Thinlits, Idea-ology Abandoned Mini Paper Stash, Halloween Trimmings and lots of Sizzix Sequins and Beads


I trimmed Tim Holtz Idea-ology Abandoned Paper to 5.3/4" x 7.3/4" and applied Picket Fence Distress Paint through the Tim Holtz/Stampers Anonymous Bubbles Layering Stencil using a mini round blending tool.
I inked the script image from Tim Holtz/Stampers Anonymous Dearly Departed with Distress Embossing ink, stamped randomly on the background and heat set with Simon Says Stamp Antique Gold Embossing Powder.
I die-cut Tim Holtz/Sizzix Steampunk Parts 3 times from Distress Mixed Media HeavyStock to create a ship's porthole,  fixed together to create dimension and painted with Gilded Alloy Alcohol Ink.
I applied a coat of Distress Collage Medium and once it was dry, I scribbled over the die-cut with Black Soot Distress Crayon and rubbed it into the detail with a damp finger.
I spritzed Antique Linen, Pumice Stone and Hickory Smoke Distress Oxide inks on to Distress Watercolour card which I sprayed with water first, dried, spritzed again with water and dried.
I die-cut using Tim Holtz/Sizzix Skelly Colorize Thinlits and coloured the die-cut pieces marked brown, using Walnut Stain and Ground Espresso Distress Inks as I assembled them.
I sprayed the mummy cloth from Idea-ology Halloween Trimmings with Barn Door and Crackling Campfire Distress Inks, fixed to Skelly using Distress Collage Medium tied in a bow to create a pirate's bandana and added crossbones die-cut using Tim Holtz/Sizzix Frightful Things Thinlits.
I fixed Steampunk Parts in place with Distress Collage Medium Matte and popped Skelly up on Sizzix Foam Adhesive to create dimension. To create the trail of jewels flowing from the porthole, I created a mix of Sizzix Sequins and Beads and let me tell you, by the time I finished the card, these sparkly little blighters were everywhere (note to self - next time, work on a tray)
I applied a generous layer of Distress Collage Medium on the edge of the porthole, trailed it down the side of the card, sprinkled on the bazillion sparkly glittering bits and bobs and set it aside to dry.
I die-cut the sentiment 3 times from the card left over from die-cutting Skelly using Tim Holtz/Sizzix Alphanumeric Classic Lower Thinlits, fixed in place with Distress Collage Medium but didn't use the "Y".
I sprinkled Stampendous Frantage Aged Black Embossing Enamel randomly over the background and heat set from underneath until melted to create more texture in and around the sequins and pearls. To finish I matted the panel on to a 6" x 8" white card blank coloured around the edges with Antique Linen Distress ink using the direct to paper technique.


You can find all the products I used over at Simon Says Stamp, just click on the links below


Why don't you pop over to the Monday Challenge Blog and check out the amazing creations from my very talented Design Team mates and as always you have until Monday 8am Ohio time...2pm UK time...3 pm CET to join in with the chance to win a $25 voucher to spend at Simon Says Stamp Online Store

You can also follow Simon Says Stamp on Instagram
and if you use Instagram...
please add #sssmchallenge to your entry uploads so we can see them on there too

I look forward to seeing what you create this week...
Have Fun and Happy Crafting
Hugs Kath xxx

Where available I use compensated affiliate links which means if you make a purchase I receive a small commission at no extra cost to you. You can find my affiliate and product disclosure HERE


Friday, October 23, 2020

The Unfortunate Fortune Teller

Hi my friends, after watching Tim's amazing Saturday Facebook Live, I was itching to create the crystal ball and drippy candles to decorate an Idea-ology Vignette Divided Drawer, to tell the story of a Fortune Teller sat at her crystal ball in a dark and dingy room lit only by the eerie glow of candles. I am not going to go into the details of creating these items, instead you too can enjoy this fabulous Masterclass with Tim, the creative genius, on his blog HERE.  I had great fun on this particular production line but, just like yesterday's Snarky Cat, I got myself in a bit of a tangle with the lights for my candles and on reflection, perhaps the title of this blog post should have been "The Unfortunate Candlemaker", but more about that later.

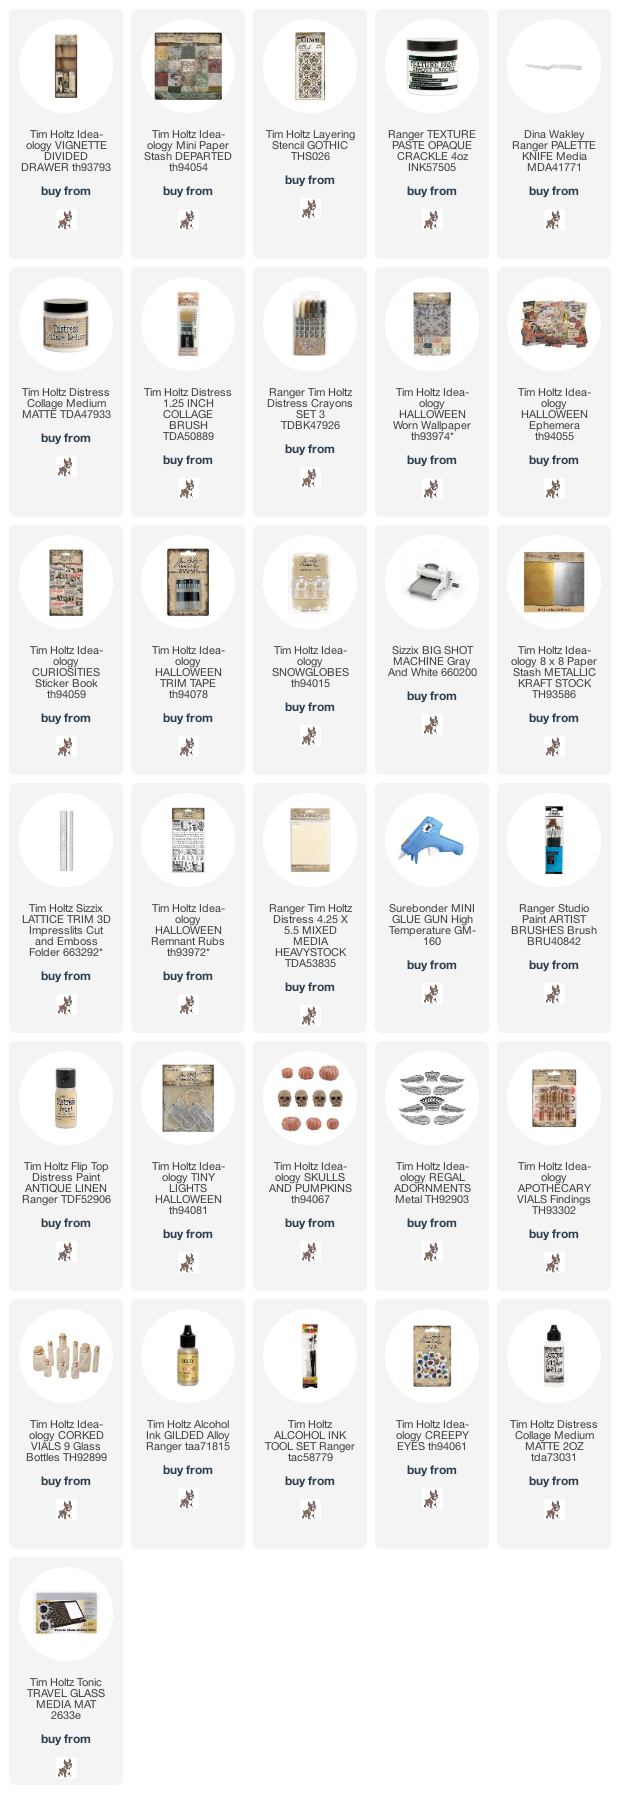
I covered the Divided Drawer with paper from the Tim Holtz Idea-ology Departed Paper Pad, applied Texture Paste Opague Crackle randomly on the sides and top of the divided drawer using Tim Holtz/Stampers Anonymous Gothic Layering Stencil. Once dry, I applied a coat of Distress Collage Medium Matte and scribbled Black Soot Distress Crayon over the surface, rubbing it into the detail with my fingers and wiping back from the texture paste slightly with a damp cloth.
I removed the shelf sections of the Divided Drawer and painted with Black Soot Distress Paint. While they were drying I covered the sides with Departed Paper and the top, bottom and backs with Idea-ology Halloween Worn Wallpaper.  I sanded the edges to neaten and added Idea-ology Halloween Trim Tape and Halloween Ephemera.
I teased out sections of Polydown (we call this wadding in the UK) and fixed to the shelves with Distress Collage Medium Matte.
Then it was time to gather supplies, fire up my laptop, head over to Tim's blog and play along.

Once I had the Crystal Ball and candles in place, I decorated the shelves with an assortment of Idea-ology Halloween bits and pieces from my many years of collecting, (too many to mention individually but listed below in the links)


At this stage, I was feeling pretty pleased with myself and all set for the big switch on, well you know what they say, pride always come before a fall. The Crystal Ball lit up perfectly and they say the camera doesn't lie, well let me tell you, that ain't true. I could see a purple glowing orb but, despite trying from every conceivable angle, apart from standing on my head, all the camera captured was a big white glowing ball. And this turned out to be one of those days when the candle lights switched on momentarily, flickered off and on for a few seconds, went out and refused to come back on. I removed the batteries, popped them back in again but no go. I had tested the lights before inserting them in the candles so I suspect when I fixed the last candle down, one of the lights may have touched the hot glue and shorted the whole string. It was a real, woe is me or words to that effect, moment but hey ho, I'm not one to give up just because I fell at the first hurdle. Let's just notch this one up as a practice run because I just happen to have a lot more candles in various stages of production, so watch this space for lit up candles Take 2.
Have a great weekend whatever you have planned. Tomorrow, I'll be forsaking the cubbyhole for the kitchen, the weather tells me it's time to stock up the freezer with home made soup and lots of winter warmer meals and at 6 o'clock on the dot, I'll be heading over to join Tim and Mario for another fun Saturday night Facebook Live. Definitely my kind of Saturday night, snuggled up on the sofa with a glass of wine and a supply of snacks, no need to dress up or even brush your hair. Hope to see you there.
Hugs Kath xxx

Where available I use compensated affiliate links which means if you make a purchase I receive a small commission at no extra cost to you. You can find my affiliate and product disclosure HERE