Friday, May 31, 2019

Quick and Easy Cards - Part 3

Hi folks, I'm back to share the third card from the trio of Quick and Easy cards made using another  Distress Oxide Spray background created with Victorian Velvet, Dried Marigold and Cracked Pistachio, Flourish Layering Stencil, Tim Holtz/Sizzix Wildflower Stems 2 and Simon Says Stamp Love Wafer Thin Die.
I trimmed Distress Watercolor card to 4" x 5.1/4", spritzed the Flourish Layering Stencil with the three colours of Distress Oxide sprays, spritzed the stencil lightly with water and laid on to the card. I dried using my heat tool and generously sprayed the card with water, allowing the ink to move around and blend. I dried again and added splatters of the 3 colours using a small paintbrush.
I used the shadow die from Simon Says Stamp Love Wafer Thin die to die-cut the Distress Watercolor card panel. I die-cut Tim Holtz/Sizzix Wildflower Stems 2 twice from Black Classic Kraftstock sanded to reveal the kraft core and fixed to the panel slightly offset using Distress Collage Medium Matte. I added white dots to the flower centre using a Sakura Gelly Roll Pen. I matted the panel on to an A2 white card blank covered with Black Classic Kraft Stock, sanded to reveal the kraft core. I die cut the shadow again from white card and fixed behind the shadow cut from the panel. I die-cut the script from Black Classic Kraftstock and fixed in place using Distress Collage Medium Matte, creating a dimensional word embellishment.  I added small strips of Tim Holtz/Sizzix Mini Foam Adhesive into the negative space and fixed the layered word on top. I inked the "with" from Tim Holtz/Stampers Anonymous Simple Sayings with Black Soot Archival and stamped on the panel to complete the sentiment.
I had great fun making my trio of quick and easy Distress Oxide background cards on a chilly rainy afternoon and love how different they are, although they were made using the same products but with different Tim Holtz/Sizzix dies.
I can't believe we're at the end of another week already and tomorrow is a brand new month. What I want to know is...when is the weather going to warm up. I refuse in the last days of May to put the central heating on during the day so as I was writing this blog post, I was snuggled up at the kitchen table, on the computer, wrapped up in one of my Furry Partner's blankets. I kid you not, I may have to invest in a super insulated furry onesie, just like the one my Furry Friend wears and, will this be a third time lucky weekend spent tidying the garden. Have a great weekend whatever you are planning and I'll see you all on Monday with my DT project for Simon Says Stamp Monday Challenge.
Toodle-oo for now
Hugs Kath xxx


*** Where available I use compensated affiliate links which means if you make a purchase I receive a small commission at no extra cost to you. You can find my affiliate and product disclosure HERE

Thursday, May 30, 2019

Quick And Easy Cards - Part 2

Hi folks, I'm back to share another quick and easy card made using another Distress Oxide Spray background along with Tim Holtz/Sizzix Geo SpringtimeThinlits, Stampers Anonymous Simple Sayings and Simon Says Stamp Love Die.
I created the background by spritzing Distress Watercolor card with Victorian Velvet Distress Oxide Spray, dried with my heat tool, spritzed with Dried Marigold and Cracked Pistachio, spritzed with water, dried again and repeated the process to add layers of the colours. I inked one of the images from Tim Holtz/StampersAnonymous Scrollwork with Victorian Velvet Distress Oxide ink and stamped randomly on the background.
I die-cut the panel using the script die from Simon Says Stamp Love and set it to one side
I lined up the shadow Love die, held in place with washi tape and die-cut
I used my Tim Holtz Craft Pick to create holes for faux stitching, die-cut 2 butterflies from black Classic Kraft Stock sanded to reveal the kraft core using Tim Holtz/Sizzix Geo Springtime Thinlits. I fixed one butterfly flat to the panel using Distress Collage Medium and the other, only applying adhesive to the body section to create dimension.
I used a Sakura Black Micron pen to add the faux stitching
I coloured white self adhesive pearls from my stash by painting with Tim Holtz/Ranger Enchanted Alcohol Pearl ink and fixed to the body section of the butterfly and randomly on the panel. I matted the panel on to an A2 white card blank covered with Black Classic Kraftstock and fixed the script Love die-cut into the negative space using Distress Collage Medium Matte. To complete the sentiment I inked "with" from Tim Holtz/Stampers Anonymous Simple Sayings with Black Soot Archival and stamped on the panel.


I'll be back tomorrow to share the third card in the trio of Quick and Easy Cards, in the meantime, have fun with whatever you are creating.
Toodle-oo for now
Hugs Kath xxx

*** Where available I use compensated affiliate links which means if you make a purchase I receive a small commission at no extra cost to you. You can find my affiliate and product disclosure HERE

Tuesday, May 28, 2019

Quick And Easy Cards - Part 1

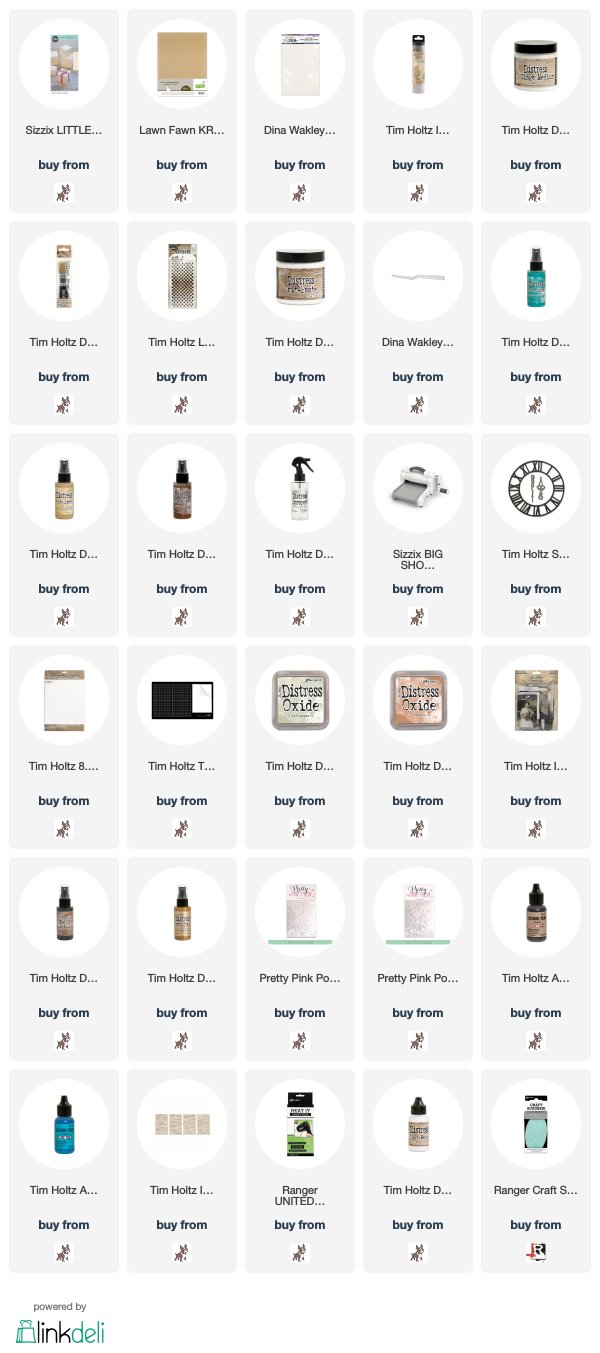
Hi folks, I still have quite a few Distress Oxide Spray backgrounds and left over scraps sitting on my workdesk
and because my weekend gardening plans were scuppered by RAIN, RAIN and more RAIN, I retreated to the cubbyhole to make a trio of Quick and Easy Cards which I'll be sharing this week.
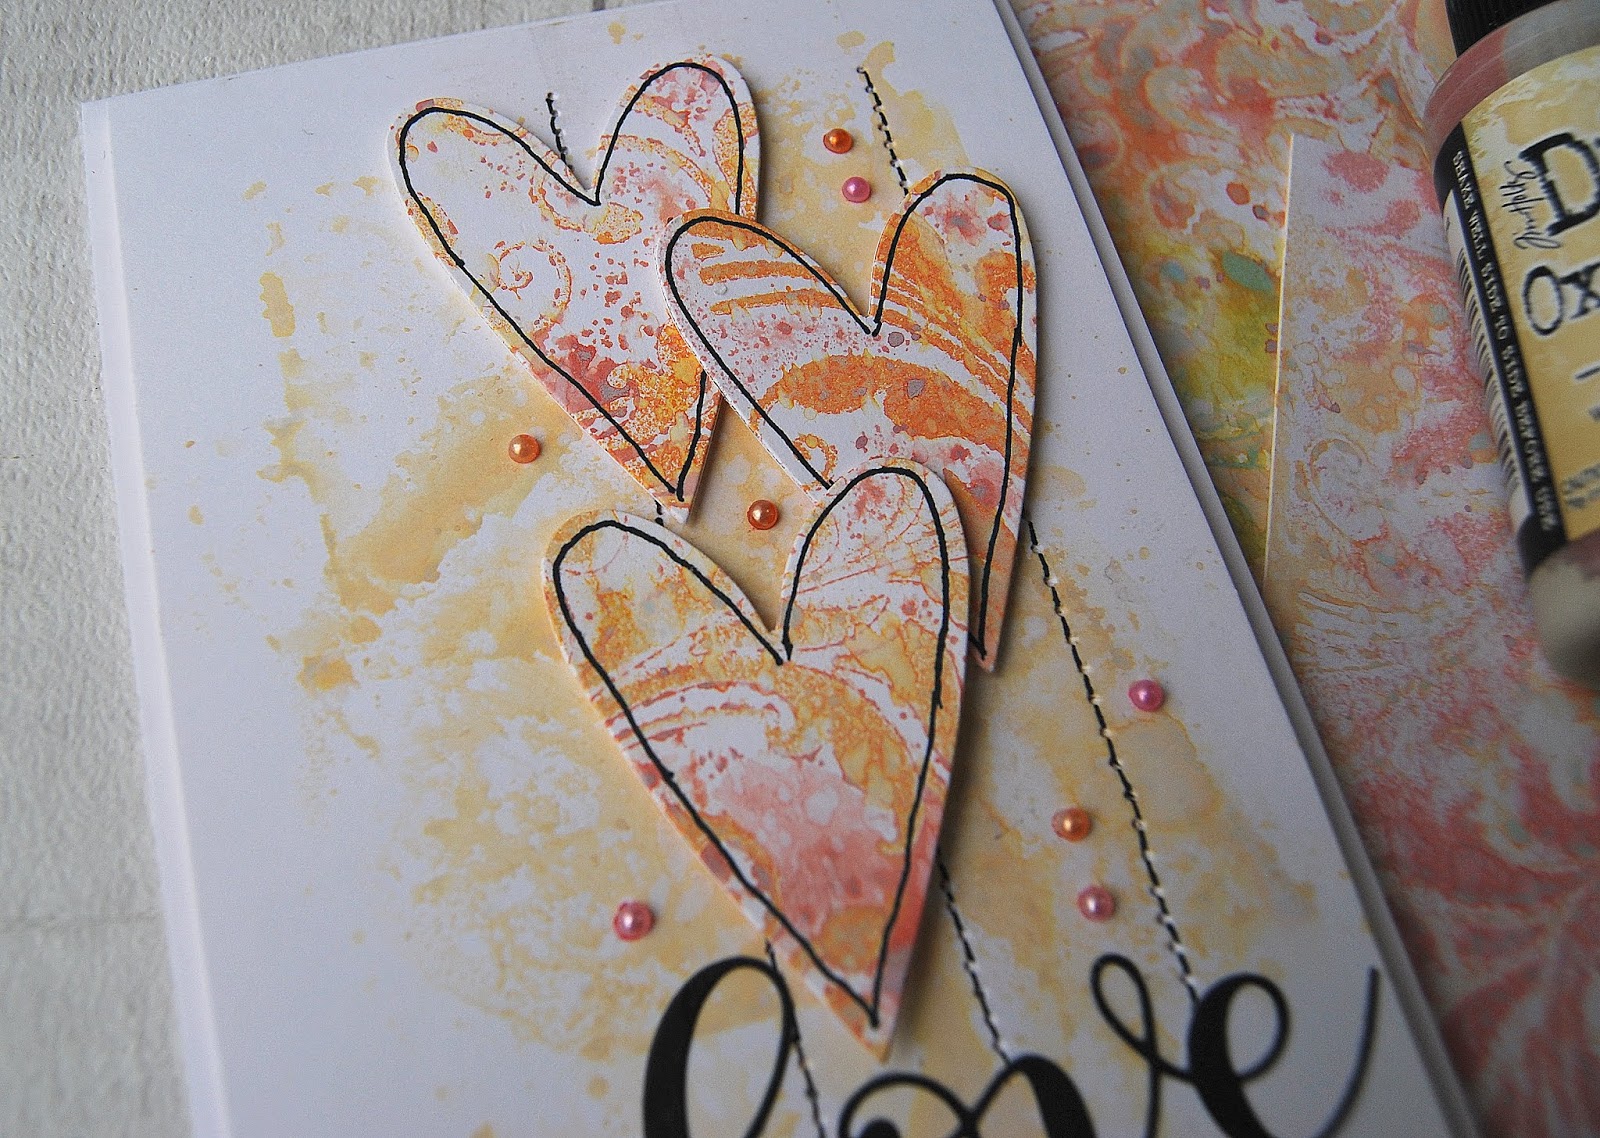
starting off with the one in the centre which I needed in a hurry to send to a friend using a scrap of a background created using Victorian Velvet and Dried Marigold Distress Oxide sprays with the Flourish Layering Stencil.

I trimmed Distress Watercolor card to 4" x 5.1/4", pencilled in some lines and used my trusty Tim Holtz Craft Pick to make holes, ready for some faux stitching, a handy alternative when you don't have time to look out the sewing machine.
To create a quick background, I spritzed Antique Linen Distress Oxide Spray on to my Glass Media Mat, picked the ink up on a piece of clear plastic and smooshed it on to the card panel, leaving it for a few seconds to let the ink soak into the card.
I dried the card with my heat tool, spritzed with water and dabbed off the excess with kitchen towel. I die-cut 3 hearts from the Distress Oxide Spray background scrap using Tim Holtz/Sizzix Heartfelt BigZ die
I used a Sakura Black Micron Pen to create the faux stitching and doodled around the edges of the die-cut hearts
and fixed the hearts in place using Distress Collage Medium Matte and Tim Holtz/Sizzix Mini Foam Adhesive to create dimension.
I die cut "Love" from Simon Says Stamp Black Cardstock using Simon Says Stamp Love Die and fixed to the panel with Distress Collage Medium Matte.
I coloured small white self adhesive pearls from my stash with Splendor and Enchanted Distress Alcohol Pearl inks using a small paintbrush. I added drops of the ink to my Glass Media Mat but you have to be quick because it dries fast and what do you know, they were the perfect match for the Dried Marigold and Victorian Velvet Distress Oxide Sprays I used on the background scrap.
I fixed the pearls in place with Distress Collage Medium Matte and matted the panel on to an A2 white card blank.

To complete the sentiment, I inked "with" from Tim Holtz/Stampers Anonymous Simple Sayings with Black Soot Archival, stamped on to a scrap of Distress Oxide Spray card and trimmed.
I'm on a mission today to use up the rest of the Distress Oxide Spray backgrounds and scraps to share with you soon. But I'll be keeping an eye out for the postie and a urgent delivery to stock-up the product I can't live without. I'm down to scraping out the bottom of my last pot of Distress Collage Medium Matte and the small bottle with the precision nib is operating on fumes. It will be a major "head in hands" catastrophe and production will grind to a halt if it doesn't arrive today.  I've come to the conclusion that ordering two pots at a time just doesn't cut the mustard, I need a gallon drum or a baker's dozen. Have fun whatever you're creating and I'll see you soon to share Quick and Easy Card No 2.
Toodle-oo for now
Hugs Kath xxx


*** Where available I use compensated affiliate links which means if you make a purchase I receive a small commission at no extra cost to you. You can find my affiliate and product disclosure HERE

Monday, May 27, 2019

Simon Says - Frame It

Hi Everyone...welcome to another week on the Simon Says Stamp Monday Challenge Blog...thank you for joining us for last week's challenge...we hope you can join us this week too because...

and the theme for this week is...
FRAME IT
I created an Art Panel using Dina Wakley Cotton Watercolor Paper, Tim Holtz/Ranger Distress Oxide Sprays, Gradient Dot Layering Stencil with Distress Grit Paste and added a frame to this delightful Idea-ology Found Relatives photo using Tim Holtz/Sizzix Timekeeper BigZ die. I'm always fascinated by these vintage photos, intriqued by the people they feature and the stories they could tell. I can't help but wonder if they are wearing their Sunday best outfits just for the photograph or if this their normal day to day attire - are they brother and sister or just friends. I guess we'll never know but it's fun imagining.


I trimmed Dina Wakley Media Cotton Watercolor Paper to 6.1/2" x 8.1/2", added torn strips of Idea-ology Travel Collage Paper, fixed in place with Distress Collage Medium Matte, applied Distress Grit Paste through Tim Holtz Gradient Dot Layering Stencil.
Once the Grit Paste was dry, I sprayed the centre of the panel with Peacock Feathers Distress Oxide Spray and generously spritzed with water . I tilted the panel to let the ink move around and dabbed off any excess drips with kitchen towel.
I dried the ink, repeated the process with Antique Linen and Vintage Photo Distress Oxide Sprays, drying between each layer and then machine stitched around the edges of the panel.
Then I turned my attention to creating a frame. I die-cut Tim Holtz/Sizzix Timekeeper from Sizzix Matboard and Distress Watercolor Card. I smooshed Old Paper and Tea Dye Distress Oxide inks on to the craft mat on my Glass Media Mat, spritzed with water and pulled the Distress Watercolor die-cut through the ink. I repeated several times, drying between each layer.
I applied Distress Grit Paste sparingly on the die-cut with my finger and once it had dried, I continued building up layers of colour with Peacock Feathers and Vintage Photo Distress Inks until I was happy with the rusty crusty look. I did use my Splatbox but after many applications of the sprays, the die-cut was saturated from sitting in a puddle of wet ink, so I dried it throughly and held the die-cut in my hand for the last few sprays, hence the Incredible Hulk meets Avatar colour on my fingers. On reflection, I should have fixed the die-cuts together before embarking on this particular inking advenure but hey ho, it's nothing that a rub-a-dub session with warm soapy water and a Ranger Scrubbie won't  put right.
I used the Sizzix Matboard die-cut as a template to cut out the Idea-ology Found Relatives photo. I fixed the die-cuts together and attached the photo to the back with Distress Collage Medium Matte creating dimension and stability. 
I wasn't going to repeat my previous "mucky fingers" mistake so with the die-cut clock hands layered up, I spritzed first with Gathered Twigs Distress Spray Stain, dried and continued spraying Peacock Feathers and Tarnished Brass Distress Spray Stain and spritzing with water repeatedly, drying between each layer of colour until I was happy with the result.
I added the Timekeeper frame to the panel slightly offset to the left, trimmed the excess and fixed it on the right hand side next to the machine stitching.

I added splatters of White Gouache using the Distress Splatter Brush.
I coloured Clear 4mm and 6mm Droplets with Tranquil and Smolder Alcohol Pearl inks by adding drops of the inks to a small container, swirling the droplets around in the ink and leaving them to dry on kitchen towel.
I fixed the droplets to the panel and one to the centre of the clock hands with Distress Collage Medium Matte.
and added Idea-ology Clippings Stickers.

I matted the panel on to Kraft Card and Sizzix Matboard trimmed to 7" x 9".

You can find all the products I used over at Simon Says Stamp, just click on the links below

Why don't you pop over to the Monday Challenge Blog and check out the amazing creations from my very talented Design Team mates and as always you all have the chance to win a $50 gift voucher to spend at Simon Says StampYou have until Monday 8am Ohio time...1pm UK time...2 pm CET to join in...

You can also follow Simon Says Stamp on Instagram
and if you use Instagram...
please add #sssmchallenge to your entry uploads so we can see them on there too

I look forward to seeing what you create this week...
Have Fun and Happy Crafting
Hugs Kath xxx

SUPPLIES:

*** Where available I use compensated affiliate links which means if you make a purchase I receive a small commission at no extra cost to you. You can find my affiliate and product disclosure HERE.