

 Before we start on the technique, I used both my Stamping Platforms (Tim Holtz Regular and Travel versions) so that I could position the Brushstrokes Circle and Sketchy Leaves stamp on separate lids and leave them there for repeat stamping.
I began by trimming Distress Watercolor, Black and Kraft HeavyStock card to create 3 - 4" x 5.1/4" panels. I inked the Tim Holtz/Stampers Anonymous Shattered Background with Vintage Photo Distress Archival ink and stamped on to the Distress Watercolor and Kraft HeavyStock panels. I cleaned off the stamp, applied Picket Fence Distress Paint using a mini round blending tool and stamped on to the Black HeavyStock panel.
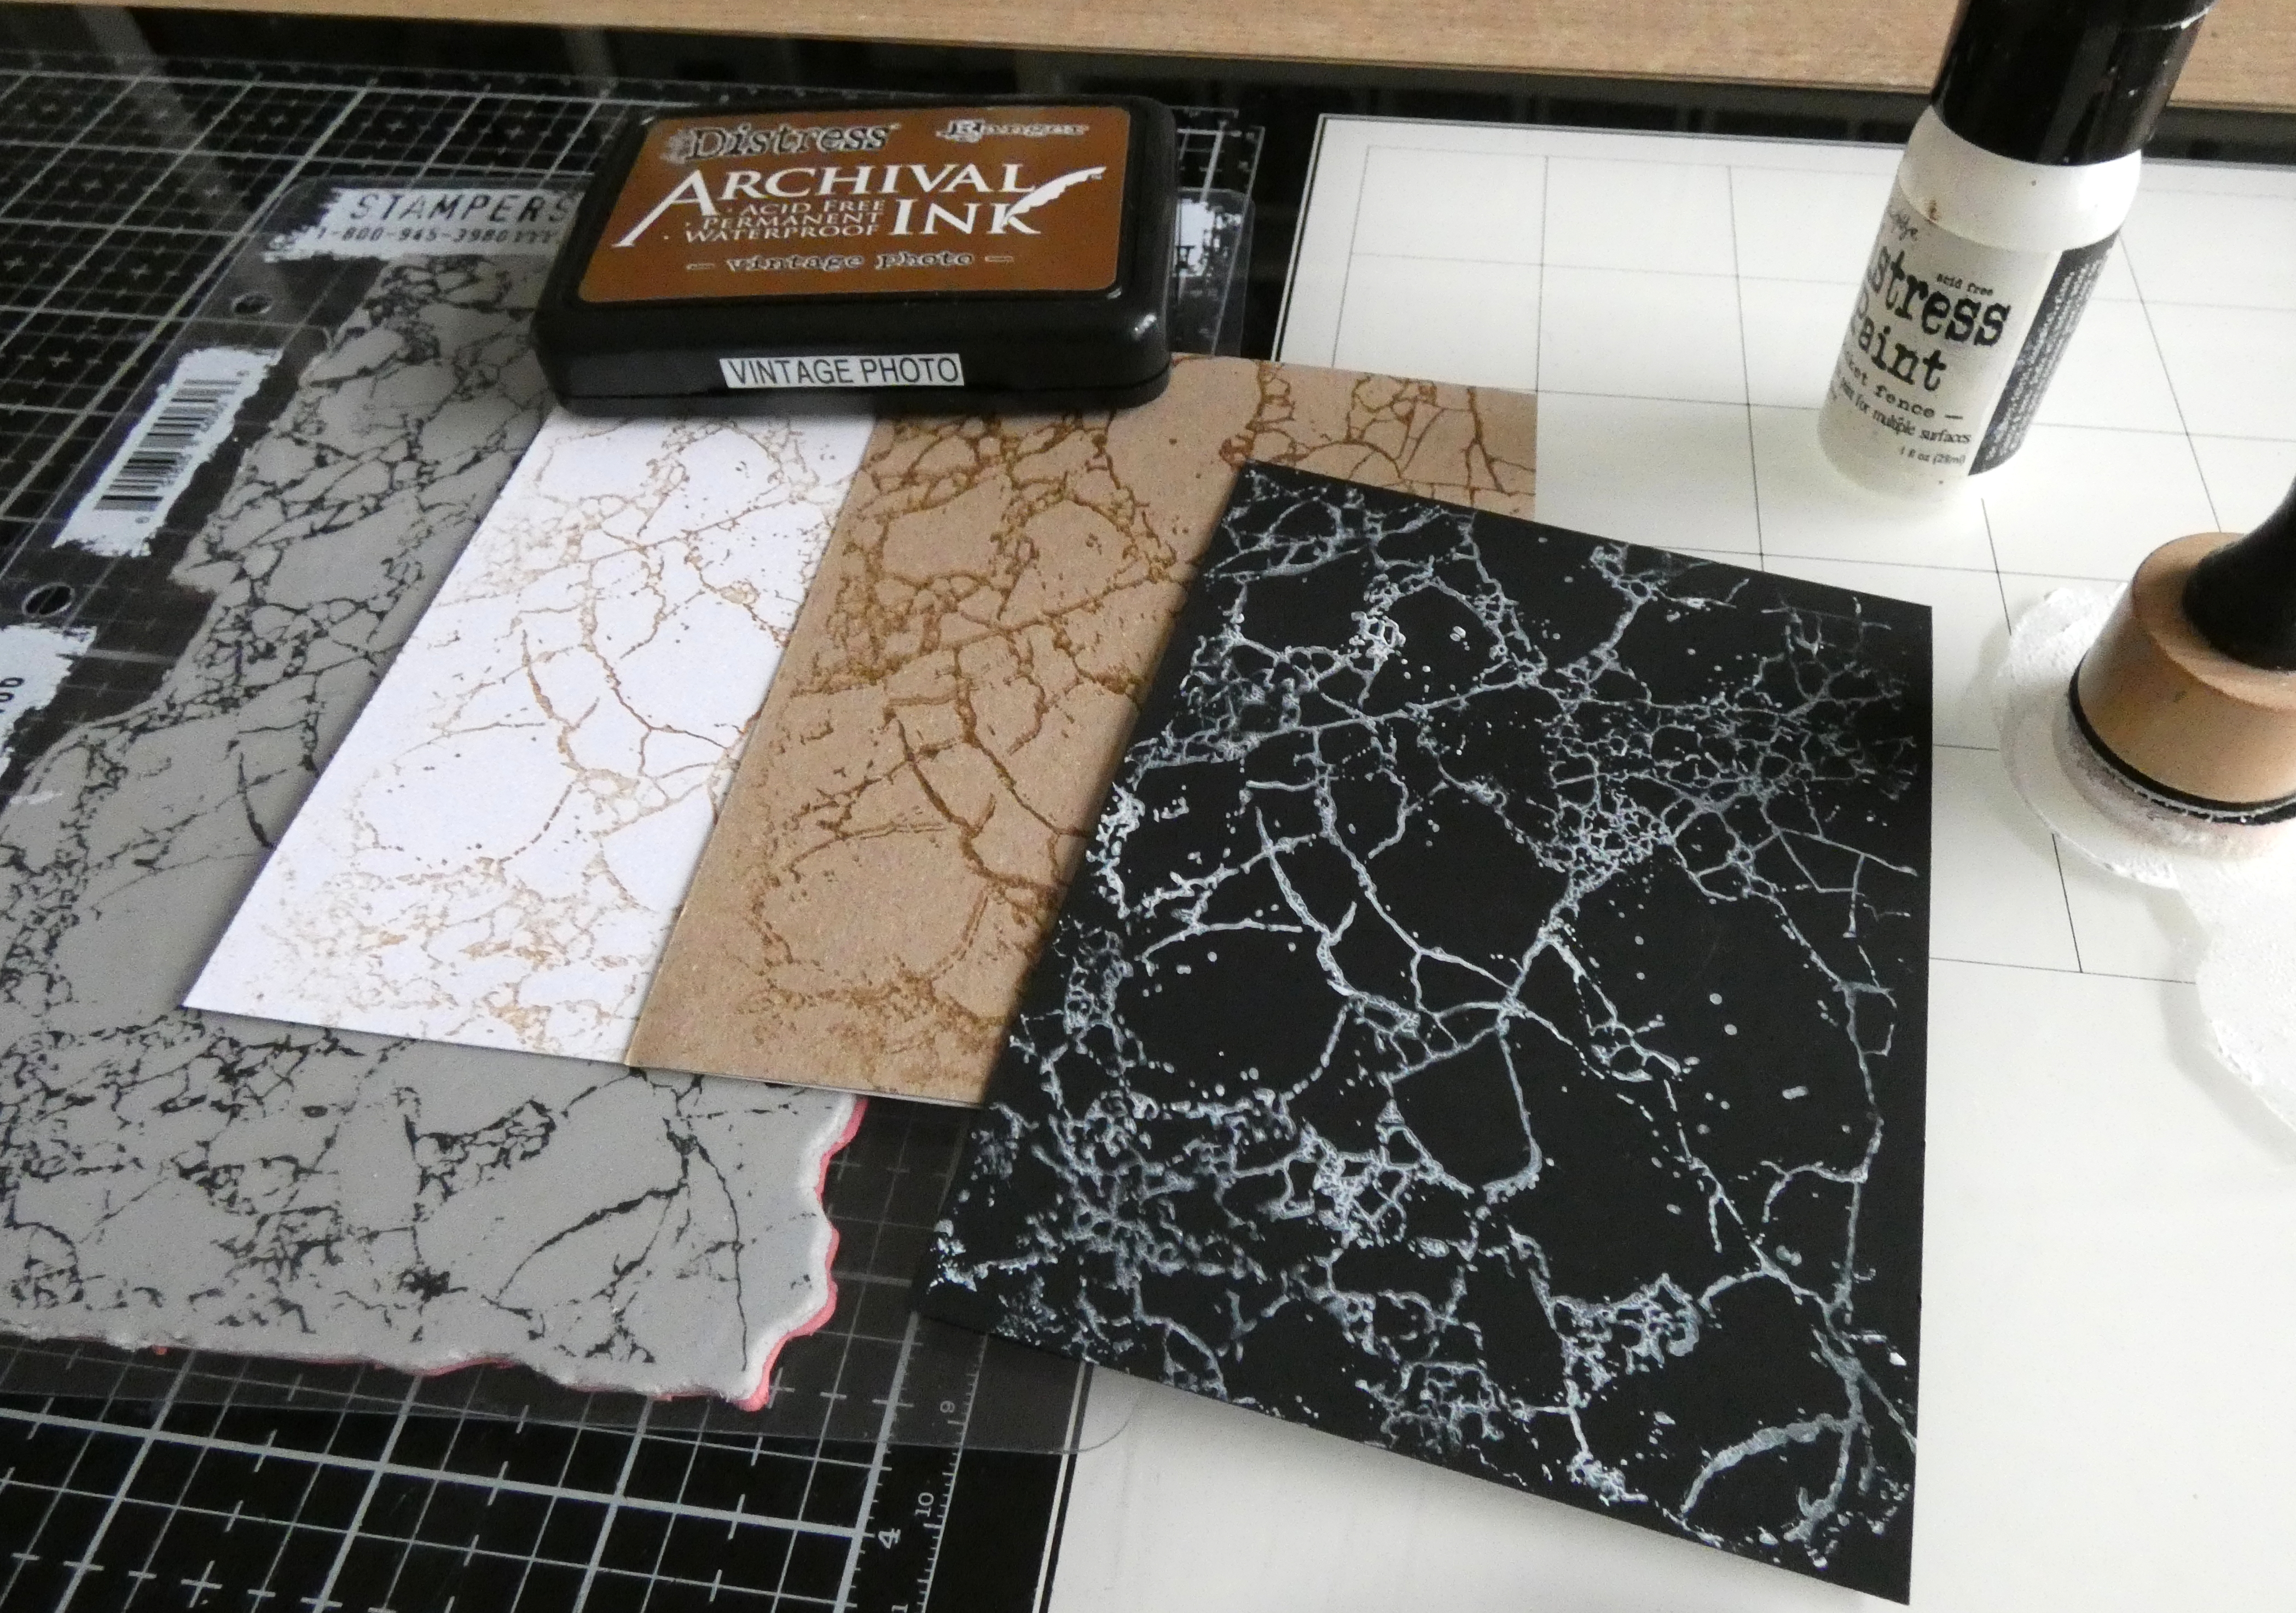
I dried the panels with my heat tool, placed the first panel in the left hand corner of my stamp platform, positioned the large circle from Tim Holtz/Stampers Anonymous BrushStrokes in the centre of the panel, picked up with the lid and applied Picket Fence Distress Paint on the stamp as before. I reapplied the paint and re-stamped until I was happy with the coverage. I repeated this step on all 3 panels, cleaned the stamp immediately to remove the paint before it dried but leaving the stamp in the same position on the stamp platform.

For the next step, I placed the first panel in the corner of my second platform, positioned the Sketchy Leaves stamp in the centre of the panel and stamped 3 times, inked with Black Soot Distress Archival to get a really dark image. I repeated this step on the other panels.

I moved the panels back to the other stamp platform, inked the BrushStrokes circle with Versamark ink, sprinkled with Distress Embossing Glazes, tapped my fingers lightly on the back of the panel to mix and blend the powder and heat set and repeated this process with the other two panels.

I reinked the BrushStrokes circle with Versamark ink and sprinkled with Ranger Clear UTEE and heat set. I reinked the stamp again, sprinkled more Distress Embossing Glazes to intensify the colour, heat set and finally repeated with a final application of UTEE to create a dimensional clear very glossy finish.

I added strips of Idea-ology Halloween Design Tape and stitched the panels on to Distress Black HeavyStock trimmed to 4.1/4" x 5.1/2".

To finish I fixed the panels to A2 white card blanks.


The cracks were unintentional and happened when I flexed the panel before fixing to the card front but hey I don't mind them either and after cleaning everything up, no way was I starting over. In the words of my adorable Professor "you get what you get and you don't throw a fit".


Have fun and happy making with your Stampers Anonymous Halloween goodies
Hugs Kath xxx
Hi Kate ! I'm always impressed by your art works ! thank you for sharing your inspiration ! It's a great gift
ReplyDeleteThank you so much for posting the instructions, absolutely love all the inspiration you create! Thank you!
ReplyDelete