

Hi my friends, I'm sharing the card trio I made for the YouTube Live launch of Tim Holtz/Stampers Anonymous Christmas 2023 release using Festive Print, Twinkle and Berry Leaves Mini Layering Stencils with some of new Distress Mica Stains and pastes from Tim Holtz/Ranger Halloween and Christmas releases. If you missed the Live you can watch the replay and check out the amazing inspiration from the Makers on Tim's YouTube Channel HERE or Blog HERE.
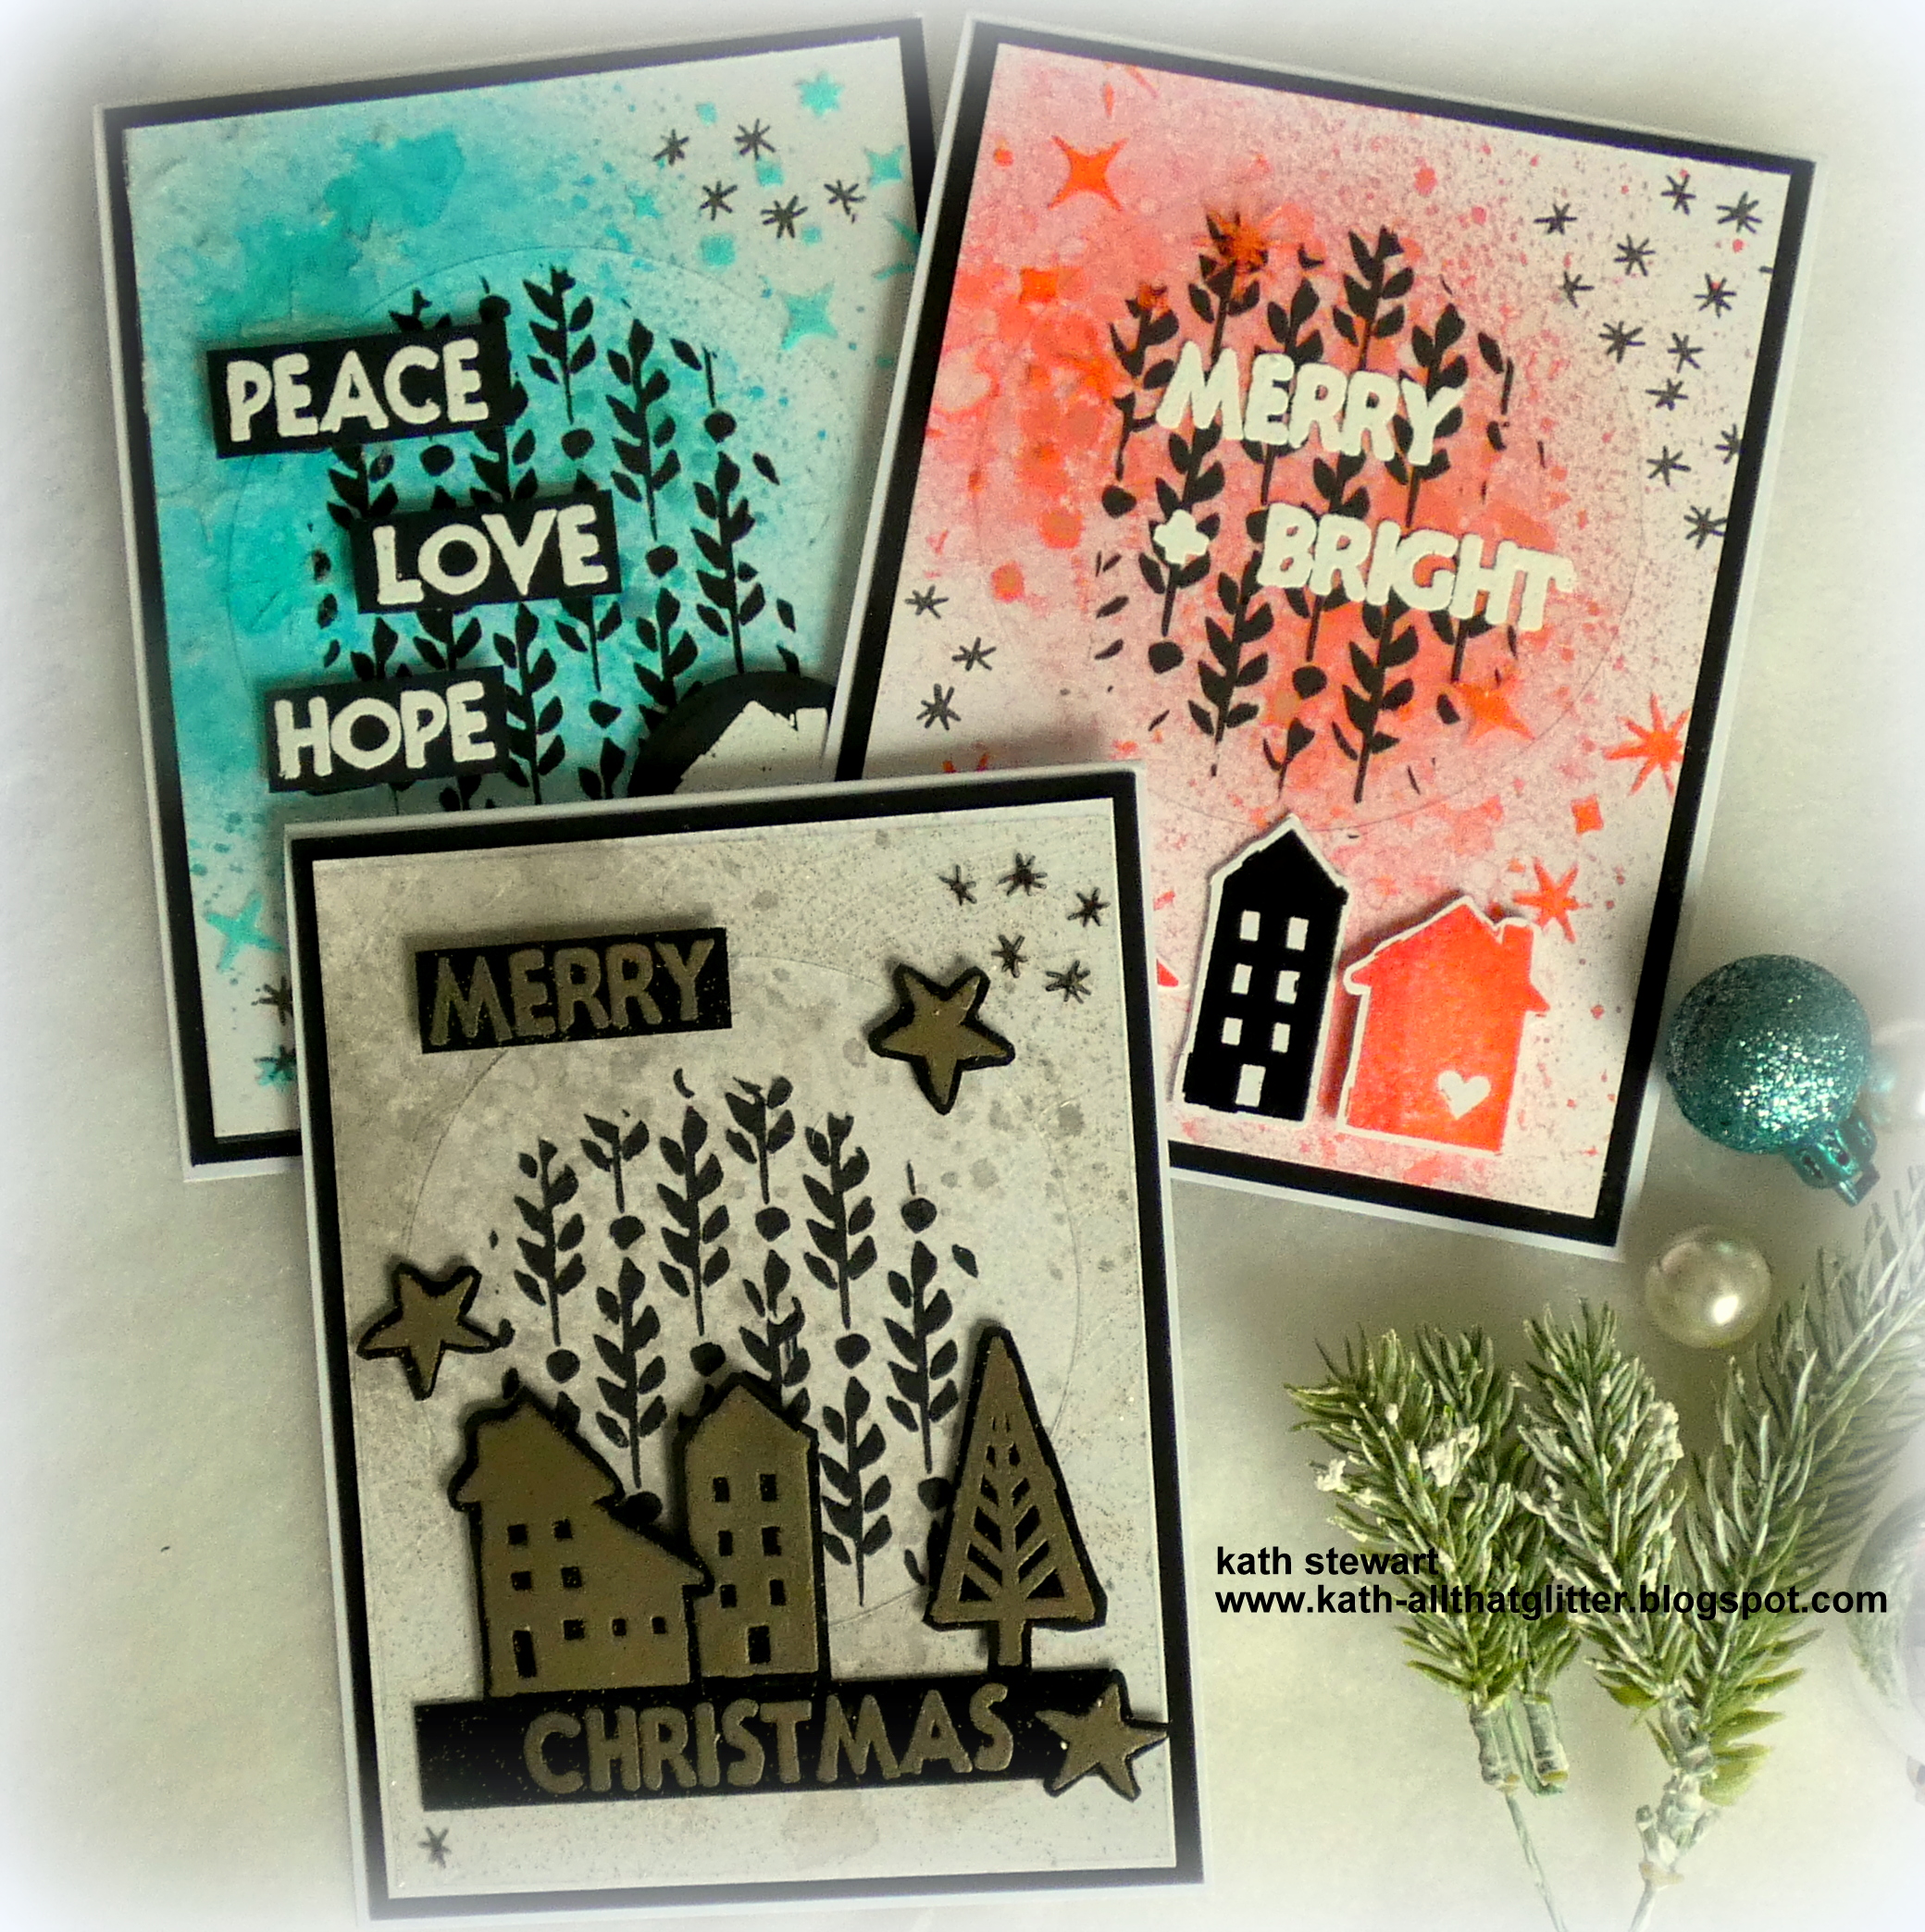
 I coloured A2 panels of Distress Watercolor card with Distress Spray Stains and Distress Mica Stains - Saltwater Taffy/Sugary Gumdrops, Lost Shadow/Frozen Fog and Salvaged Patina/Frosty Mint. I applied Distress Black Texture Paste Opaque through the Berry Leaves Mini Layering Stencil to create a circle shape.


I stamped the house images on to scraps of Distress Watercolor card, inked with Black Soot Distress Archival, sprinkled with Ranger Black Embossing Powder and inked with Saltwater Taffy and Abandoned Coral Distress Oxide inks, sprinkled with the matching Distress Embossing Glazes and heat set. I fussy cut the houses to leave a small border and fixed to the panel with black foam squares. I inked the stars image with Black Soot Distress Archival and stamped on the background.


I inked the house images and sentiments from Festive Print with Versamark ink, stamped on to Distress Black HeavyStock, sprinkled with Ranger Liquid Platinum Embossing Powder and heat set.

I trimmed the sentiments and fixed to the acetate panel with strong adhesive tape, applied tape to the back of the sentiments and used to fixed the acetate to the card panel.


I lifted the acetate back from the corners, placed the stars image on a small Grid Block, inked with Black Soot Distress Archival and stamped under the coloured Distress Grit Paste Snowfall.
I trimmed all the panels to 4" x 5.1/4", matted on to A2 panels of Distress Black HeavyStock and fixed to top folding white card blanks.


Hugs Kath xxx
Stunning cards and creative Kath
ReplyDeleteGorgeous set of cards Kath. xx
ReplyDelete