Hi my friends, I'm sharing the acetate card I made for the YouTube Live launch of Tim Holtz/Sizzix Chapter 2 release using Brushstroke Flowers 3 Thinlits. If you missed the Live, you can catch up with all the new dies and amazing samples from all the Makers over on Tim's blog HERE.
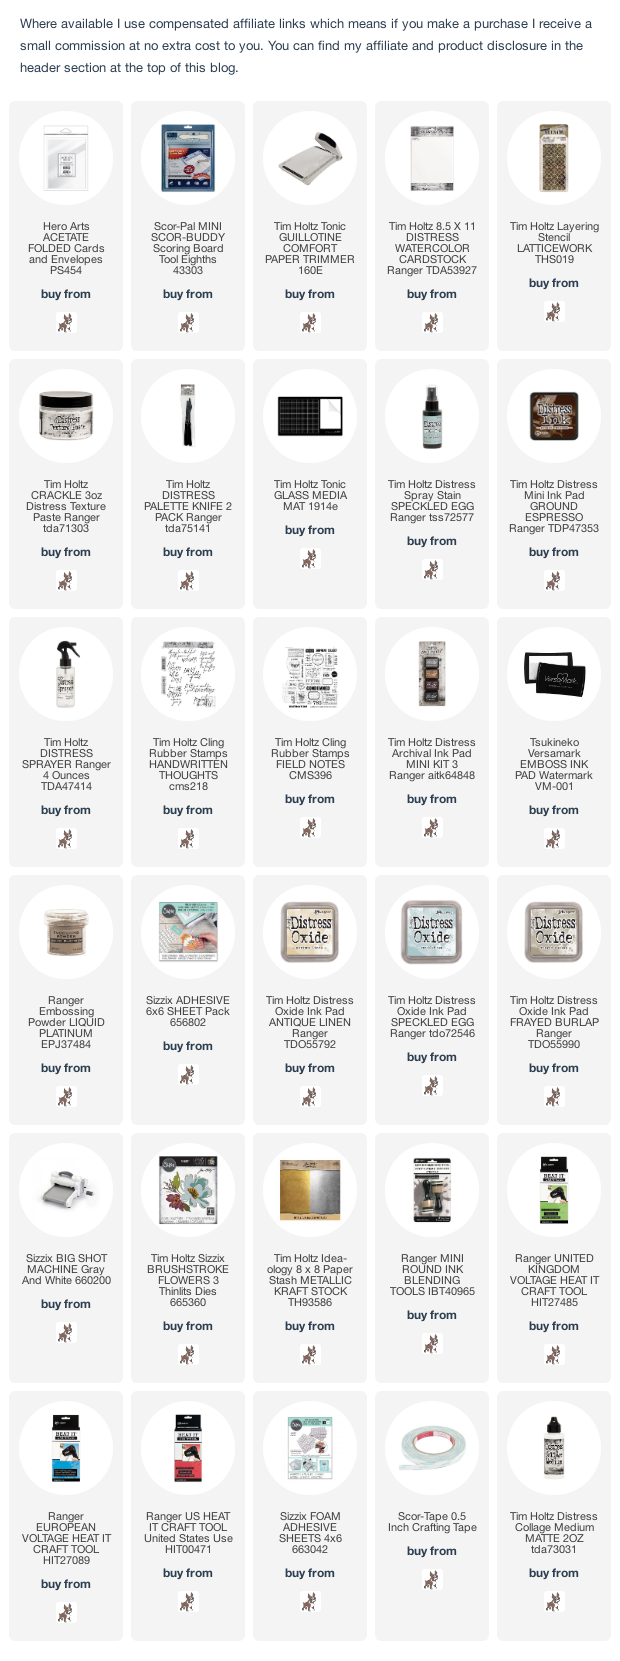
I began by trimming heavyweight acetate that I've had in my stash for years to create a 5.1/2" square card. (I have lined Acetate cards from Hero Arts below although they are pre-scored and are not the same size as I used). I trimmed Distress Watercolor card to create 4 - 5" square panels and applied Ranger Crackle Texture Paste through the Tim Holtz/Stampers Anonymous Latticework Layering Stencil on to one panel. Once the paste had dried, I sprayed the panel with water and lightly with Speckled Egg Distress Spray Stain allowing the water to move the spray around until I was happy with the background. I smooshed Ground Espresso Distress Ink on to the craft mat, spritzed with water and tapped the panel into the ink to create splotches of colour. I sprayed Speckled Egg Distress Spray Stain on to the craft mat, spritzed with water and used to colour the remaining 3 panels. I inked the sentiment from Tim Holtz/Stampers Anonymous Handwritten Thoughts with Black Soot Distress Archival ink and stamped on to one of the 3 panels.
I fixed Sizzix Adhesive Sheets to panels of Distress Watercolor card which I had coloured using Antique Linen, Speckled Egg and Frayed Burlap Distress Oxide inks and die-cut using Tim Holtz/Sizzix Brushstroke Flowers Thinlits.
I darkened the edges of the main flower and some of the die-cuts with Frayed Burlap Distress Oxide ink using a mini round blending tool, die-cut extra foliage from Distress Watercolor card, die-cut the flower centre from Idea-ology Metallic KraftStock, assembled and fixed to the front panel using Sizzix Foam Adhesive. I stamped the images from Tim Holtz/Stampers Anonymous Field Notes with Ground Espresso Distress Archival ink and Versamark Ink and heat embossed with Ranger Liquid Platinum Embossing Powder.
I stamped the Field Notes images again on to the inside panel, added extra foliage die-cuts and flower centres die-cut from Idea-ology Metallic KraftStock. I then fixed all the panels to the acetate card blank using Scor Tape. It is important not to fix the panels in place before heat embossing because the heat will more than likely distort the acetate.I'll be back soon, in the meantime, have fun with whatever you are creating.
Hugs Kath xxx


Kath this is amazing, its so beautiful, love the acetate and the design is brilliant.xx
ReplyDeleteBeautifully composed. Love the background and the Chapter 2 flower.
ReplyDeleteSo pretty! I've never used acetate although I recently purchased some. You've inspired me to try to do a card like this.
ReplyDeleteBtw, your Buddy reminds me so much of our Maggie. She was with us for 12 years. I miss her so much!
So pretty! I've never used acetate although I recently purchased some. You've inspired me to try to do a card like this.
ReplyDeleteBtw, your Buddy reminds me so much of our Maggie. She was with us for 12 years. I miss her so much!
I love this soooo much Kath! 💜 I ordered the flowers because of your card! Thank you for sharing!
ReplyDeleteKath this is so lovely x
ReplyDeleteThis is just gorgeous Kath, I love the acetate idea and the flower is just stunning! Hugs, Anne xxx
ReplyDeleteI loved seeing your card in Tim's video. It is so inspiring, pretty and beautiful! The acetate was genius! Thank you for sharing your tutorial.
ReplyDelete