Hi my friends, if you watched yesterday's YouTube Live from Tim Holtz, you'll know that we now have four new sets of Seasonal Distress Mica Crayons that have the most beautiful pearlescent shimmer in the same colours as the Seasonal Distress Mica Stains, a gorgeous palette of colours for you to make for all seasons throughout the year. If you missed the Live, you can watch the replay and check out all the amazing projects from the Makers on Tim's Blog HERE or Tim's YouTube Channel HERE. I'm sharing the cards I made for the Live using the Halloween sets.
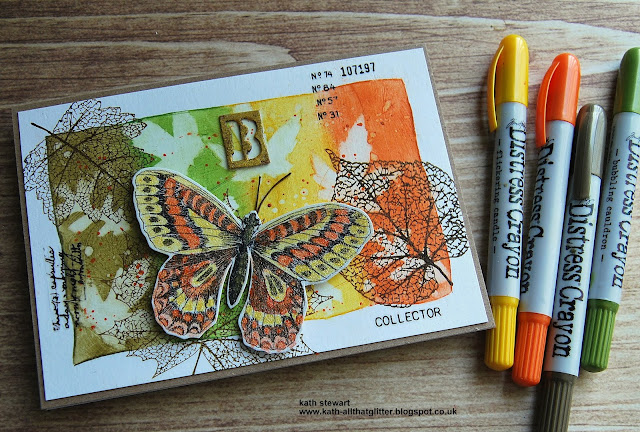
I began by trimming Distress Watercolor card to measure 4.3/4" x 6.3/4" and applied a coat of Distress Collage Medium Matte over the panel. I trimmed out the centre of masking paper to leave a border around the edge, scribbled on the 4 colours of the Distress Crayons (from L to R Crooked Broomstick, Bubbling Cauldron, Flickering Candle, and Jack O' Lantern) and went to town blending the colours with my fingers, seriously my friends, you have the perfect tools for working with Distress Crayons right at your fingertips (forgive the pun).
I laid the Tim Holtz/Stampers Anonymous Autumn Layering Stencil on the panel, dabbed through the stencil with damp kitchen towel to remove the colour from the background, flicked on some water from my Distress Sprayer and dabbed again to create the water droplet effect.
I removed the mask and stamped images from Tim Holtz/Stampers Anonymous Pressed Foliage inked with Ground Espresso Distress Archival ink randomly over the background.
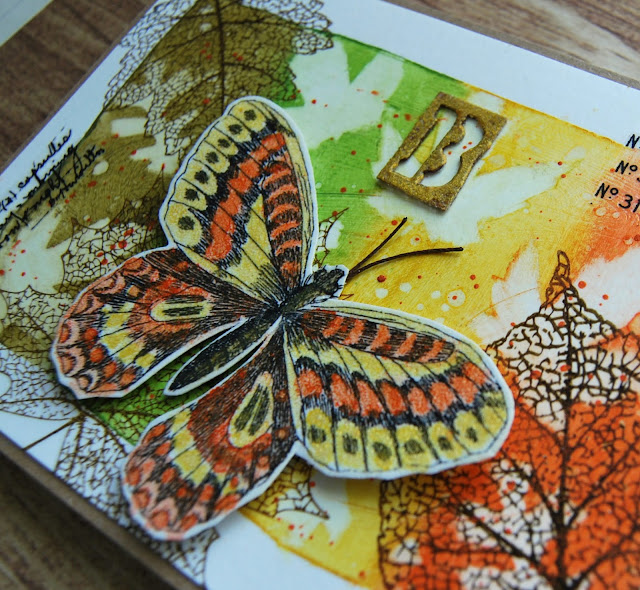
I tapped the Versamark ink pad over a butterfly from Tim Holtz Idea-ology Layers Engravings , sprinkled with Distress Frosted Crystal Embossing Powder and heat set. I picked up colour directly from the Flickering Candle, Jack O'Lantern and Crooked Broomstick Distress Crayons with my Distress Detailer Brush to colour the image. The Frosted Crystal provides tooth on a non-pourous surface allowing colouring mediums to adhere and works great with Idea-ology Paper Dolls too.
I trimmed one of Tim Holtz Idea-ology Silver Stencil Chips to leave a small border and coloured using the same technique with the Jack O'Lantern and Crooked Broomstick Distress Crayons.
I replaced the mask on the panel and added splatters of Jack O'Lantern Distress Mica Stain. I fixed the Idea-ology Stencil Chip in place with Distress Collage Medium, added thread antennae to the butterfly and popped up on foam adhesive to create dimension.
To finish I added Tim Holtz Idea-ology Halloween Remnant Rubs and matted the panel on to a 5" x 7" Distress Kraft HeavyStock card blank.
On the second card, I trimmed Distress Watercolor card to 4.1/2" x 5.1/2", stamped the images from Tim Holtz/Stampers Anonymous Rest In Peace inked with Black Soot Distress Archival ink, applied Tim Holtz Idea-ology Halloween Remnant Rubs randomly over the panel and finished with a coat of Distress Collage Medium.
As before, I scribbled the Distress Crayons, Hocus Pocus, Crooked Broomstick and Empty Tomb over the panel, blended out the colours as before with my trusty fingers, flicked on water and dabbed with kitchen towel to create the water droplet effect.
I used damp kitchen towel to remove colour to highlight some of the text images on the background, sprinkled on Stampendous Frantage Aged Silver Embossing Powder and heat set from underneath.
I fixed Idea-ology Clipping Stickers from the Curiosities Sticker Book in place with Distress Collage Medium and added a hint of colour using Crooked Broomstick, Empty Tomb and Hocus Pocus Distress Crayons and a Distress Detailer Brush.
To finish I matted the panel on to a white 5" x 7" card blank, covered with Idea-ology BlackOut KraftStock.
I'll be back tomorrow to share the projects I made with the two sets of Christmas Distress Crayons. In the meantime, have fun with whatever you are making.


 If you missed the Live, you can watch the replay and check out all the amazing projects from the Makers on Tim's Blog HERE or Tim's YouTube Channel HERE. I'm sharing the cards I made for the Live using the Halloween sets.


These are wonderful Kath, I really must try and invest in them, never tried them before but they look brilliant.xx
ReplyDeleteWonderful projects. The colors are amazing.
ReplyDeleteI like the look of those pens your colouring is fantastic xx
ReplyDeleteStunning!
ReplyDeleteLove these cards they are so simple when you break them down into steps but they have so much texture colour and detail they look amazing x
ReplyDelete