Hi my friends, I'm sharing two cards I made to celebrate a very Happy Day, the arrival of the brand new colour to join the Distress Family and say a huge thank you to Tim, Mario and Simon Says Stamp for sending this delicious package of Prize Ribbon for me to play with. It truly is the most gorgeous shade of blue and if you missed the Live, you can catch up over on Tim's YouTube Channel where he walks us through the new colour products and shares swatches, comparisons of how this gorgeous colour fits in with the other blues and colours from the Distress Family and all the amazing projects from the makers.
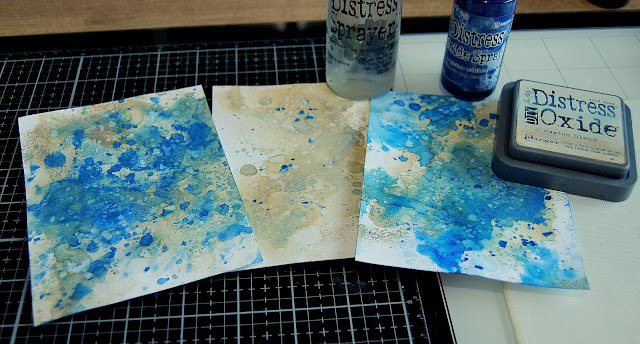
Mr FedEx had barely left the premises and I had that package open. I grabbed my labeller, created my swatches and was ready for some playtime. I began by trimming Distress White HeavyStock to create A2 panels and made me some backgrounds using a favourite Custom Ink Pad (Antique Linen/Old Paper Distress Ink and Speckled Egg/Frayed Burlap Distress Oxide Inks) and Prize Ribbon Distress Oxide Spray.and created two cards from entirely different backgrounds
I placed the panel into the bottom left corner of my stamp platform and stamped the gorgeous image from Tim Holtz/Stampers Anonymous Floral Outline, inked with Vintage Photo Distress Archival ink. I coloured the image with Prize Ribbon, Fossilized Amber and Old Paper Distress Re-inkers using a Distress Detailer Brush to create a watercolor look. Distress re-inkers are transparent which means that instead of covering up the color from the background, they re-activate it and mix with it, giving me the shabby vintage look I was hoping for. I dried the panel with my heat tool and added layers of colour until I was happy, always drying between each layer. I placed the panel back into it's original position on the stamp platform and re-stamped the image to define the details.
I added splatters of White Gesso, sprinkled with Ranger White Superfine Embossing Powder and heat set to create the look of small enamel dot splatters.
I trimmed the panel to slightly less than A2, added an Idea-ology Sentiments Label Sticker fixed to white card and trimmed to leave a small border and matted the panel on to a white A2 card blank.
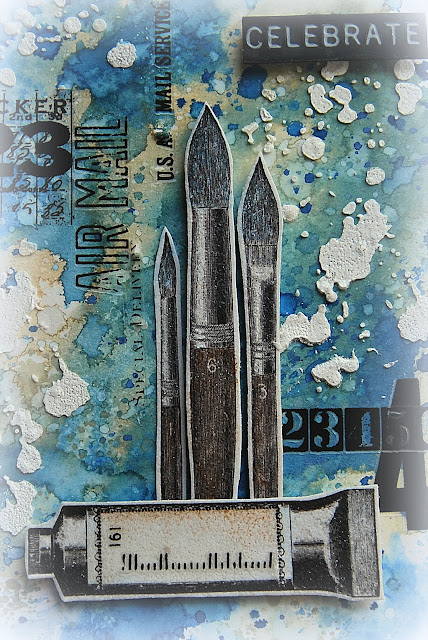
On the second panel, I added Ranger Distress Texture Paste through the Grime Mini Layering Stencil from set 43 and set aside to dry. I tapped Versamark ink over the pieces from Idea-ology Engraving Layers Ephemera, sprinkled with Ranger Antiquities Frosted Crystal Embossing Powder and heat set. This will give some tooth to what is essentially a shiny surface, making colouring easier.
Normally I use this technique with Distress Crayons but of course, as yet there is no Prize Ribbon Crayon so I chanced my luck using Distress Re-inker for the brush bristles and Antique Linen, Vintage Photo and Brush Pewter Metallic Distress Crayons for the rest of the colouring.
I fixed the Engraving Layers in place popped up on foam adhesive to create dimension and added Idea-ology Numbers and Postale Remnant Rubs to add interest to the background, old favourites, sadly now retired but I'm hanging in there and using them sparingly. I've linked to ones that are currently available and would work just as well.
To finish, I trimmed the panel to 4" x 5.1/4", added an Idea-ology Sentiments Label Sticker and matted the panel on to an A2 white card blank.
I'll be sharing another Prize Ribbon card with you tomorrow, a lucky killing two birds with one stone bonus for my Simon Says Monday Challenge DT project. When you're busy busy and your back is up against the wall, us crafters have to grab every opportunity to make life easier...crafty by name and crafty by nature. Enjoy what's left of your weekend and have fun with whatever you are making.
Hugs Kath xxx


Morning Kath and WOWSERS, love the new colour and of course your wonderful creations are simply the best. I often wonder how on earth the brilliant 'one' TH keeps coming up with all this, he is quite amazing.
ReplyDeleteHave a lovely day, another hot one.xx
Ditto on what Janette said...
ReplyDeletebeautiful Prize Ribbon cards! you know I love flowers so that is my favorite but I love how you used the engravings for the collage. Great cards!
ReplyDelete