Monday, May 20, 2024

Tim Holtz/Tonic Studios Recoil Scissors

Hello my friends, it's an exciting news day. Tim Holtz and Tonic Studios have just released their fabulous new Recoil Scissors  - 9.5" and Mini Snips and I couldn't wait to put these new boys through their paces when they arrived in the cubbyhole. The minute I released them from the packaging, I knew they would become favourites. They are so comfortable to hold with their soft cushioned handles, have super duper sharp non serrated blades and the added safety features of a locking mechanism and blade covers when not in use and also come with interchangeable high tension springs. For more info and to see them in action, make sure you join Tim on his YouTube channcel for the official Live launch on Saturday 25th May at 9am PT, 12pm ET or 5pm in the UK.

I decided to make the Recoil Scissors their very own storage box to sit on my counter top for easy access.

I just happened to have an empty Ranger Heat It Tool box and the 9.5" Recoil Scissors made short work of chopping off the lid and shortening the top.
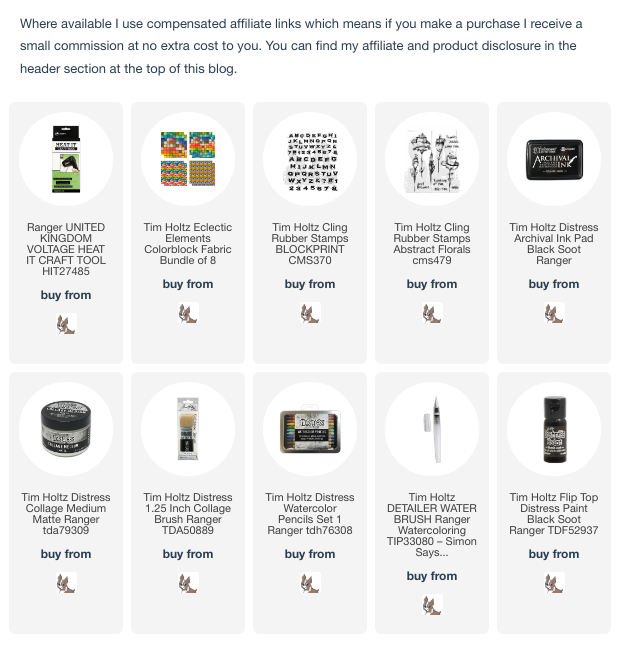
I covered the outside and inside of the box with Tim Holtz Idea-ology paper from my hoard of long since retired paper pads, neatened the top edge with Idea-ology Design Tape and applied Black Soot Distress Paint along the edges.
I used the 9.5" Recoil Scissors to trim out strips from Tim Holtz/Eclectic Elements Colorblock fabric and oh boy, these super sharp blades are amazing, one minute they're chopping thick cardboard, the next minute effortlessly cutting fabric.
I stamped letters from Tim Holtz/Stampers Anonymous Blockprint, inked with Black Soot Distress Archival ink, on to the fabric strips and trimmed into individual tiles with the Mini Recoil Snips.
I fixed the alphabet tiles to Distress Watercolor card and trimmed out with the 9.5" Recoil Scissors. I am so impressed that with the super sharp blades there was no fraying on the edges of the fabric.
I stamped the image from Tim Holtz/Stampers Anonymous Abstract Florals, inked with Black Soot Distress Archival ink, on to Distress Watercolor card, coloured with Distress Watercolor Pencils and a Distress Detailer Brush and easily fussy cut with the Mini Recoil Snips. I'm a bit of a fussy cutting nerd and believe me, the Recoil Scissors will be my absolute No 1 go to from now on.
Just to up the anti - I decided to re-stamp the flower head image, inked with Black Soot Distress Archival ink, on to a square of the Colorblock fabric and the magical Recoil Snips didn't let me down. I fixed the perfectly fussy cut flowerhead on top of the original using Distress Collage Medium.
I fixed larger trimmed rectangles of the Colorblock fabric to the front and sides of the box, added the alphabet tiles and Abstract flower using Distress Collage Medium.  To finish I applied Distress Collage Medium randomly over the front of the box, sprinkled lightly with Stampendous Frantage White Chunky Embossing Enamel and heat set.


Have fun with whatever you are making.
Hugs Kath xxx
Simon Says - Let's Art Journal

Hi Everyone...welcome to another week on the Simon Says Stamp Monday Challenge Blog. Thank you for joining us for last week's challenge and we hope you can join us this week too because


and the theme for this week is...
LET'S ART JOURNAL
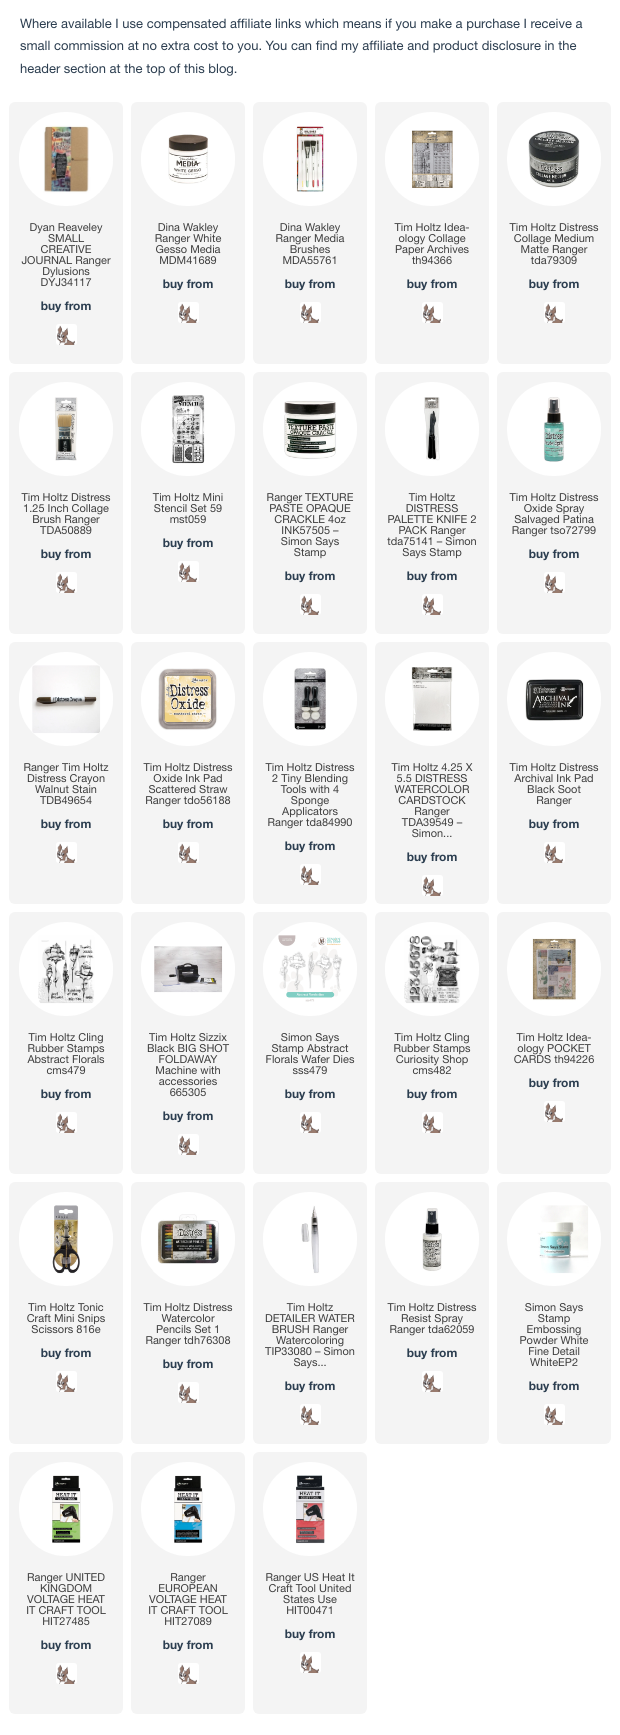
I created a page in my Dylusions Small Media Journal using Tim Holtz/Stampers Anonymous Abstract Florals and Curiosity Shop, Mini Layering Stencils from Set 59, the Simon Says Abstract Florals dies and Tim Holtz/Idea-ology Archives Collage Paper from the new 2024 collection.
I began by applying a coat of White Gesso over the pages and attached torn strips of Tim Holtz/Idea-ology Archives Collage Paper using Distress Collage Medium.
I applied Distress Texture Paste Opague Crackle through Tim Holtz/Stampers Anonymous Labels Mini Layering Stencil from Set 59. Once the paste was dry and crackled, I spritzed the pages with Salvaged Patina Distress Oxide Spray. I applied Scattered Straw Distress Oxide ink through the Spots Mini Layering Stencil also from Set 59 using a Tiny Blending Tool. I scribbled the Walnut Stain Distress Crayon over the crackle and blended out with a damp finger.
I inked the images from Tim Holtz/Stampers Anonymous Abstract Florals with Black Soot Distress Archival ink, stamped on to Distress Watercolor card, die-cut using Simon Says Stamp Abstract Florals dies and fixed to the pages with Distress Collage Medium.
I repeated the process with the images from Tim Holtz/Stampers Anonymous Curiosity Shop and fussy cut - I don't have the dies for those.
I fixed the typewriter in place with Distress Collage Medium, trimmed out the individual letters from the Idea-ology Archives Collage Paper and added them to the page using Distress Collage Medium to spell out the page title.
I coloured the Abstract Florals and added shading to the papers in the typerwriter using Fossilized Amber, Crackling Campfire and Walnut Stain Distress Watercolor Pencils from Set 1 and a Distress Detailer Brush.
I highlighted some of the stencilled spots using the Fossilized Amber Distress Watercolor Pencil, added extra circle letters from the Idea-ology Archives Collage Paper, added splatters of Distress Resist Spray, sprinkled with white embossing powder and heat set.


You can find all the products I used over at Simon Says Stamp, just click on the links below


Why don't you pop over to the Monday Challenge Blog and check out the amazing creations from my very talented Design Team mates and as always you have until Monday 8am Ohio time...1pm UK time...2pm CET to join in with the chance to win a $25 voucher to spend online at Simon Says Stamp


You can also follow Simon Says Stamp on Instagram
and if you use Instagram...
please add #sssmchallenge to your entry uploads so we can see them on there too

I look forward to seeing what you create this week...
Have Fun and Happy Crafting
Hugs Kath xxx

Thursday, May 16, 2024

Simon Says - Sweet Birthday Card

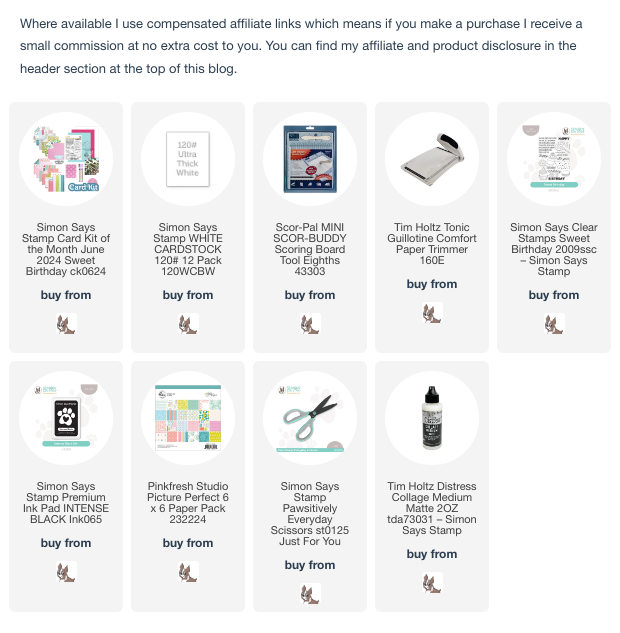
Hello my friends, I'm sharing another card made using Simon Says Stamp Sweet Birthday June Card Kit. The kit is available to purchase HERE or if you wish you can also purchase individual items from the kit.


I created a card using Pinkfresh Studio Picture Perfect 6" x 6" patterned paper and the sentiments only from the Sweet Birthday 6" x 8" stamp set, a great way to use up any patterned paper scraps.

I trimmed the Neenah Solar White cardstock included in the kit to 3.3/4" x 5", placed in my Stamp Platform, lined up the sentiments from the Sweet Birthday stamp set and stamped, inked with Simon Says Intense Black Ink.
With the stamps still positioned in the same place on the lid, I added the first torn strip of the patterned paper, masked off the stamped sentiments to the right and stamped the sentiments again. I added the second torn strip of contrasting patterned paper and stamped again. I added a thin strip of the teal coloured paper to the left side, fussy cut the flowers from the patterned paper and fixed in place with Distress Collage Medium.
To finish I matted the panel on to the same pink patterned paper as the torn strip, trimmed 1/4" larger and fixed to an A2 white card blank.

With lots more products to use in this beautiful kit, I'll be back soon to share more makes.
Hugs Kath xxx

Tuesday, May 14, 2024

Simon Says - Sweet Birthday June Card Kit

Hello my friends, it's the 14th day of the month, the day that Simon Says Stamp reveals their monthly card kit and the Sweet Birthday June Card Kit is full to bursting with lots of fabulous goodies for celebrating birthdays. The kit is available to purchase HERE or if you wish you can also purchase individual items from the kit. If you don't already subscribe to Simon Says Stamp card kits, there are many benefits, savings and perks from signing up and you can find all the details HERE.


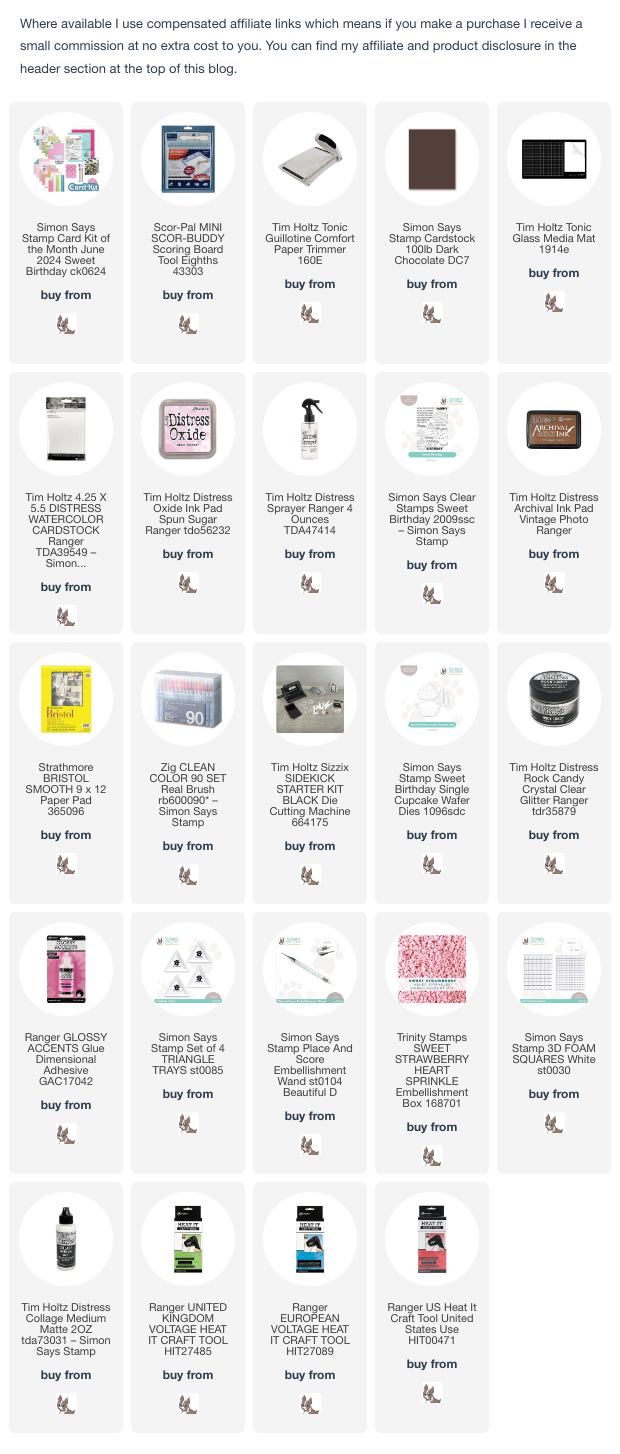
I created a card using the Sweet Birthday 6" x 8" stamp set from the kit, because who doesn't love cupcakes.

I smooshed a Spun Sugar Distress Oxide ink pad on to the craft mat on my Glass Media Mat, spritzed with water and tapped an A2 panel of Distress Watercolor card into the ink repeatedly and dried between layers to create a soft background. I stamped the sentiments from the Sweet Birthday 6" x 8" stamp set on to the panel, inked with Vintage Photo Distress Archival ink.
I inked the cupcake bases and frosted toppings with Vintage Photo Distress Archival ink and stamped on to Strathmore Bristol Smooth White cardstock.
I coloured the cupcakes using Zig Clean Color Real Brush Markers and die-cut using Simon Says Sweet Birthday Single Cupcake die set included in the kit. I stamped the dots/sprinkles on to the background, inked with Vintage Photo Distress Archival ink, fixed the bases in place with Distress Collage Medium and popped the frosted toppings up with foam squares to create dimension.

I added a thin layer of Distress Collage Medium to the swirls on the frosting and sprinkled with Distress Rock Candy Glitter to add some birthday sparkle. I coated the cherry with Ranger Glossy Accents and added Trinity Stamps Sweet Strawberry Heart Sprinkles.
To finish I trimmed the panel to 4" x 5.1/4", matted on to Simon Says Chocolate cardstock trimmed 1/8" larger and fixed to a top folding A2 white card blank scored and folded from the Neenah Solar White 110lb cardstock included in the kit.

I'll be back soon to share more makes with this sweet card kit, in the meantime, have fun with whatever you're making.
Hugs Kath xxx

Monday, May 13, 2024

Simon Says - Romance/Wedding/Anniversary

Hi Everyone...welcome to another week on the Simon Says Stamp Monday Challenge Blog. Thank you for joining us for last week's challenge and we hope you can join us this week too because


and the theme for this week is...
ROMANCE/WEDDING/ANNIVERSARY
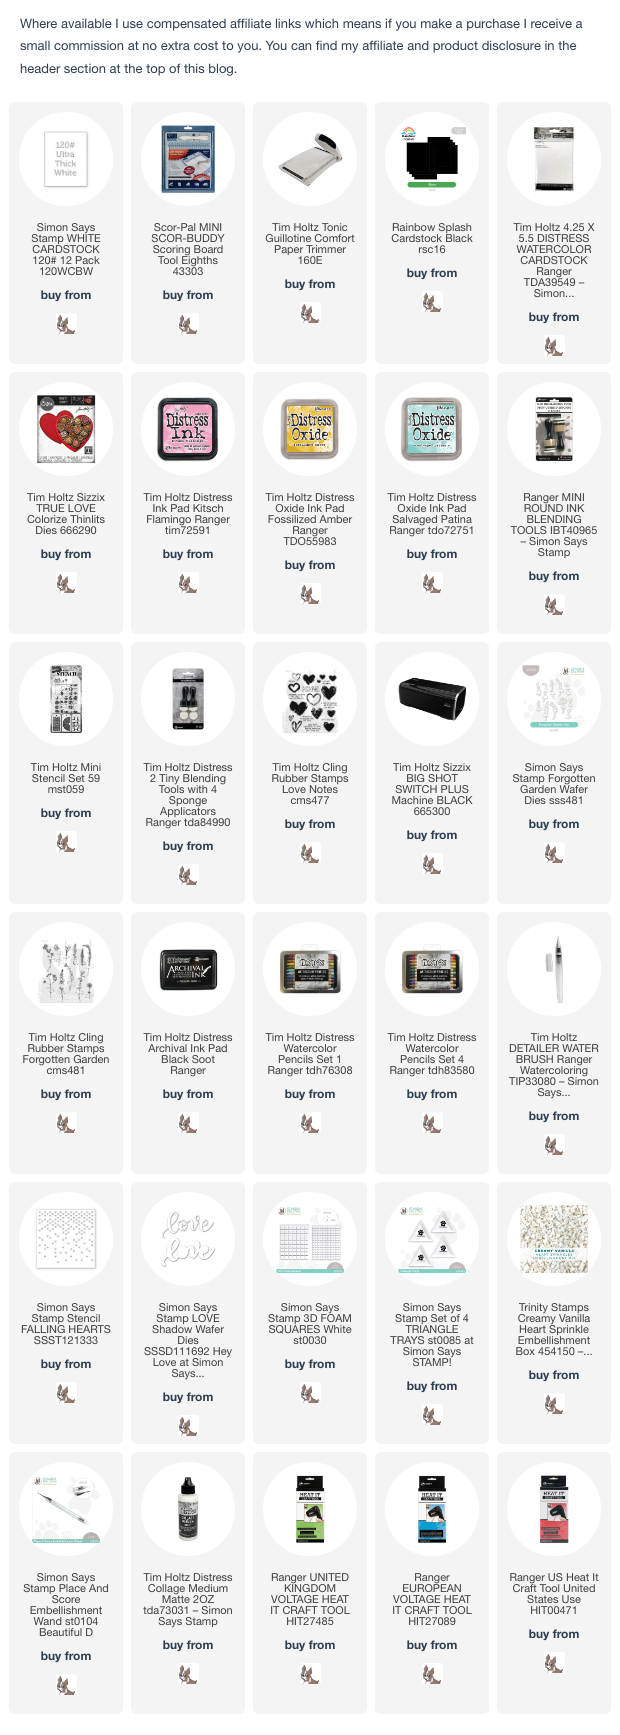
I made a trio of "love themed" cards using Tim Holtz/Sizzix True Love Colorize Thinlits, Tim Holtz/Stampers Anonymous Mini Layering Stencil Set 59, Forgotten Garden and Love Notes, Simon Says Stamp Forgotten Garden and Love Shadow dies.
I began by die-cutting the heart shape from Distress Watercolor card using Tim Holtz/Sizzix True Love Colorize Thinlits to use as a stencil.
I trimmed Distress Watercolor card to create 3 - 4" x 5.1/4" panels and applied Kitsch Flamingo, Fossilized Amber and Salvaged Patina Distress Oxide inks through the stencil using Mini Round Blending Tools. With the stencil still in place, I applied a heavier application of the same ink through the Mini Layering Stencils from Set 59 using Tiny Blending Tools to create tone-on-tone patterns.
I stamped the sentiments from Tim Holtz/Stampers Anonymous Love Notes on to the panels, inked with Black Soot Distress Archival ink.
I trimmed Distress Watercolor card to fit inside my stamping platform and die-cut the Simon Says Stamp Forgotten Garden dies which co-ordinate with the Tim Holtz/Stampers Anonymous Forgotten Garden stamp set. I will keep this as a template to ensure that the stamped images match up exactly with the die-cuts in future. I placed the stamps into the respective negative spaces and picked up with the lid of the platform. I replaced the die-cuts back into the spaces and stamped the images, inked with Black Soot Distress Archival ink.
I coloured the Forgotten Garden die-cuts using Distress Watercolor Pencils, Carved Pumpkin, Salty Ocean and Wilted Violet and a Distress Detailer Brush. I fixed the die-cuts in place using Distress Collage Medium. I added splatters by flicking the colour from the pencils with a wet brush on to the panels and dried.
I applied the matching Distress Oxide inks through Simon Says Stamp Falling Hearts Stencil to add more interest to the backgrounds.
I die-cut Simon Says Stamp Love Shadow die from Distress Watercolor card, coloured the shadow pieces to match the hearts, added the die-cut words and fixed to the panels with foam squares to add dimension.
I matted the panels on to Simon Says Stamp Black cardstock trimmed 1/8" larger and fixed to top folding A2 white card blanks. To finish I added Trinity Stamps Creamy Vanilla Heart Sprinkles.


You can find all the products I used over at Simon Says Stamp, just click on the links below


Why don't you pop over to the Monday Challenge Blog and check out the amazing creations from my very talented Design Team mates and as always you have until Monday 8am Ohio time...1pm UK time...2pm CET to join in with the chance to win a $25 voucher to spend online at Simon Says Stamp


You can also follow Simon Says Stamp on Instagram
and if you use Instagram...
please add #sssmchallenge to your entry uploads so we can see them on there too

I look forward to seeing what you create this week...
Have Fun and Happy Crafting
Hugs Kath xxx