

Hi my friends, I'm sharing the project I made for the YouTube Live launch of Tim Holtz/Sizzix Chapter 3 - an album with a garden theme and pages created with file folders die-cut using Specimen Thinlits. If you missed the Live, you can catch up with all the amazing dies and Texture Fades in this fabulous new must-have collection and check out all the amazing inspiring projects from the Makers on Tim's YouTube Channel HERE or Blog HERE.
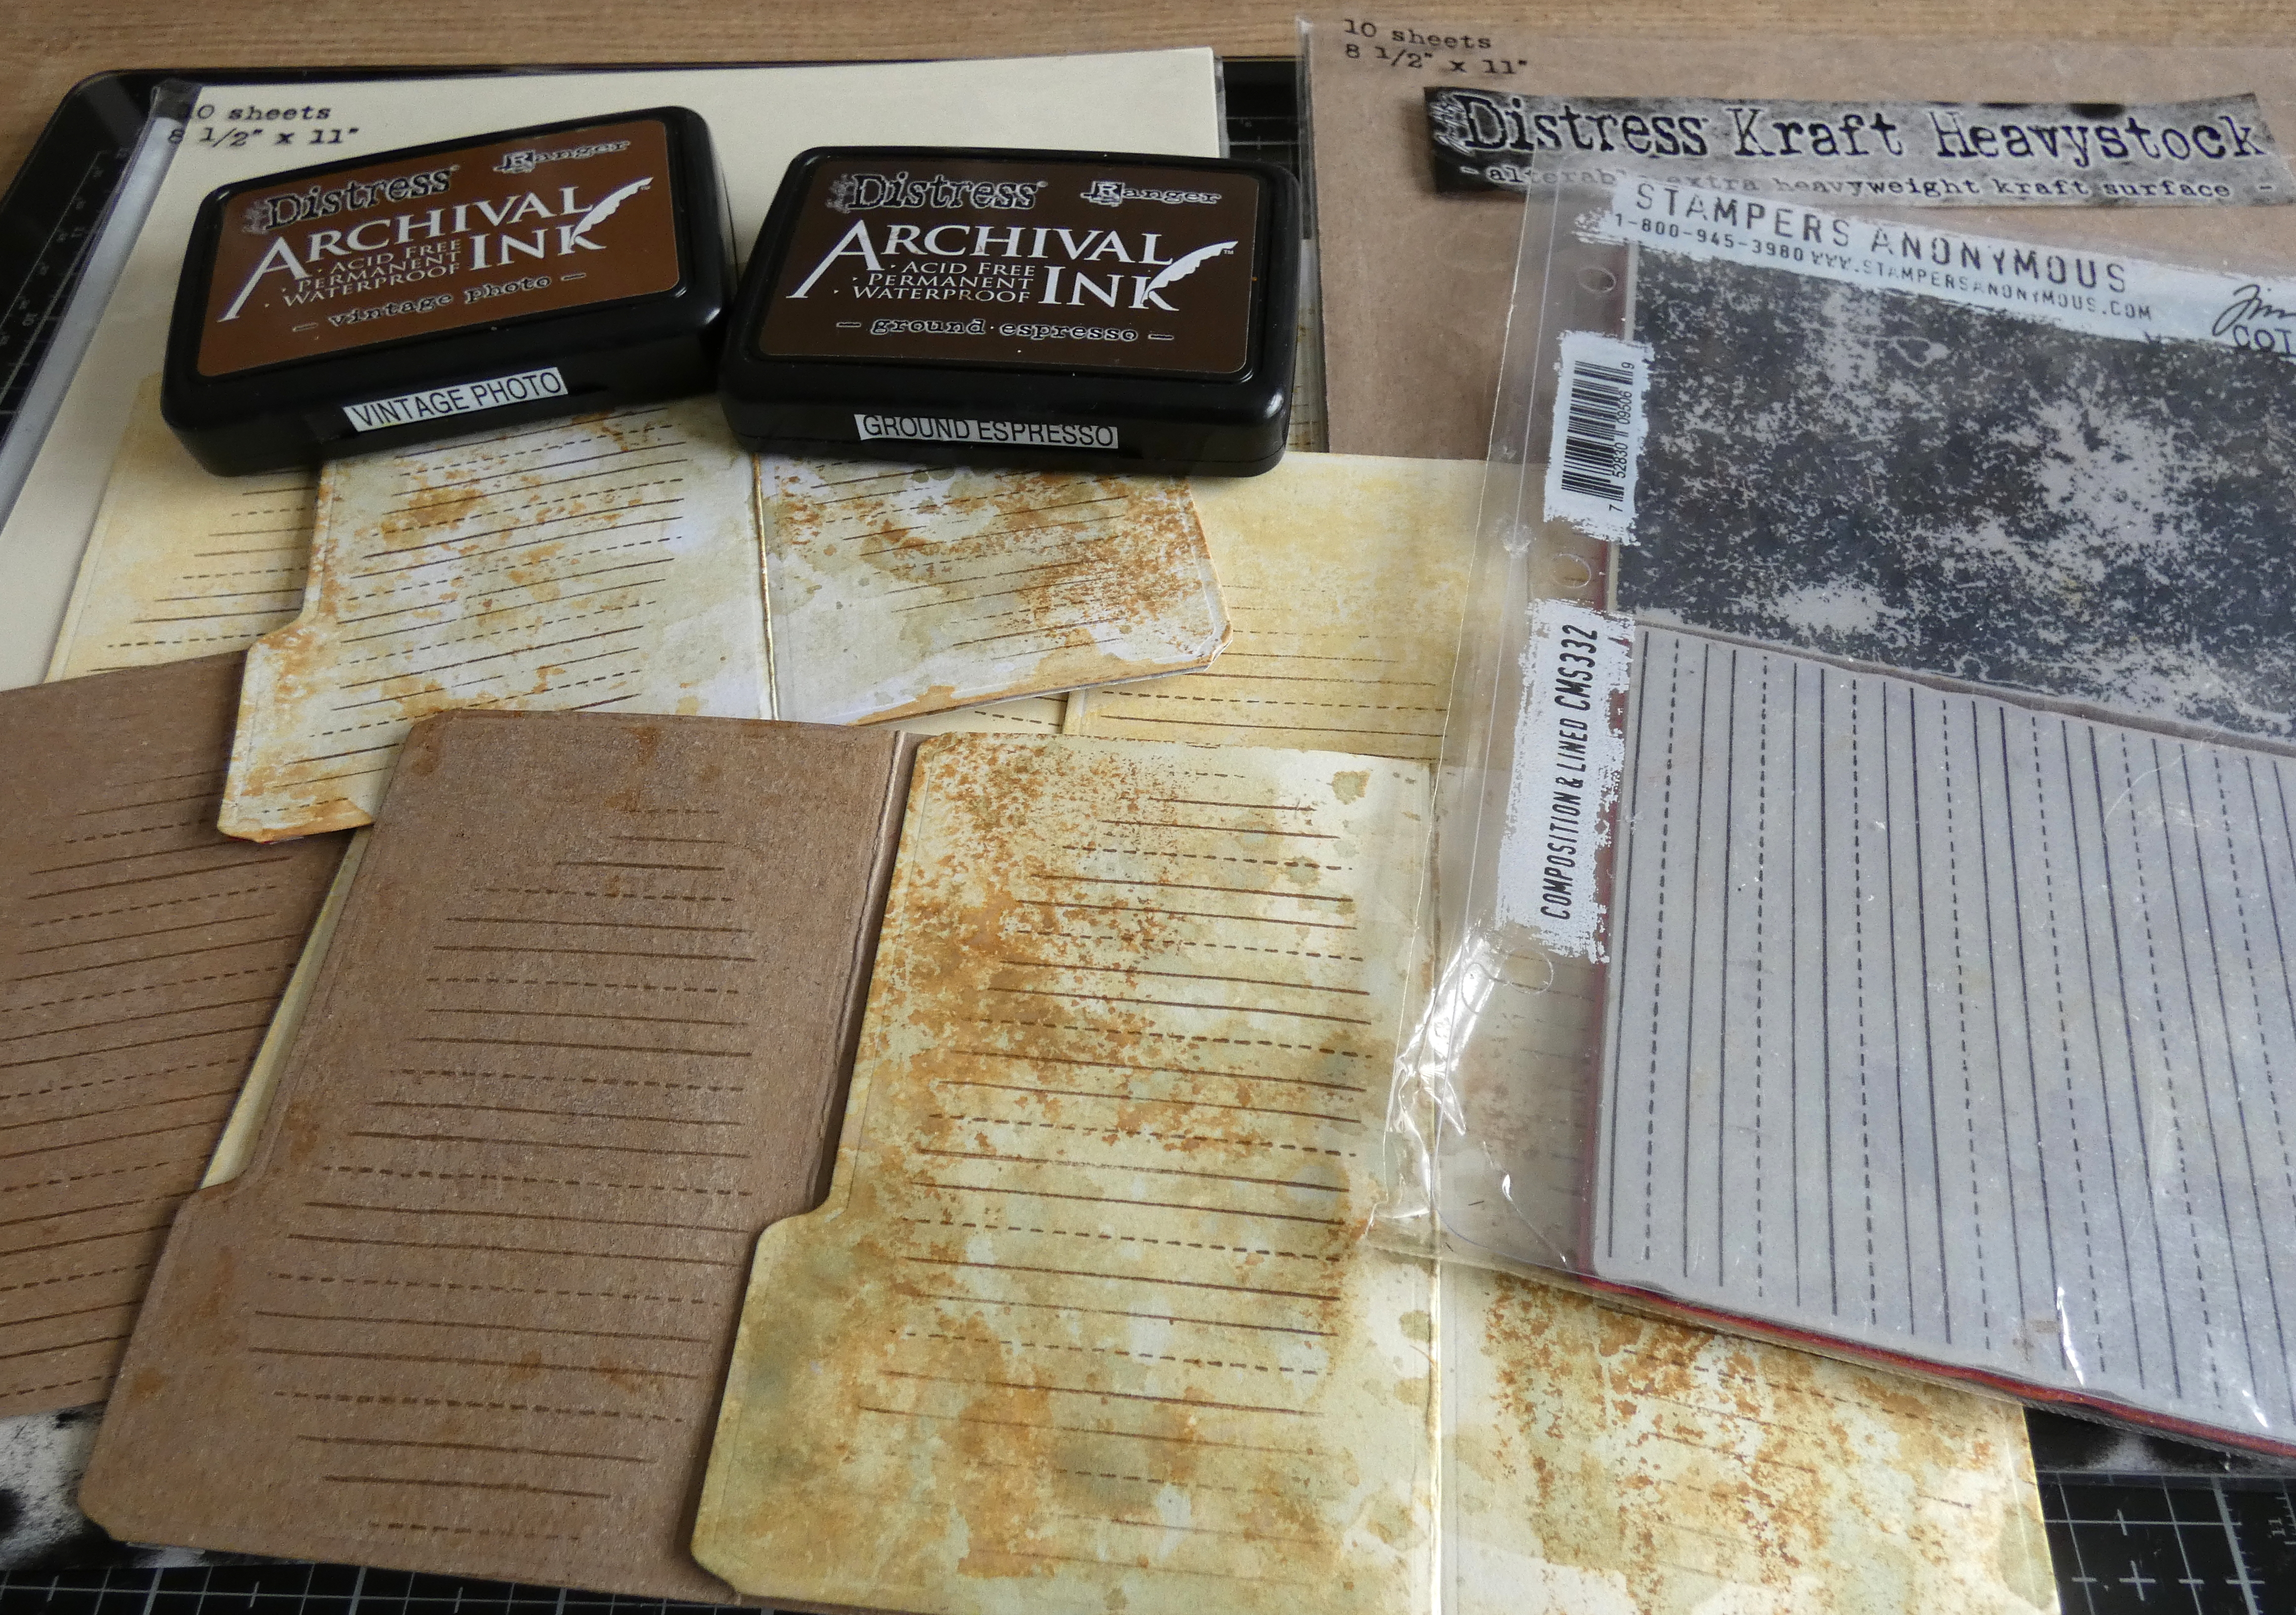
I trimmed Distress Kraft HeavyStock to create the album, coloured Distress Watercolor card using Antique Linen/Old Paper Distress Spray Stains and Antique Linen Distress Oxide Spray and trimmed panels to cover the outside and inside of the album.


I used Distress Kraft HeavyStock to create the folded section


I fixed Scor Tape to one side of each mountain, pressed together, fixed tape on the underside and fixed to the centre panel on the inside of the album. I also fixed the inked panels to the front and back of the album using Distress Collage Medium.


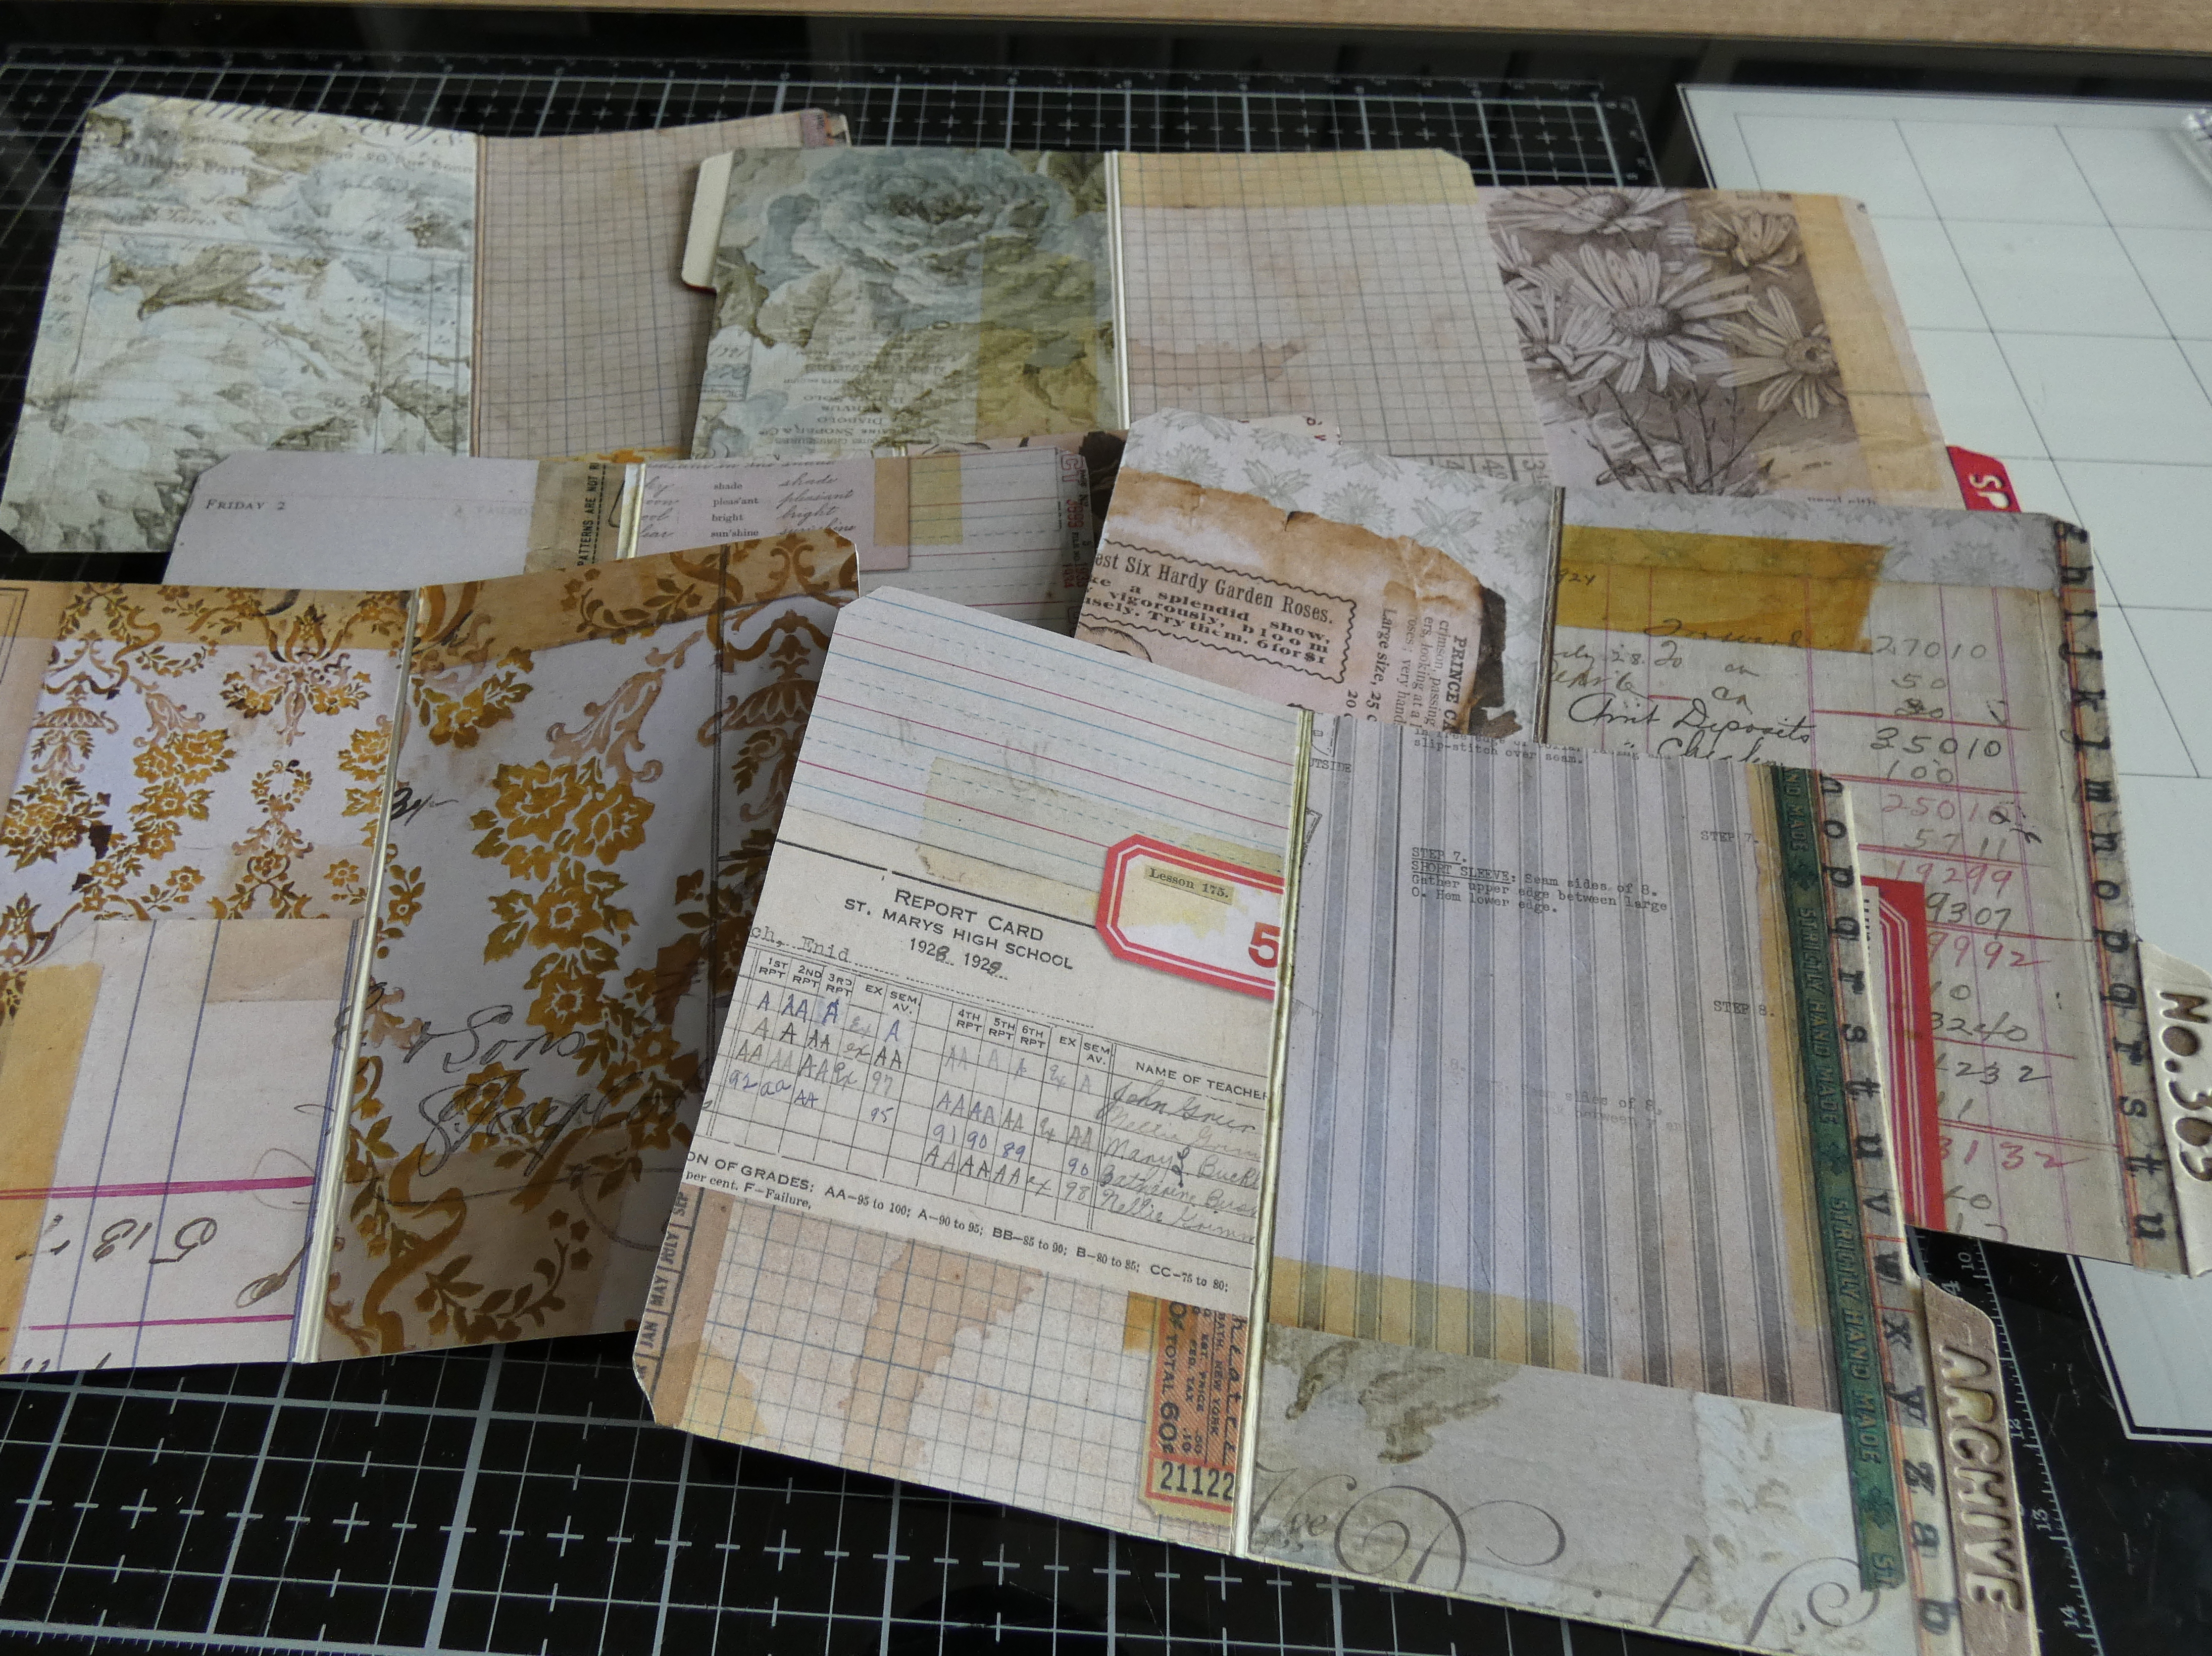
I'm not going to bore you silly with all the steps to decorate each file folder, instead, here are some photos of the file folder pages (brace yourselves, grab a comfy sofa and a cuppa)


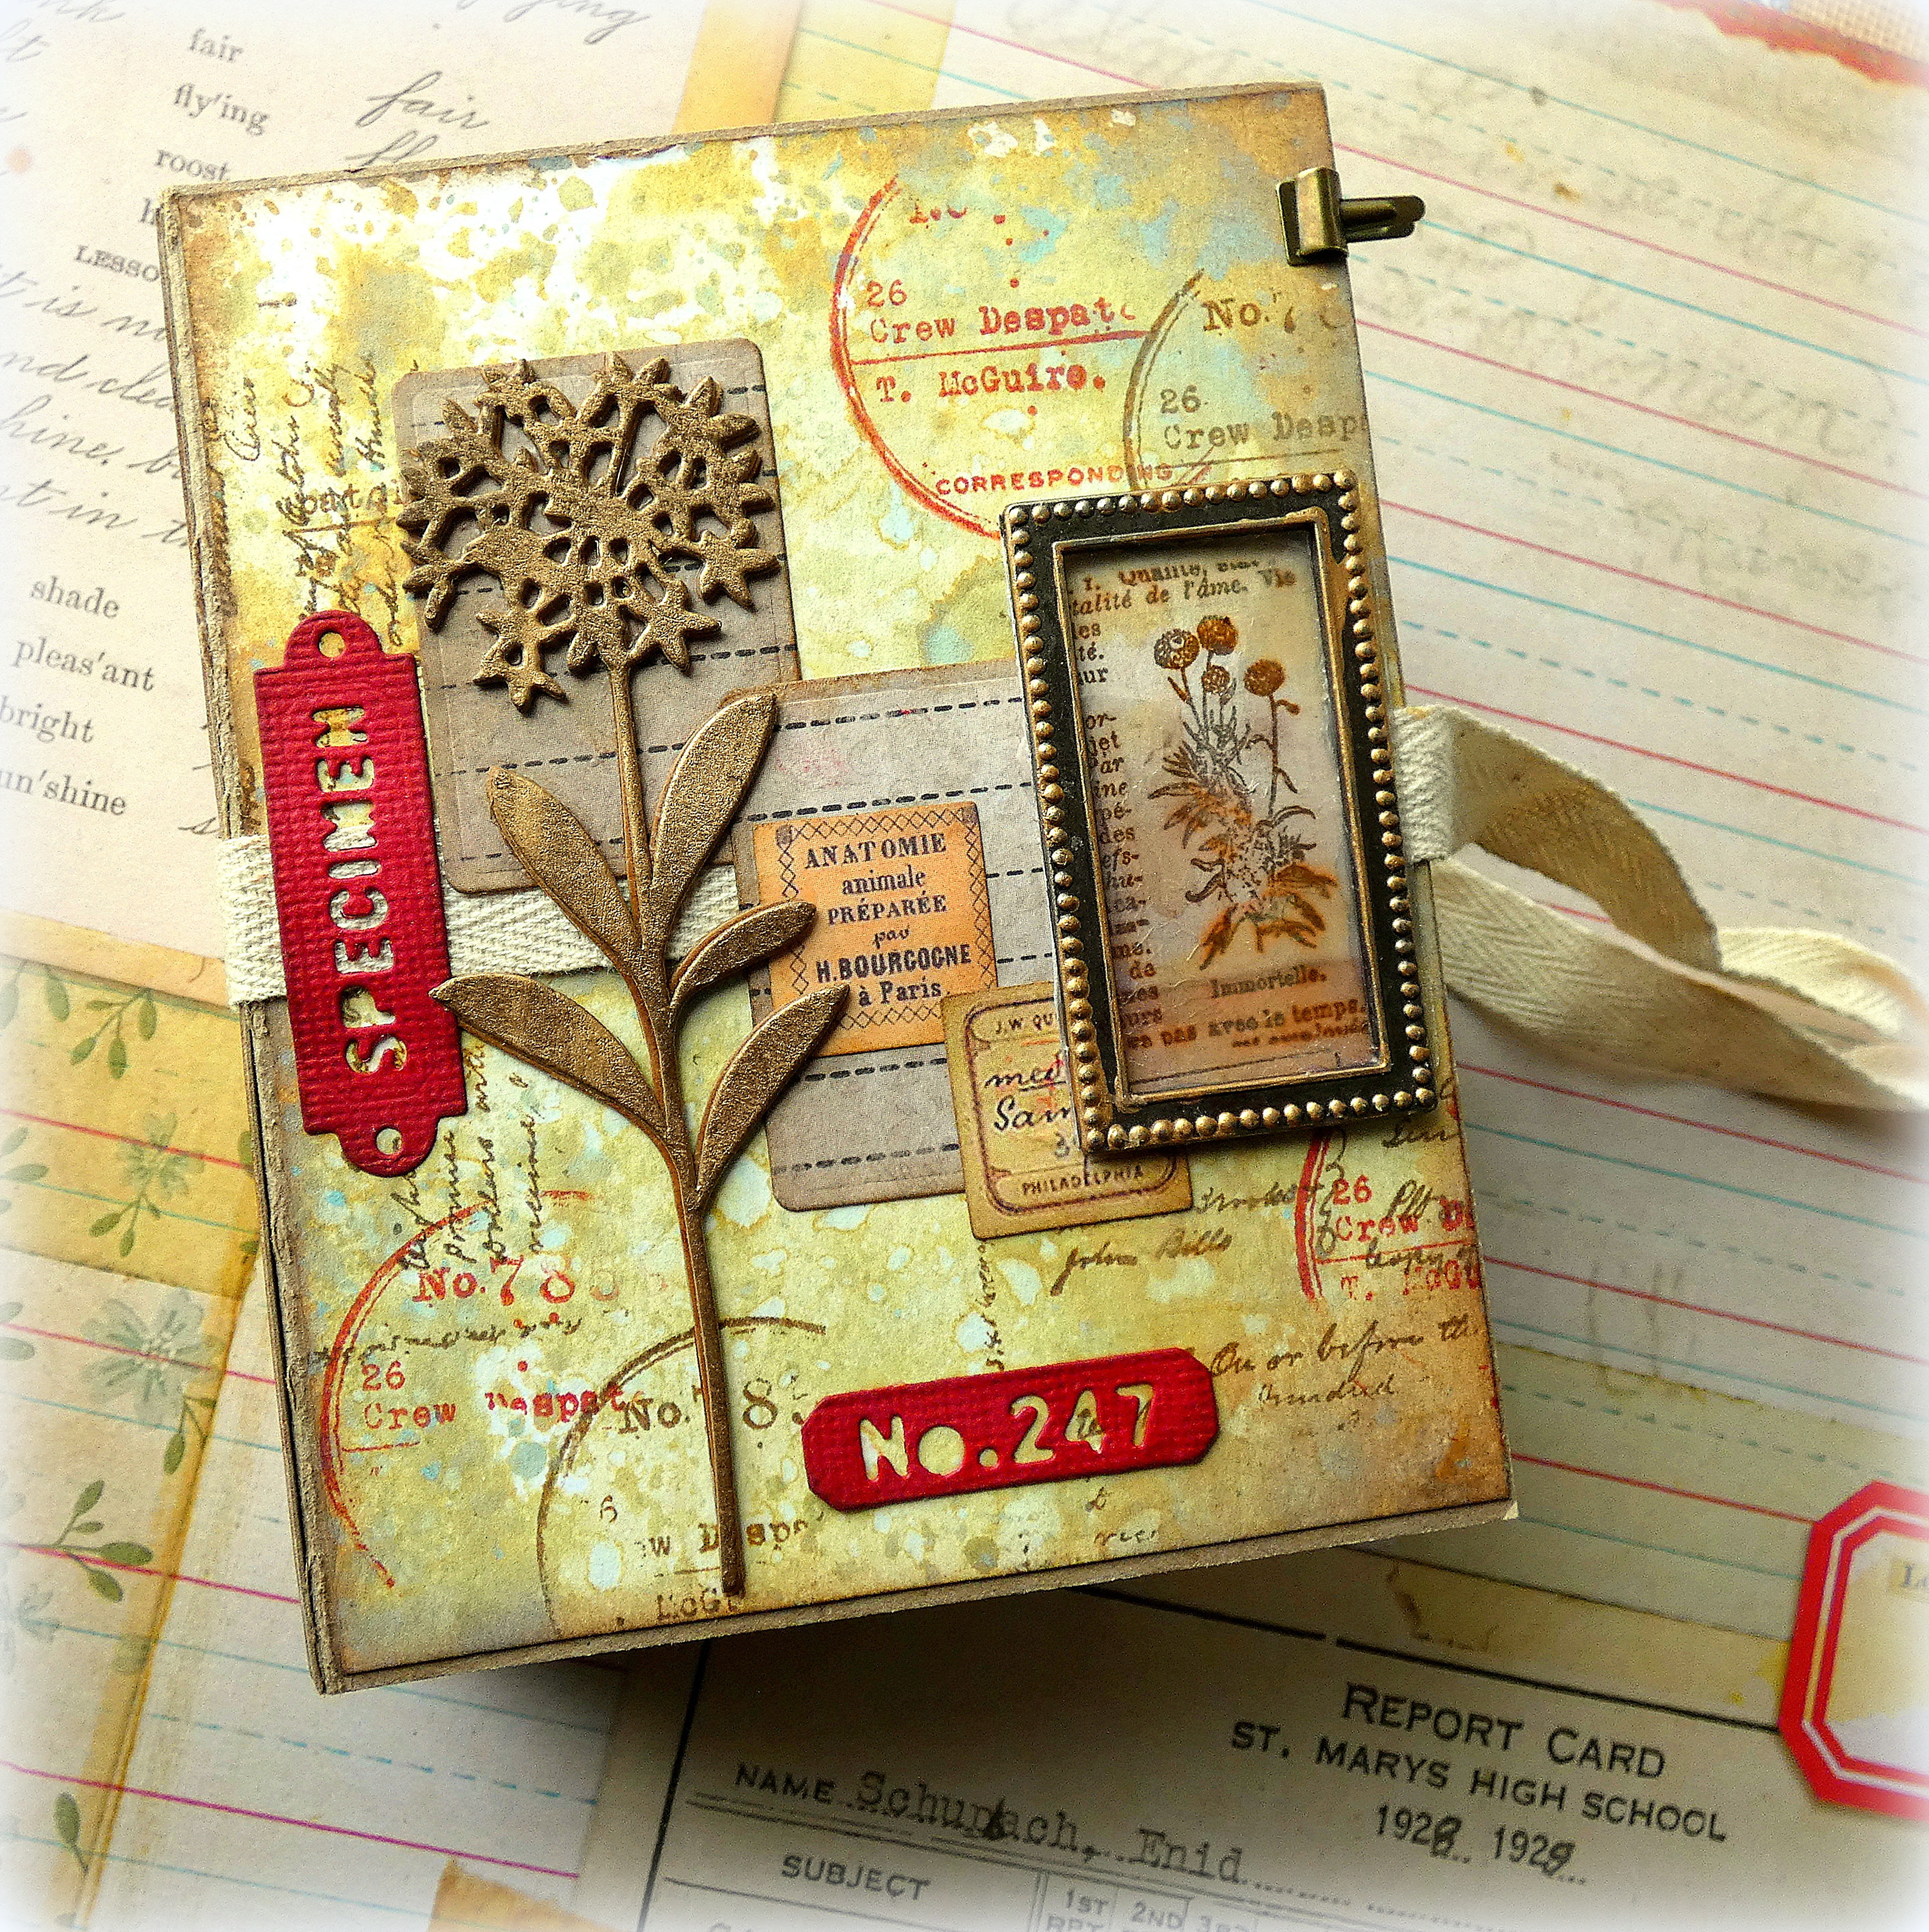
 I fixed twill tape around the cover using Scor Tape, secured at the back with a brad and added a plaque die-cut from the Specimen Thinlits.
To decorate the front, I added die-cut plaques stamped with the Lined Background, Field Notes Snippets and the labels die-cut with the words and numbers from Specimen. I smeared Mined Foundry Wax on to Idea-ology Black KraftStock, heat set and die-cut flowers using Tim Holtz/Sizzix Wildflower Stems 2 and fixed one on the cover and several more on the file folders inside.


I used a variety of Tim Holtz stamps, dies and Idea-ology bits and pieces to decorate the file folders, all linked below.
Hugs Kath xxx
This is beautiful!
ReplyDeleteWOW! WOW! WOW! This is stunning. If I could ask, where do you get the linen ribbon you use as a tie for the book? Cheers, Makira
ReplyDeleteThis book is incredible! I started following you a couple of months ago and am so glad I did - I love everything you make. Your style is infectious and inspirational and I find myself moving out of my usual box and grasping a little "Kath-ism" to add to my projects. Thank you for sharing your amazing talent with us!
ReplyDeleteAmazing! So beautiful! Thank you for sharing.
ReplyDeleteLoved watching the Tim Holtz video this afternoon. Your book design and blog are wonderful, thanks for sharing so much information and giving us new ideas. I love receding your blog emails and your Scotland Instagram post.
ReplyDeleteJeanne G
Wow , Kath what an amazing make! Thank you for the step by step for the construction of it! I'm inspired to make one! Awesome job my friend!
ReplyDeleteStunning!!!
ReplyDeleteThis is so cool! I really love how how it turned out. Great tutorial; I can’t wait to make one myself. Thanks so much for sharing all the details. Happy crafting 😊💜🎨
ReplyDeleteSo stunning Kath, totally love this make!
ReplyDeleteYour how-to tutorial is great.
Thank you so much for sharing, stay safe
and have a wonderful day.
Wonderful mini album...love that you used the hidden hinge to attach the pages...amazing tutorial too!
ReplyDeleteSimply amazing. I love it.
ReplyDeleteI think this is wonderful Kath, so much work goes into making these books and they are so worth the time, I just love this you may have woken up my very sleepy mojo Kath, its been so long since I made one of these and I love them, thankyou.xx
ReplyDeleteAdorable
ReplyDeleteThanks for inspiration Kath, I have used your book to create my own thank you!
ReplyDeletethis is totally awesome, I love everything about this, thanks for great ideas. I have two of the die sets but waited to long and wasn't able to get the specimen set, can't wait for it to come back in stock.
ReplyDeleteWow, thank you for sharing. I bet I could watch you doing this, for hours :)
ReplyDeleteI am so inspired by your project and how to make the binding to make something more substantial. Gorgeous make.
ReplyDeleteAmazing. Thanks for sharing!!!!!!
ReplyDeleteThis is beautiful! Would you please share the measurements for the 6 pages - I can't figure them out.. Thank you so much!!!
ReplyDelete