Hi Everyone...welcome to another week on the Simon Says Stamp Monday Challenge Blog. Thank you for joining us for last week's challenge and we hope you can join us this week too because


and the theme for this week is...
CHRISTMAS/WINTER CARD
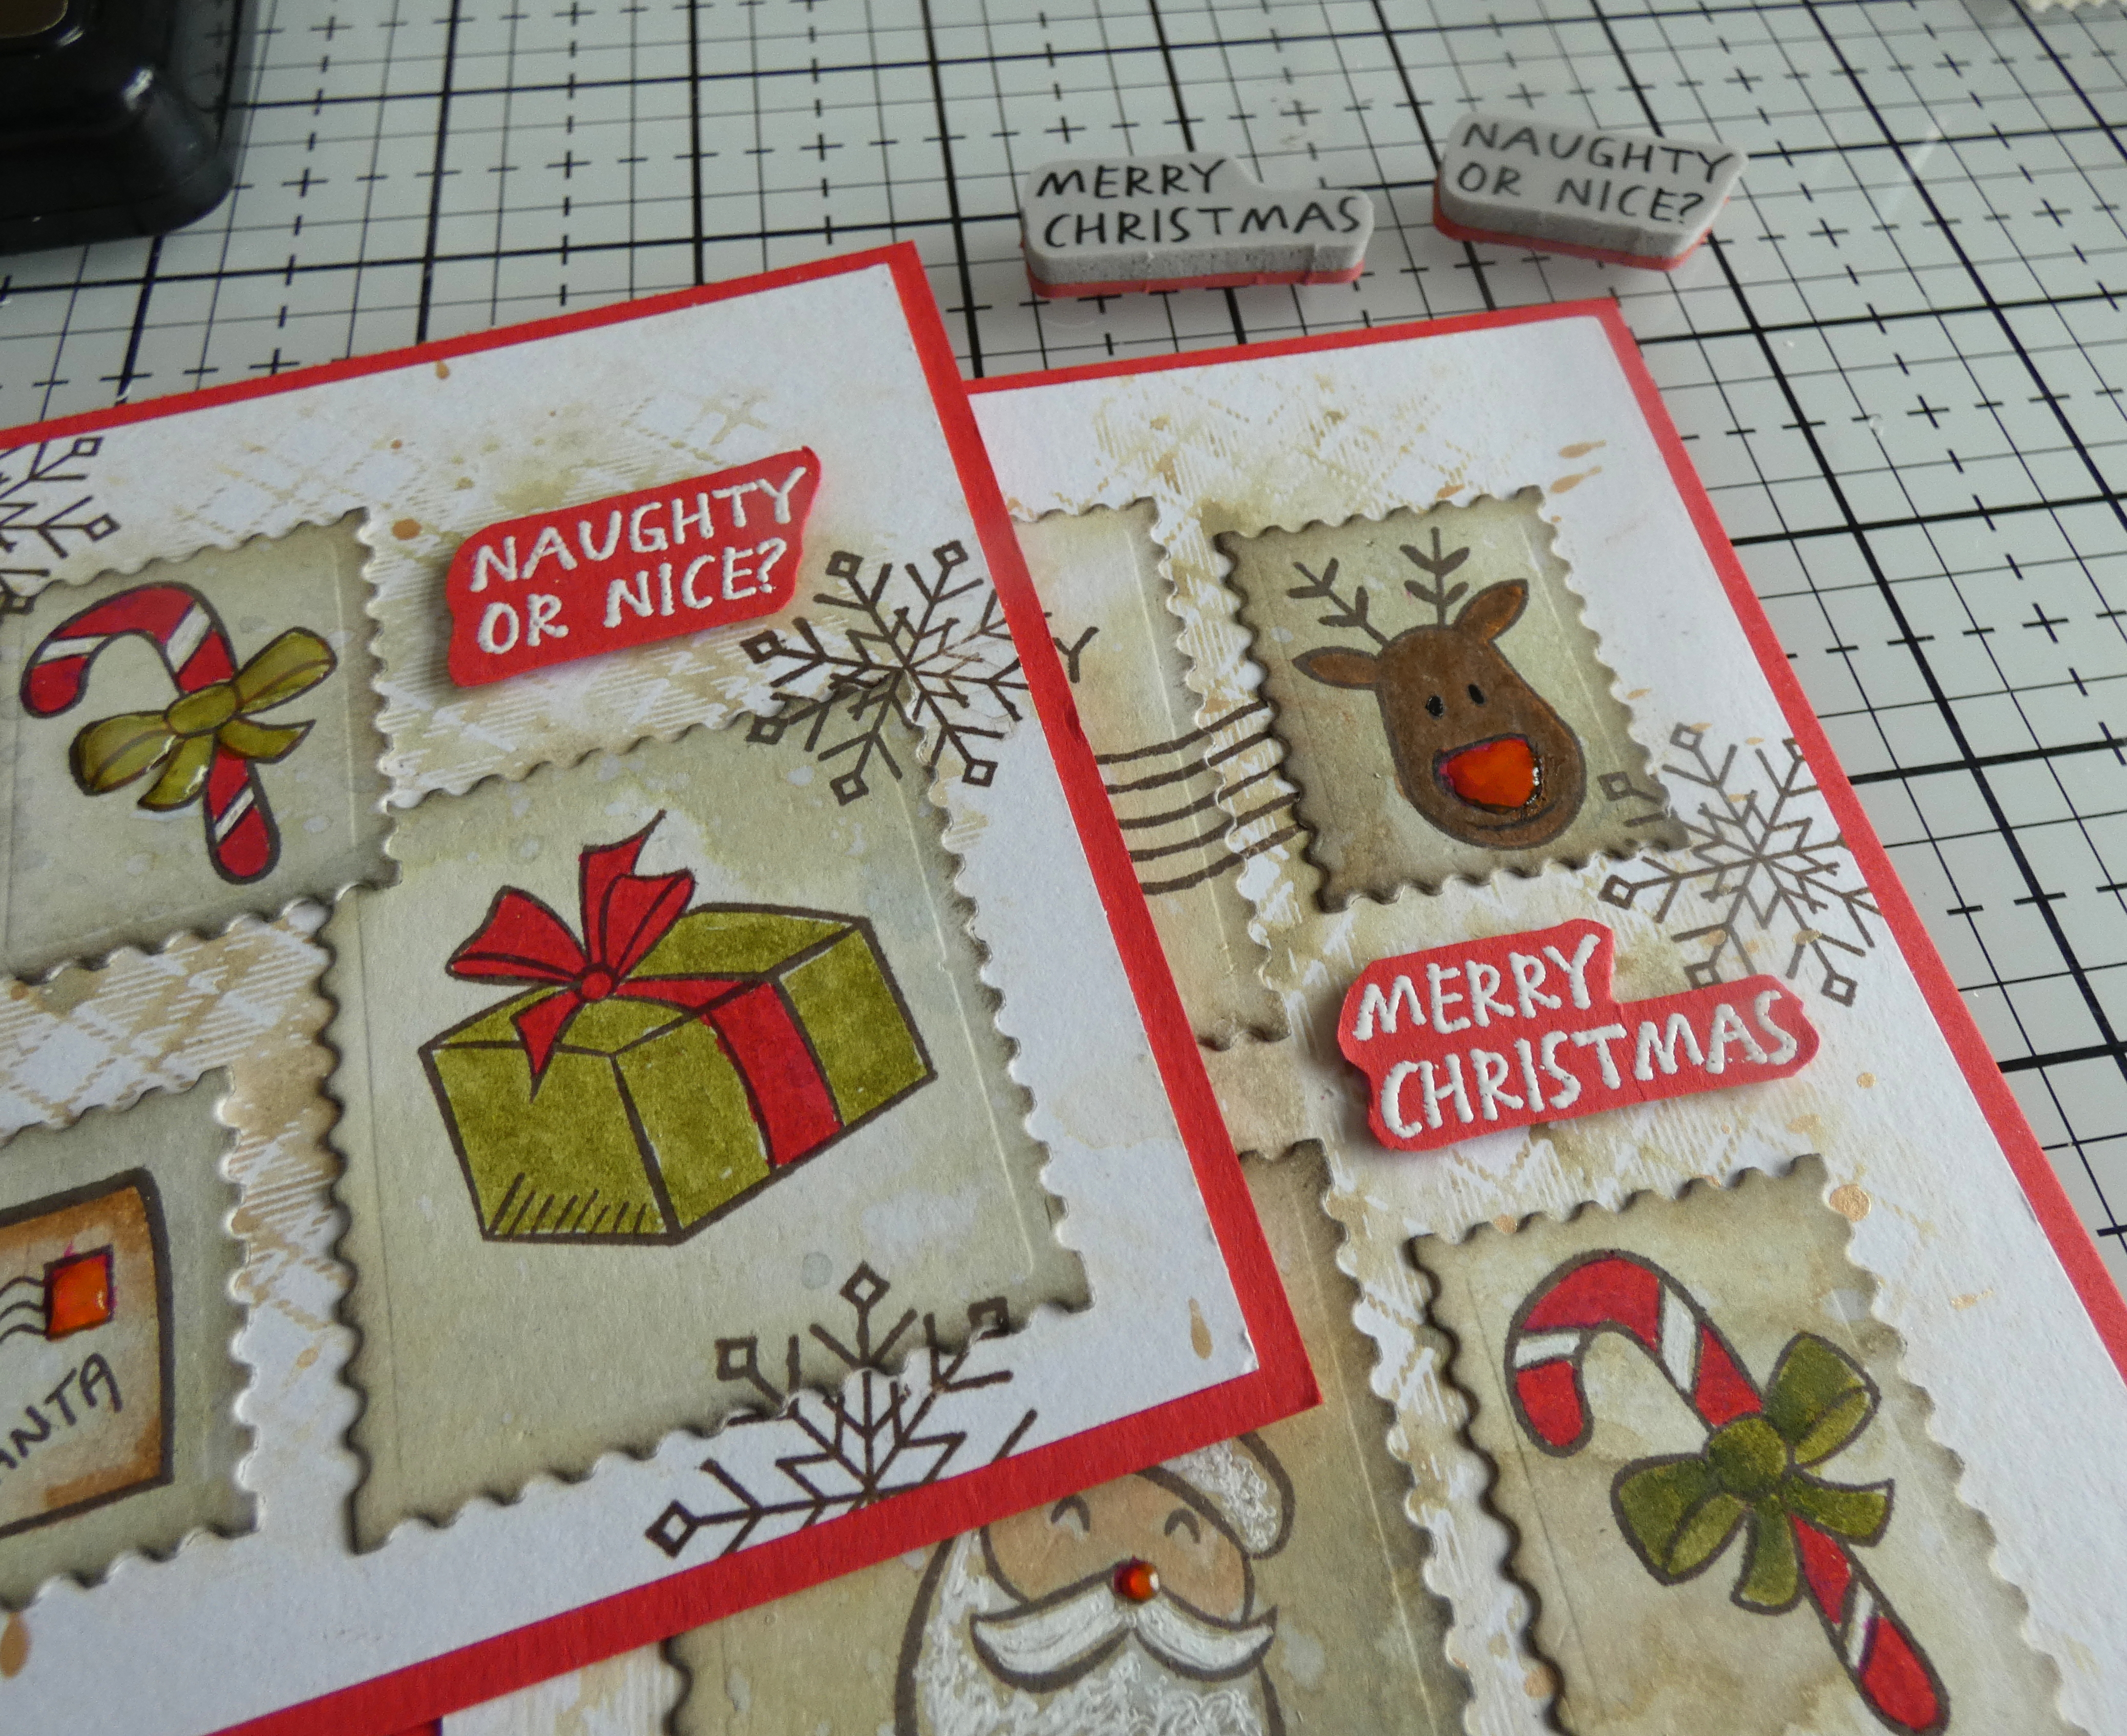
I created a Wintry Christmas card using the Postage Stamp dies included with the Tim Holtz/Stamptember 2024 stamp set, the images from Tim Holtz/Stampers Anonymous Home For Christmas, snowflakes from Mini Weathered Winter and Mr Frostie and Simon Says Pawsitively Clear Dazzling Gems.

I coloured a panel of Distress Watercolor card with Faded Jeans and Broken China Distress Oxide inks.

I stamped the snowflake image from Tim Holtz/Stampers Anonymous Mini Weathered Winter on to the panel, inked with Faded Jeans Distress Oxide ink, sprinkled with Ranger Sticky Embossing Powder, heat set and sprinkled with Distress Rock Candy Glitter to give a sparkly slightly textured effect.

I inked the one of the snowflake images from Tim Holtz/Stampers Anonymous Mr Frostie with Broken China Distress Oxide ink and stamped randomly over the background.

I used the Postage Stamps dies included with the Tim Holtz STAMPtember 2024 stamp set to die-cut postage rectangles from Distress Watercolor card.

I fixed the rectangles to my Simon Says Pawsitively Perfect Craft Tacky Mat, held the dies in place over the die-cuts to act as a mask and coloured with Faded Jeans and Broken China Distress Oxide inks using Tiny Blending Tools.

I stamped the images from Tim Holtz/Stampers Anonymous Home For Christmas on to scraps of Distress Watercolor card, inked with Ground Espresso Distress Archival ink, sprinkled with Clear Embossing Powder, heat set and fussy cut to leave a small border using my trusty Tim Holtz Mini Recoil Snips.

I coloured with Faded Jeans, Broken China, Candied Apple and Ground Espresso Distress Watercolor Pencils and a Detailer Brush. I fixed the postage stamps to the panel using Distress Collage Medium, over-stamped using the postmark and snowflake, inked with Ground Espresso Distress Archival ink and added the die-cuts popped up on 3D foam squares to add dimension.

I added Simon Says Pawsitively Clear Dazzling Gems for a little bit of Christmas/Winter bling.

To finish I inked around the edge of the panel with Scorched Timber Distress Ink and a Tiny Blending Tool and fixed the panel to an A2 white card blank.


Why don't you pop over to the Monday Challenge Blog and check out the amazing creations from my very talented Design Team mates and as always you have until Monday 8am Ohio time...1pm UK time...2pm CET to join in with the chance to win a $25 voucher to spend online at Simon Says Stamp

You can also follow Simon Says Stamp on Instagram
and if you use Instagram...
please add #sssmchallenge to your entry uploads so we can see them on there too

I look forward to seeing what you create this week...
Have Fun and Happy Crafting
Hugs Kath xxx