Hi my friends, welcome to my stop on Day 2 of the Simon Says Stamp Blog Hop for the Celebrate release. I'm thrilled to be joining lots of talented friends and designers to share inspiration using products from this fabulous release.
You can check out all the products from this release over at Simon Says Stamp HERE. Simon Says Stamp has a blog hop exclusive give-away, the Groovy Happy Birthday die is FREE with any purchase, just enter the code GHBD when you checkout. This promotion is valid until April 21 at 11.59 PM EDT or while supplies last.
Simon Says are also giving away a $25 coupon to every stop on the hop so make sure you leave a comment on each participant's blog to be in with a chance of winning. The winners will be chosen and posted on Simon Says Stamp Blog on Wednesday April 24, and if you are a lucky winner, you can e-mail Simon Says Stamp to claim your prize.
If you arrived from the very talented Barb Engler, you are in the right place but if you happen to get lost along the way, you will find a list of participants at the end of this post to help you get back on track.
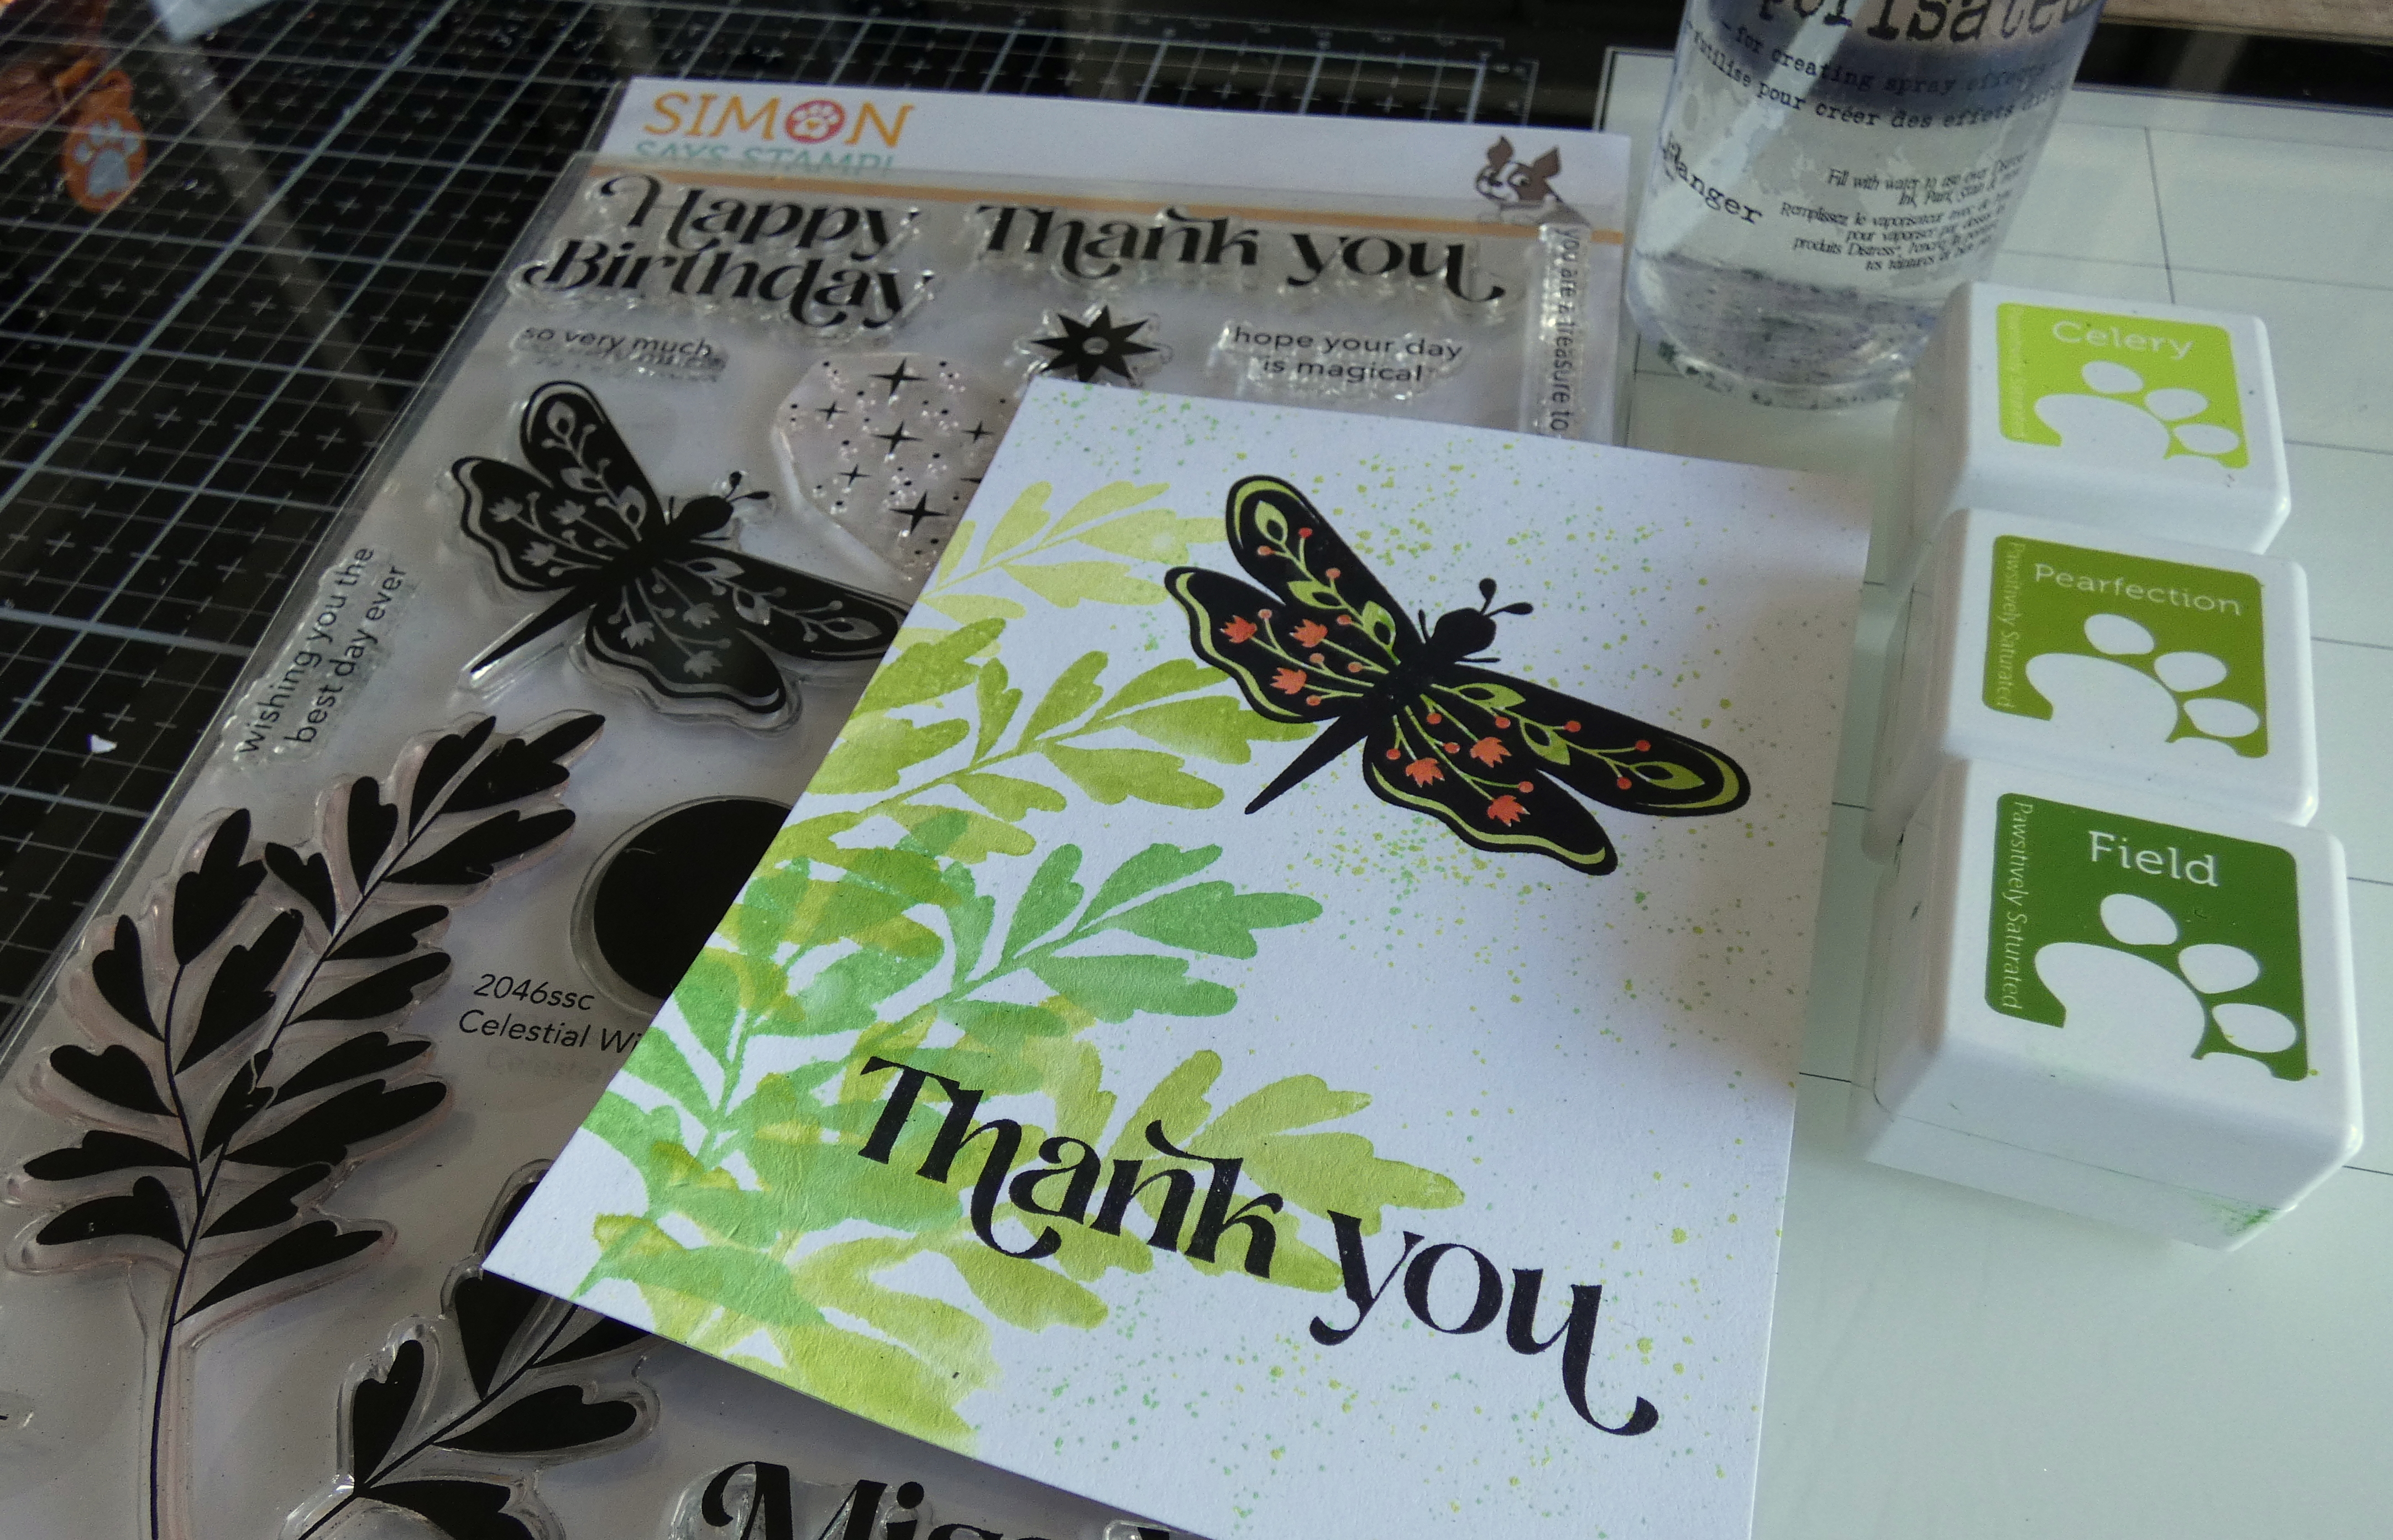
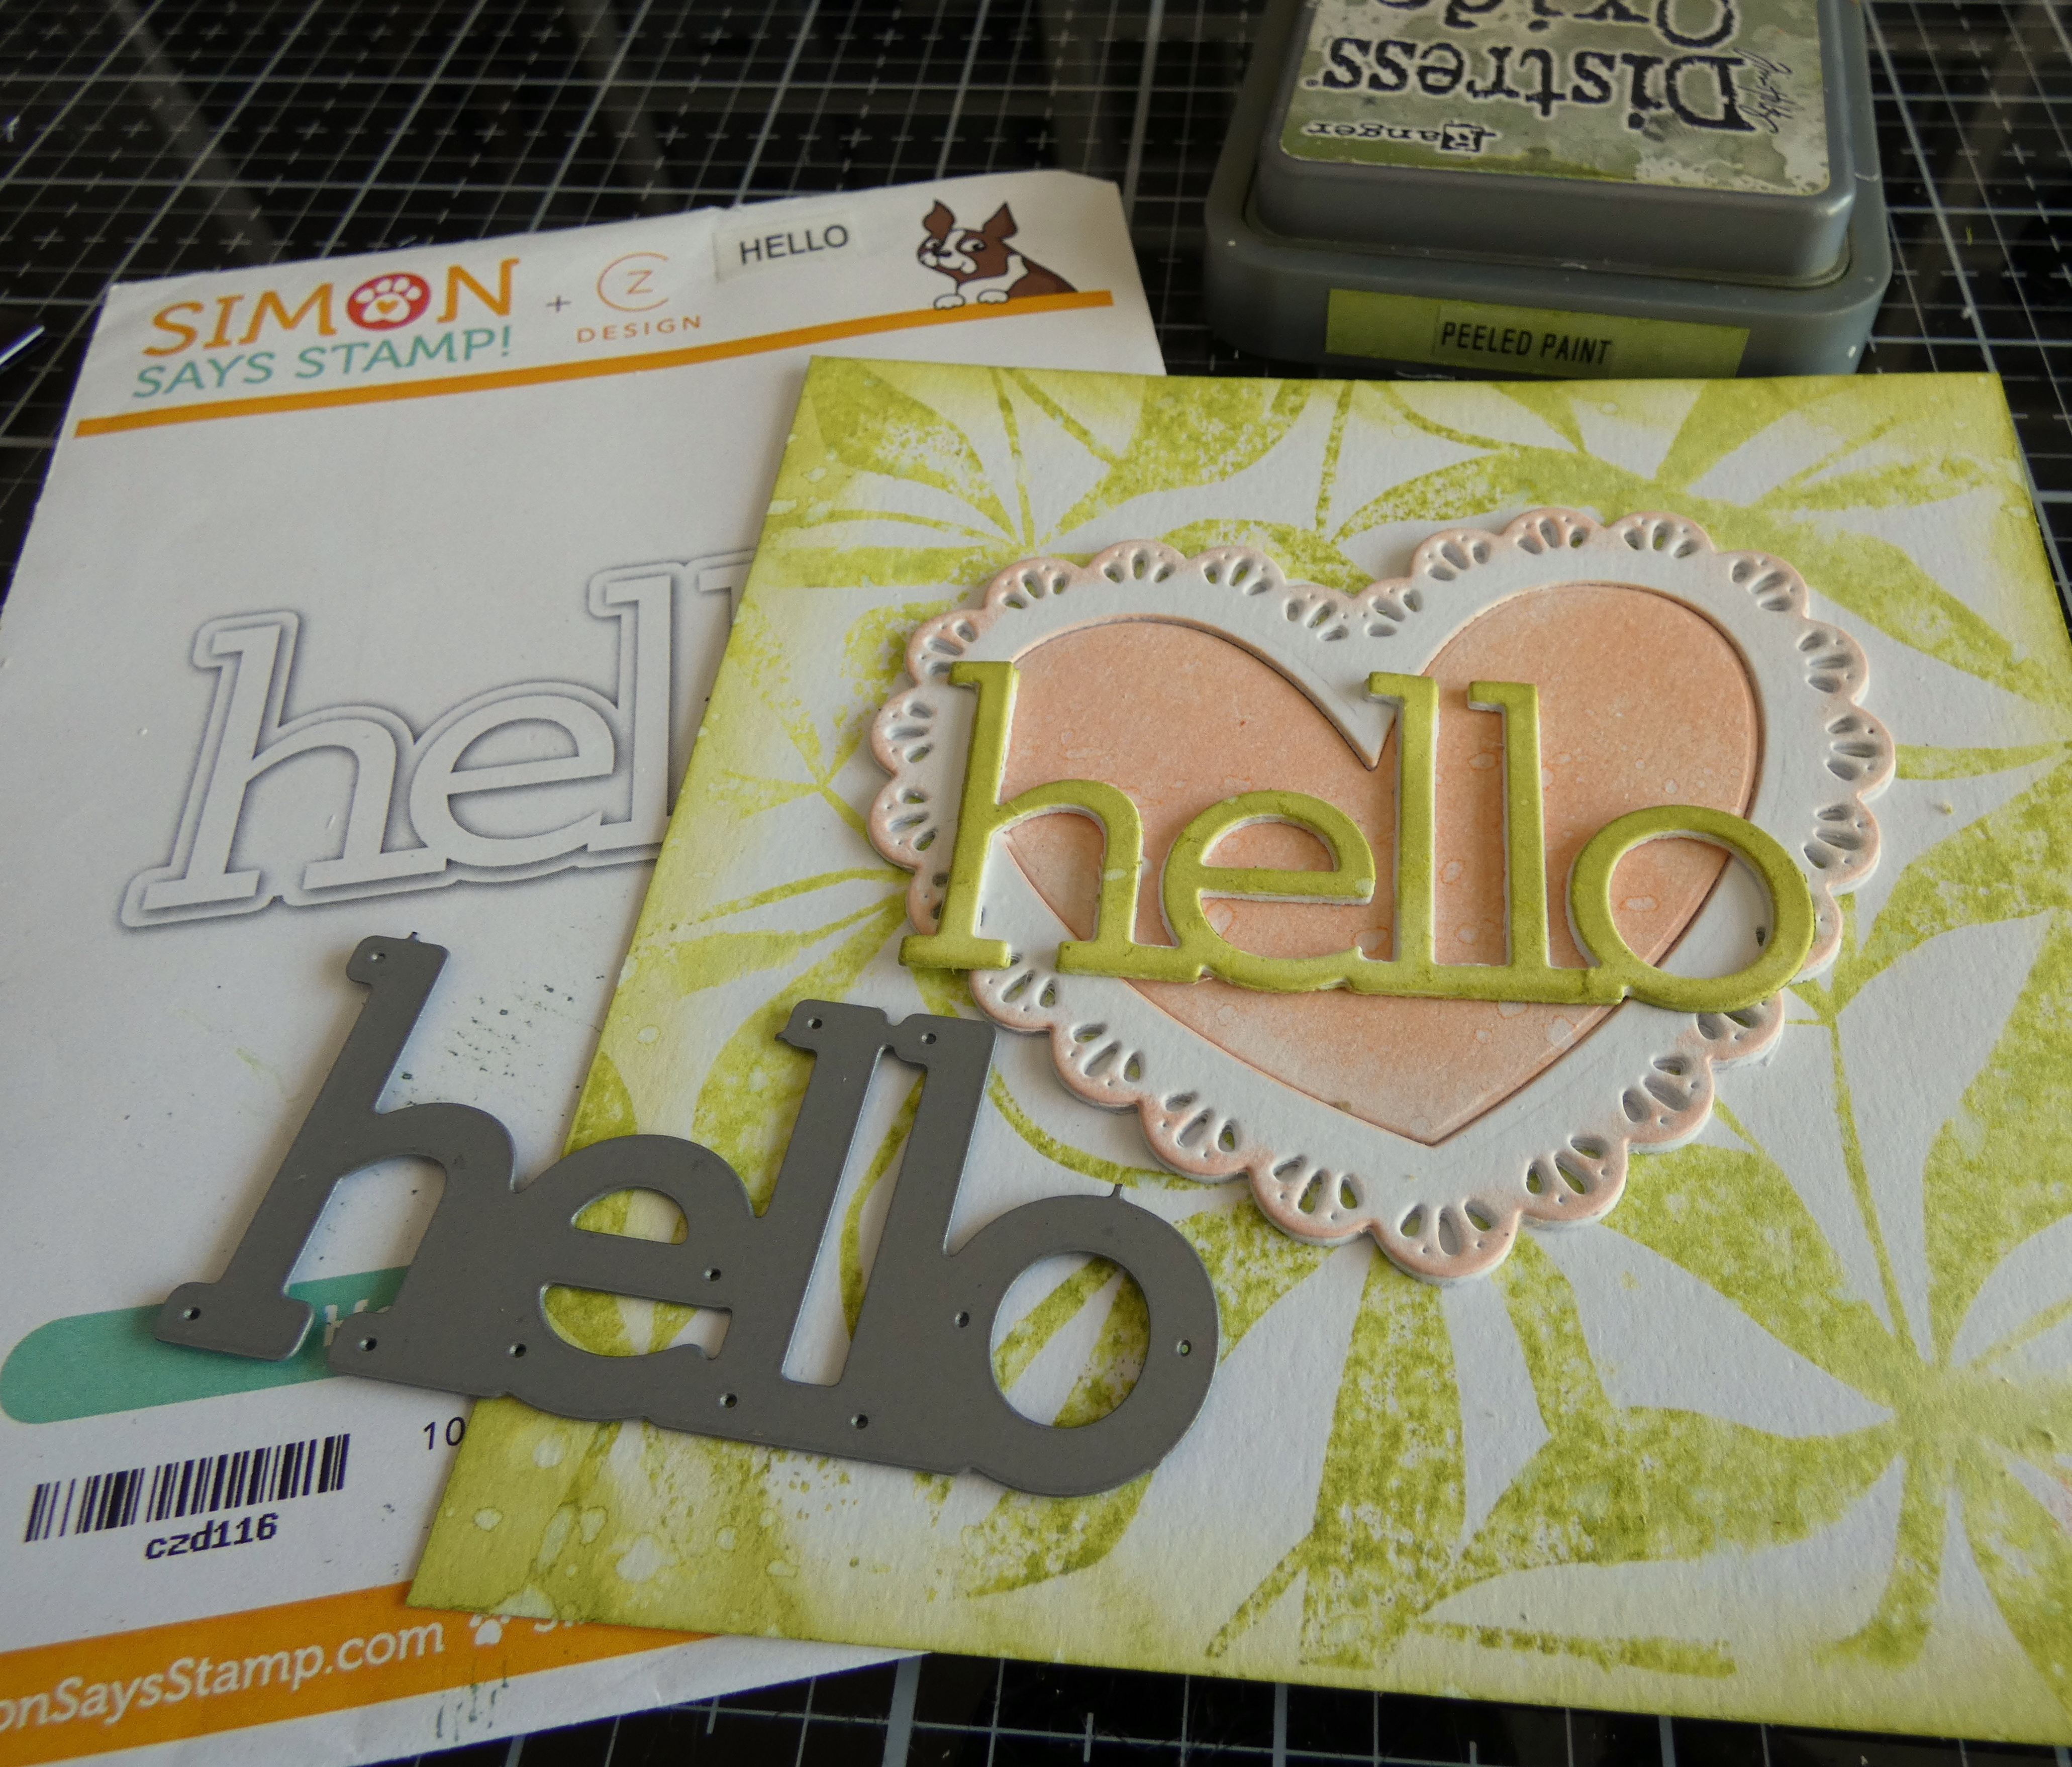
I created a card using the Organic Leaves 6" x 6" clear stamp, Lace Heart and Whirl Butterflies dies from the release and Hello Wafer die and Reverse All The Love Sentiment Strip for the sentiments.
I inked the Organic Leaves stamp with Twisted Citron and Peeled Paint Distress Oxide inks, spritzed with water and stamped on to a 5" square panel of Distress Watercolor card.
I placed the plain heart die inside the lace heart die , die-cut 3 times from Distress Watercolor card and die-cut the plain heart on it's own. I coloured the plain heart and the outer edge of one of the lace hearts with Peachy Pawsitively Saturated ink using a Simon Says Small Blending Brush.
I layered the lace hearts to create dimension, fixed to the panel with Distress Collage Medium and puzzle pieced the plain heart into the negative space.
I die-cut the Hello wafer die 3 times from Distress Watercolor card, layered to create dimension, coloured the top layer with Peeled Paint Distress Oxide ink and fixed in place with Distress Collage Medium.
I die-cut the Whirl Butterflies from Distress Watercolor card, coloured with Grapefruit and Mandarin Pawsitively Saturated Inks using Simon Says Small and Detail Round Blending Brushes and fixed in place with adhesive on the body and Simon Says Foam Squares on the wings.
I coloured a scrap of Distress Watercolor card with Mandarin Pawsitively Saturated Ink, die-cut the heart from the Lace Heart die and fixed to the panel with Distress Collage Medium.
I tapped my fingers into Distress Collage Medium, applied to White Hemp Cord which I twisted together to create the bodies and antennae on the butterflies. I added a Simon Says Reverse All The Love Sentiment Strip to complete the sentiment.
To finish I inked the edges of the panel with Peeled Paint Distress Oxide ink, spritzed with water to create splatters and added the panel to a top-folding 5.5" square white card blank.
You will find more inspiration from the release on Simon Says Stamp Celebrate Gallery
HERE and if you make anything with the release, you are welcome to share with us all in the Gallery. If you missed Day 1 of the Celebrate Blog Hop yesterday, you can catch up with more fabulous inspiration
HERE. I'm off to make myself a cuppa, find a comfy sofa and enjoy an afternoon of blog hopping.
Hugs Kath xxx